3,276 views ·
7 replies
3k views
7 replies
How do we reinforce joists for new openings?
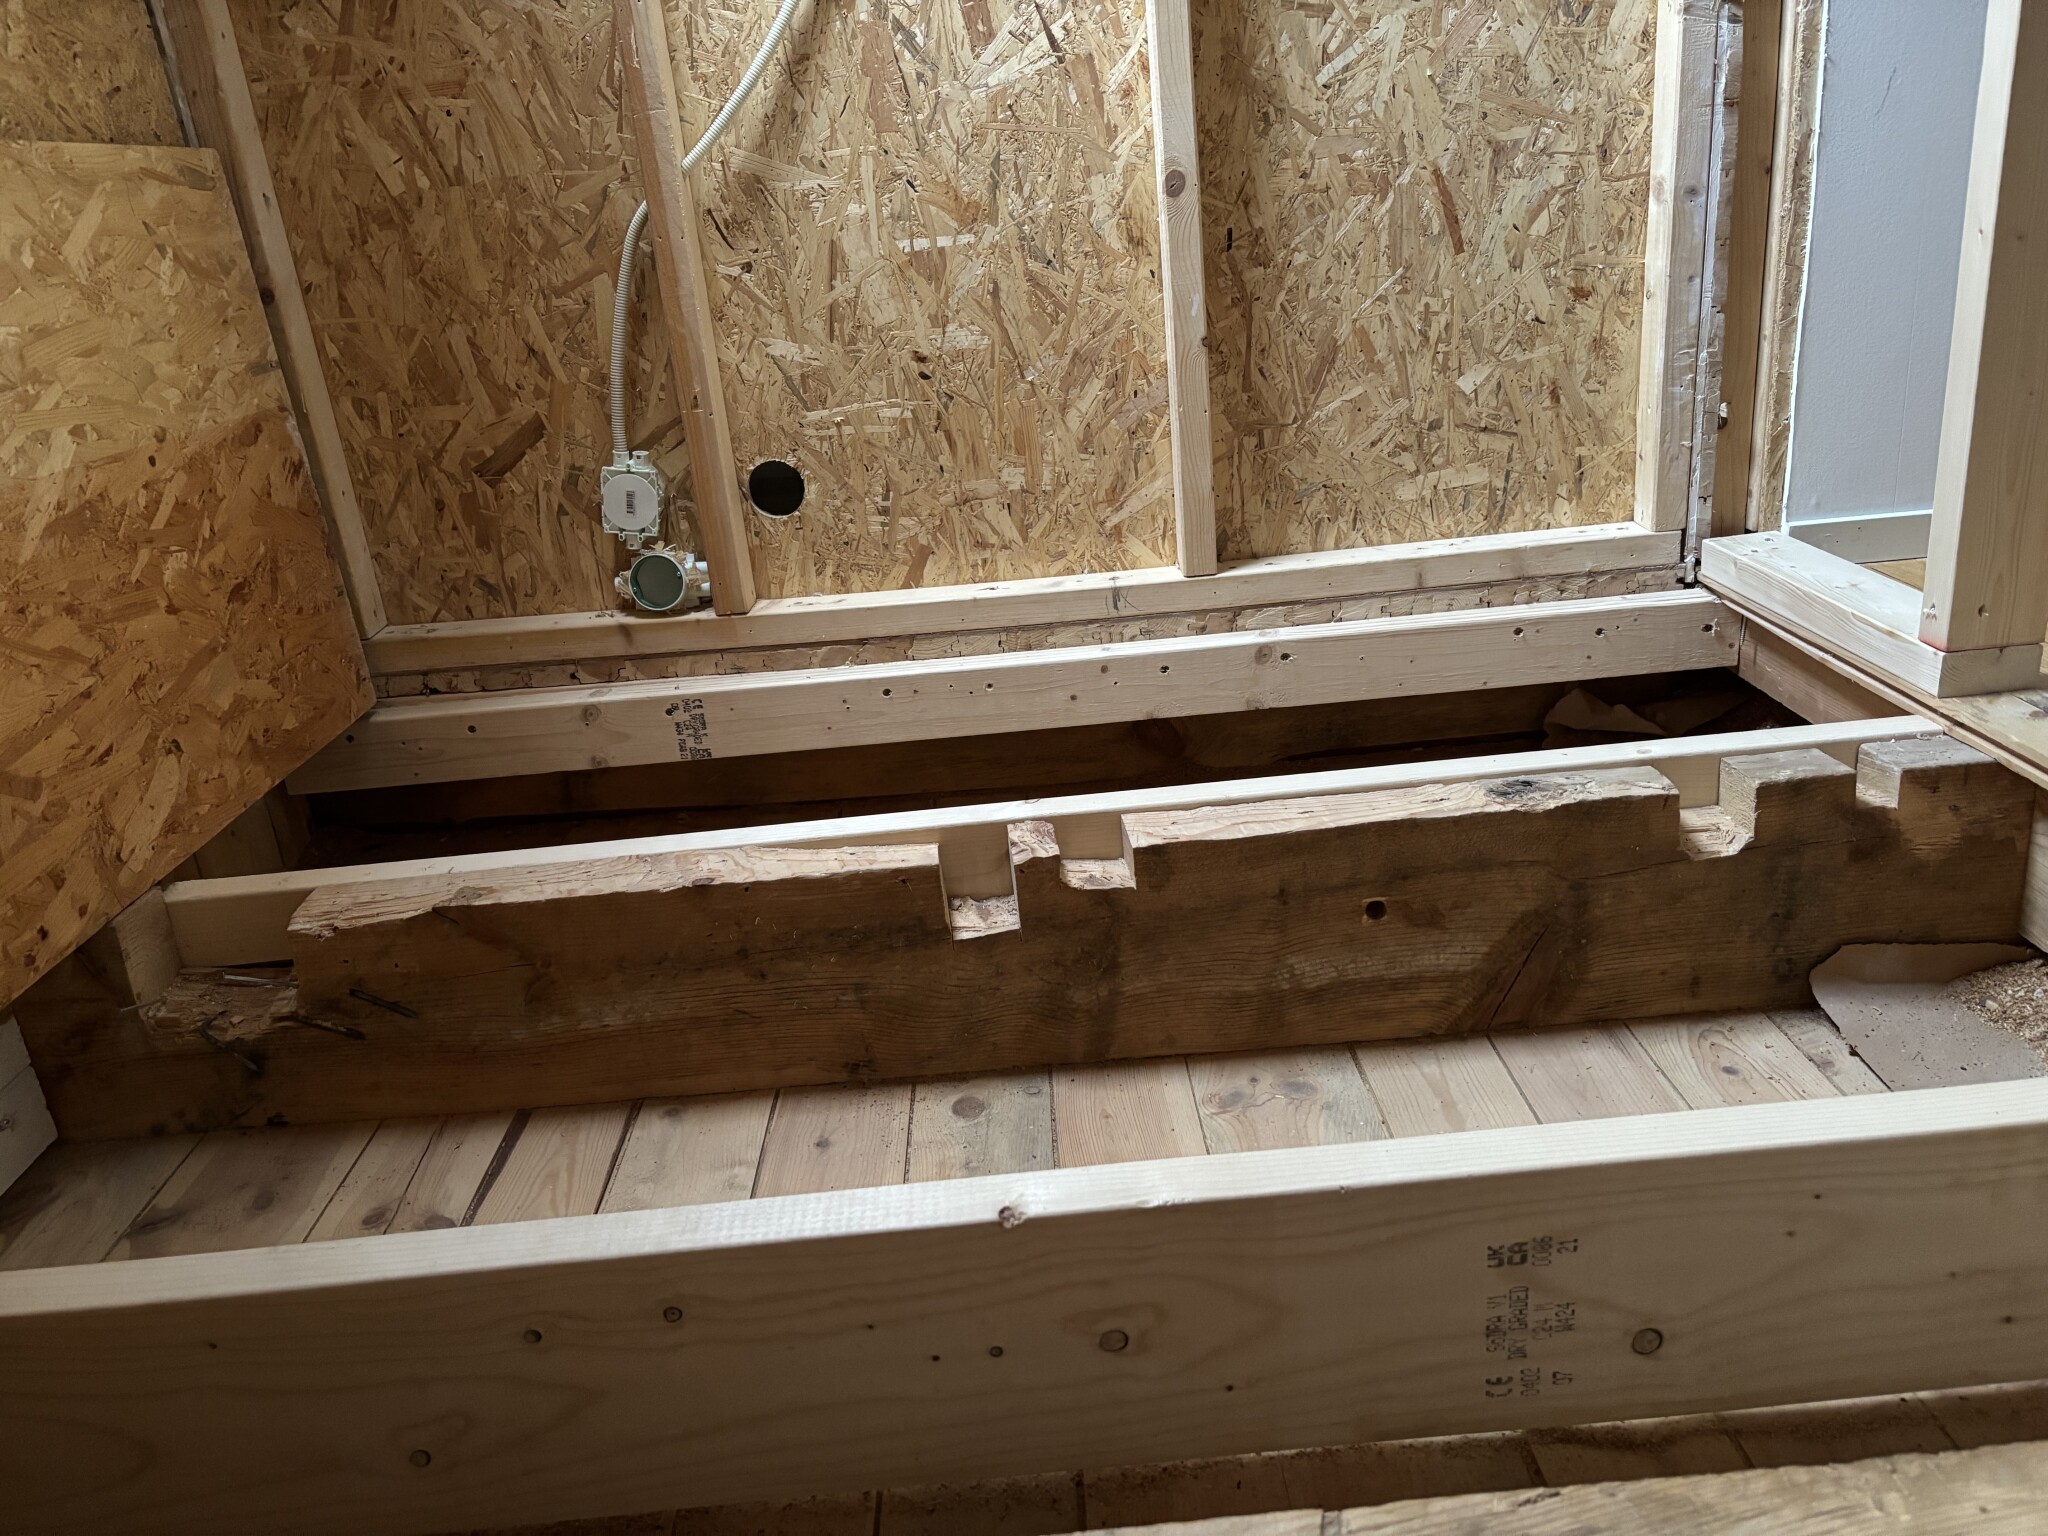
Hi, we are building a bathroom on the upper floor of our house from 1930. One of the beams, where we need to run the drain, has several notches from earlier modifications (see picture).
The dimensions are about 80x220-230, it's planed in some places which causes the difference. Free length is 4 meters.
How can we reinforce this to make it possible to create a new hole, is it even possible? Unfortunately, we cannot use the previous holes as they aren't deep enough all the way, and there is a metal reinforcement on the backside.

You can drill the holes more in the middle of the joist if they are 50-120mm holes, then you can glue-screw on construction plywood that is cut to 220x1200mm and centered over the holes.
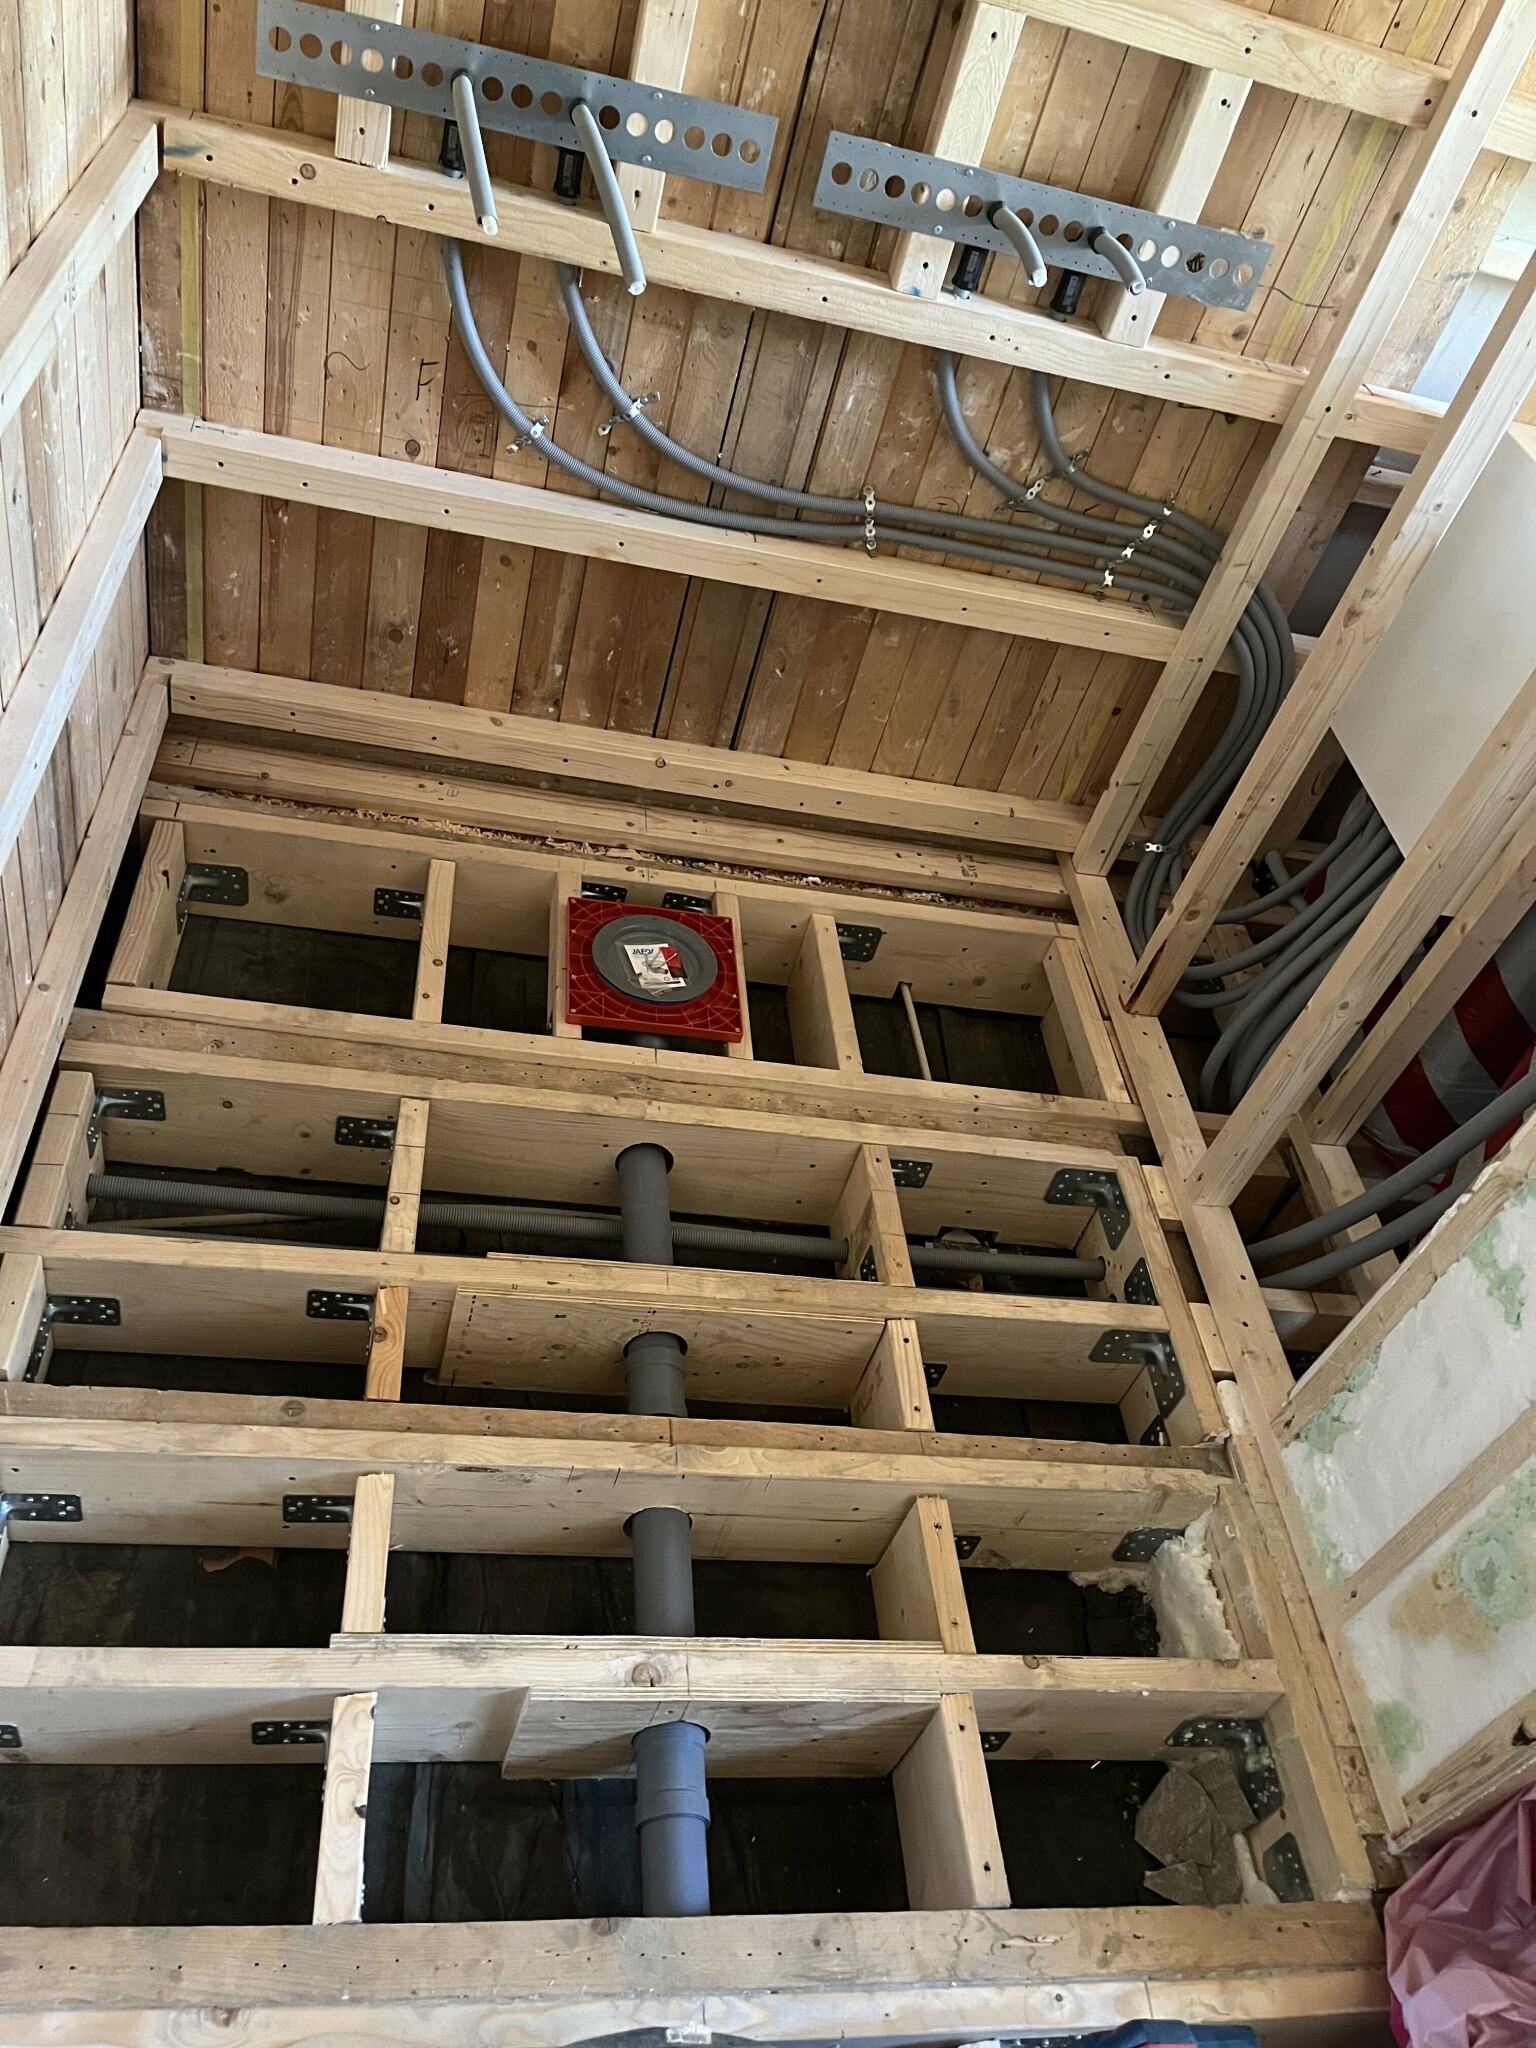
It looks like there is a wide gap between the joists? The aim is for cc300-400mm in the joist spacing in bathrooms if you plan to have ceramic flooring.
It looks like there is a wide gap between the joists? The aim is for cc300-400mm in the joist spacing in bathrooms if you plan to have ceramic flooring.
The middle of the beam, and then in with cc30 and 22spångolv,
This report is good to read to achieve a sufficiently stiff joist floor.
It also shows how to reinforce around holes.
If you have space, I would place a new joist parallel to the old one to ensure that tiles do not crack later. That is, I would not rely on the old beam at all since it has such large cutouts in the wrong places.
https://sakervatten.se/wp-content/uploads/2024/02/bjalklagets-uppbyggnad-i-vatrumskonstruktioner.pdf
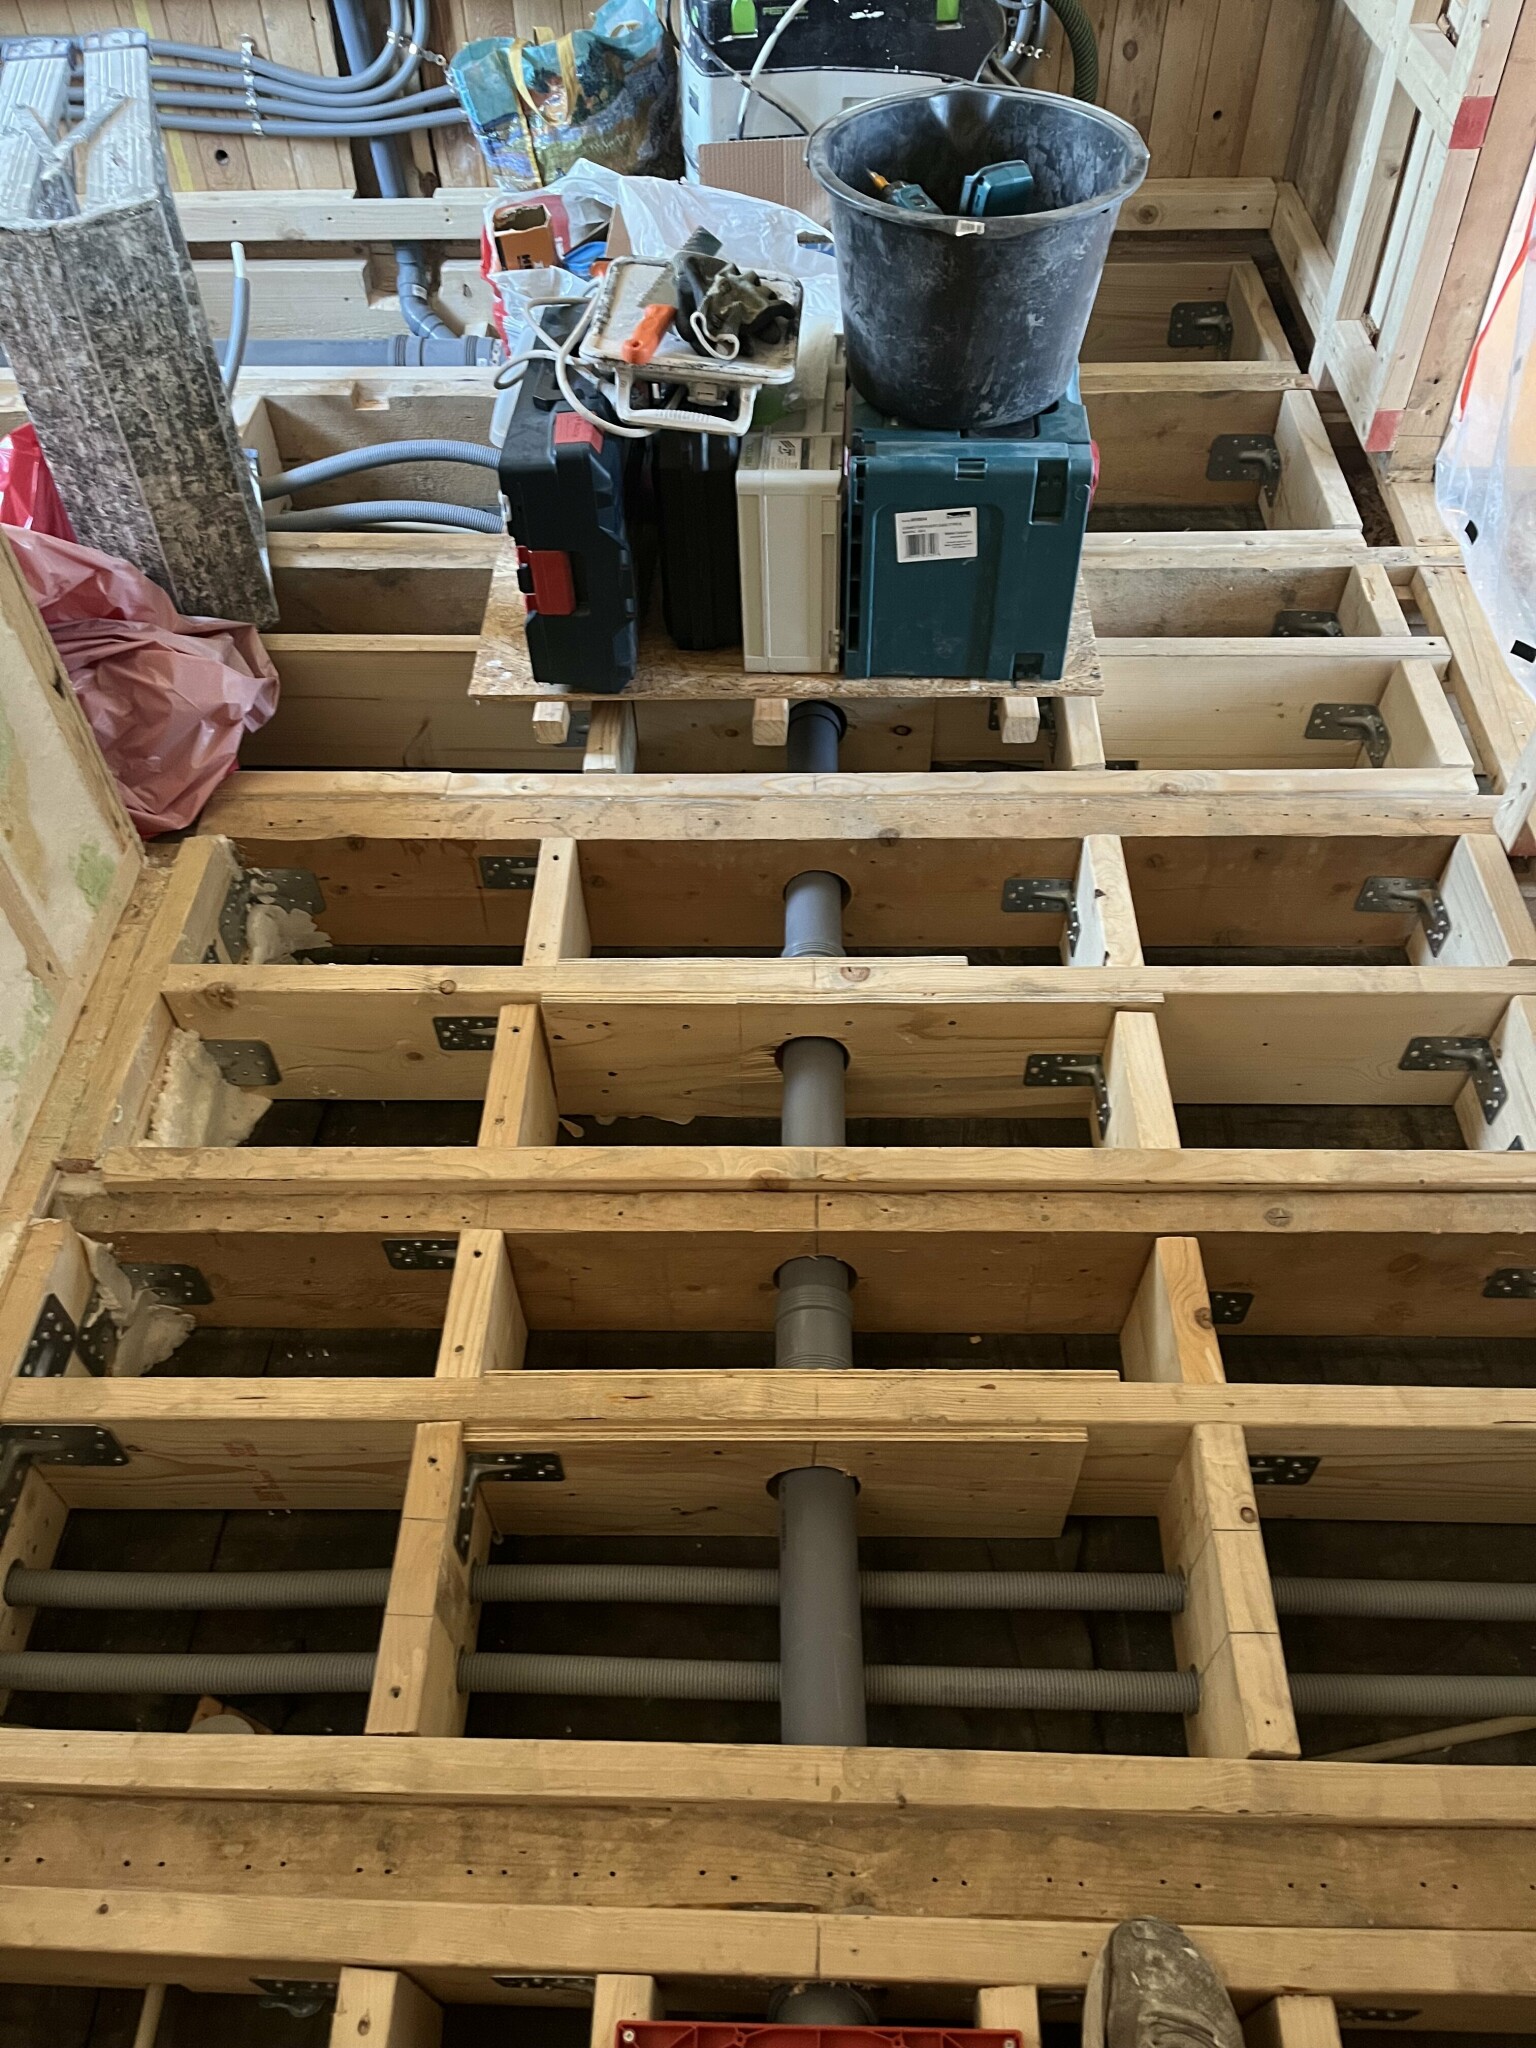
I can recommend my own thread on how I did it. Turned out excellent! In addition to what is visible in the pictures, I added 22mm flooring chipboard + 22mm grooved chipboard, reinforcement mesh + self-leveling compound. It's sturdy today!
Edit; in the largest compartment in the second-to-last picture, we made an 85mm hole I believe it was, when the pipe was in place, I also put pieces between the beams along the pipe for additional support
https://www.byggahus.se/forum/threa...ag-i-badrum-bilder-finns.520412/#post-5792793
Edit; in the largest compartment in the second-to-last picture, we made an 85mm hole I believe it was, when the pipe was in place, I also put pieces between the beams along the pipe for additional support
https://www.byggahus.se/forum/threa...ag-i-badrum-bilder-finns.520412/#post-5792793
Thanks for the links!
cc300 is the plan 🙂, but we need a plan for the drainage before we proceed.
Is it better or worse to set another one parallel but attached to the short beam under the bathroom wall, which in turn is attached to the damaged beam, than to reinforce it in some way?
cc300 is the plan 🙂, but we need a plan for the drainage before we proceed.
We don’t have the option to lay a new one all the way along the old one. Large parts of the floor outside the bathroom would have to be removed, which we’d rather avoid.Q qvirre said:
Is it better or worse to set another one parallel but attached to the short beam under the bathroom wall, which in turn is attached to the damaged beam, than to reinforce it in some way?
Click here to reply