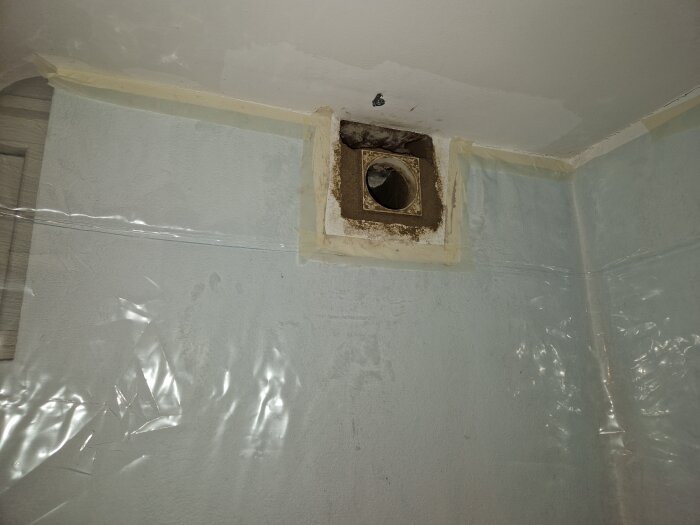
I am in the process of replacing the fresh air vents in the basement with Fresh models with filter options. The ones currently installed are large open dish models that are about 20x20 cm.
The new ones I plan to install look like this:
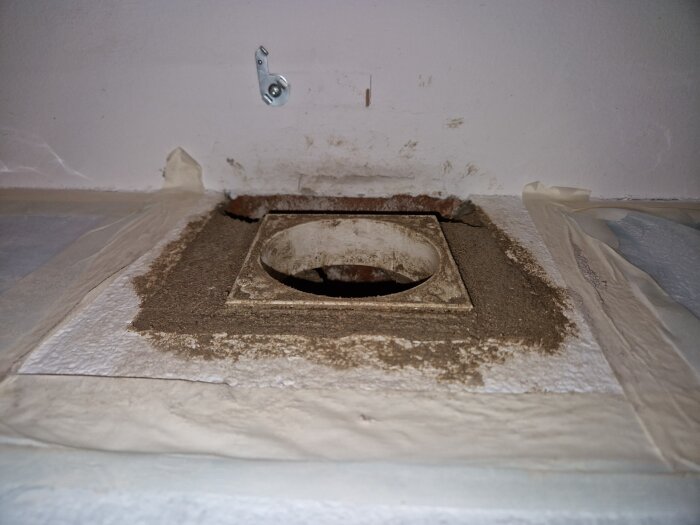
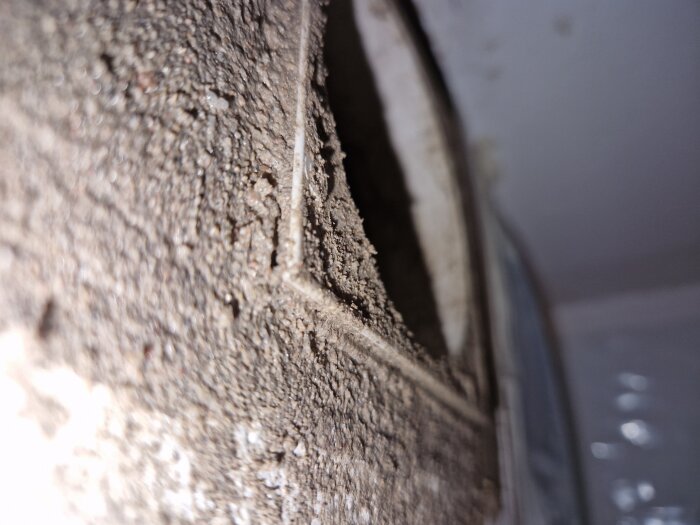
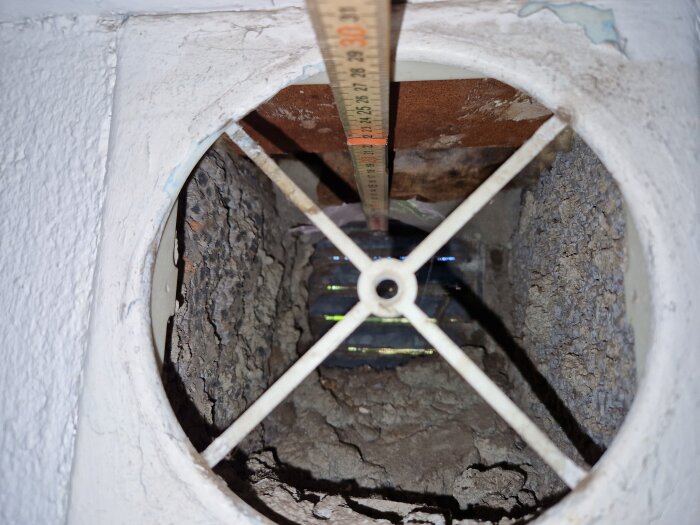
The stub is approximately 11x11 cm, so I need to remove what's there and apply mortar (C-mortar). I haven't done this before, so my question is how to do it. Do you cast the stub in place, meaning you mix mortar thick enough to shape and then press the stub where you want it? Or do you build up with mortar, let it cure completely for a few weeks, and then drill holes to attach the stub? How do you ensure that the mortar has a good and durable build-up so that it doesn't break when you drill into it? You don't want to have too much mortar behind, it would be an advantage if you can remove the items after a year and vacuum the passage.
My idea is simply to tidy up in the passage, smooth it out, install insect netting, and then mount a new inner part with a filter.
I would have done according to option 1, meaning mixed a slightly thicker mortar which I would then press the inner part into. Option 2 seems more cumbersome and dusty and difficult to get the inner part to stay in place.
When I have replaced valves in the basement, I have bought both the outer and inner part with plastic pipe in between and then used sealing foam.
I would go with option 1, meaning mix a thicker mortar which I would then press the inner part into. Option 2 seems more cumbersome and dusty and it's difficult to get the inner part to stay in place.
When I have replaced valves in the basement, I have bought both the outer and inner parts with plastic piping in between and then used foam sealant.
Yes, option 1 sounds best.
I know, usually you install plastic pipes, but here I think it's enough to even out by chipping away some remains and also smoothing it out with mortar. Installing pipes would require in this case that I move the grille outside to get the right angle, which simply becomes much more work for very little benefit.
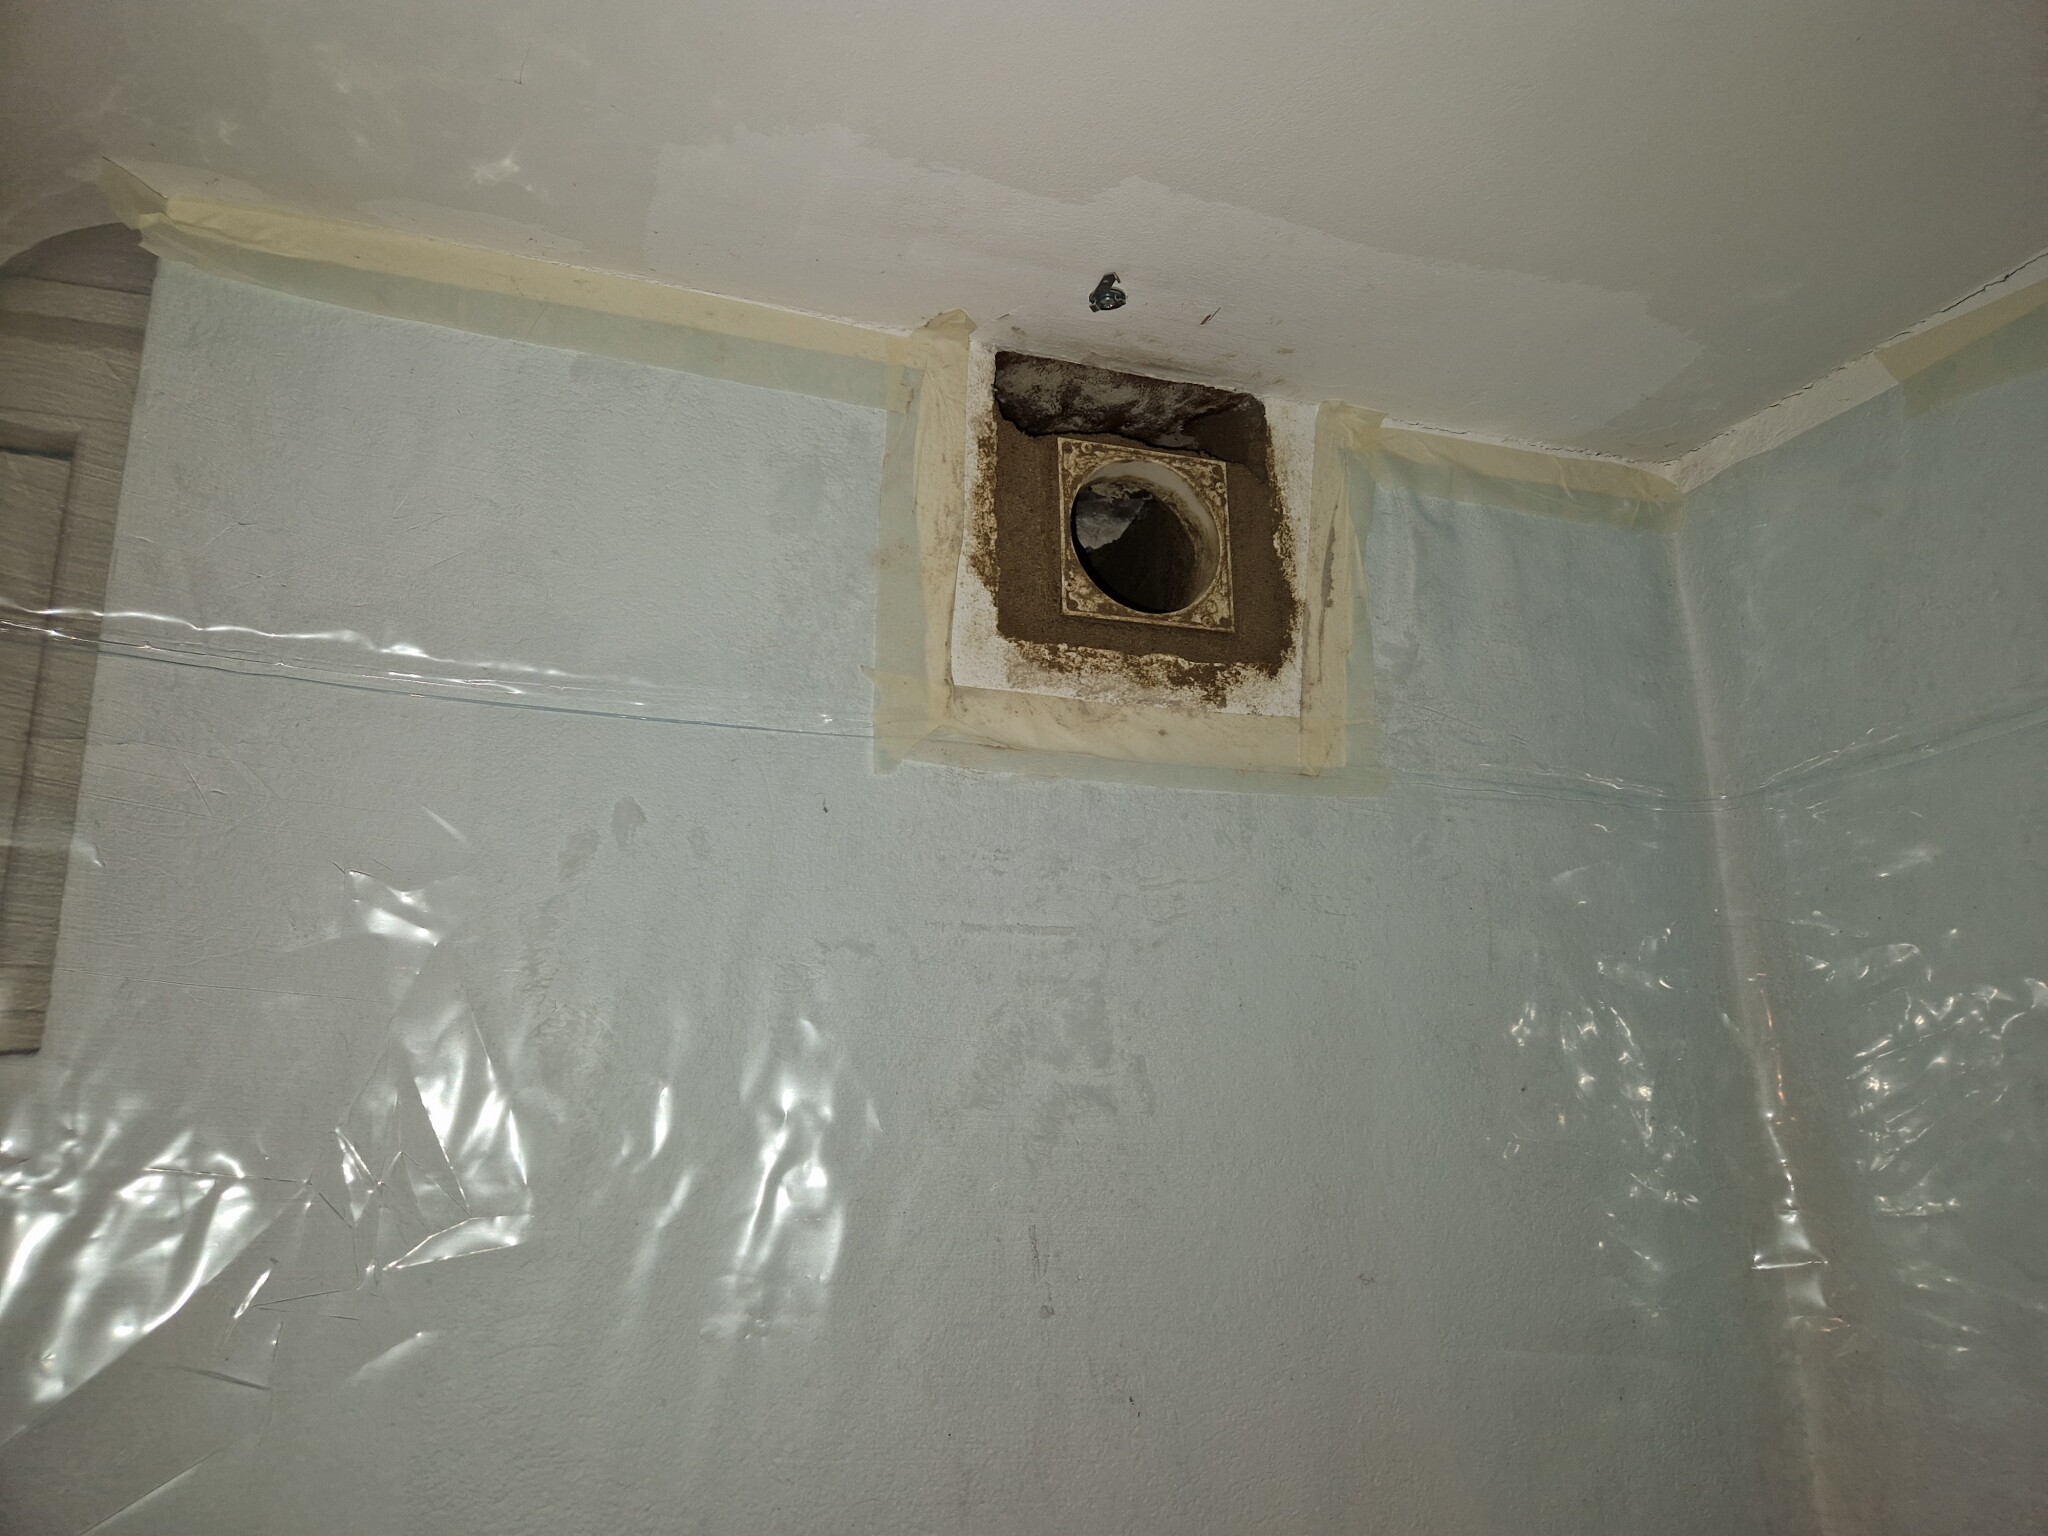
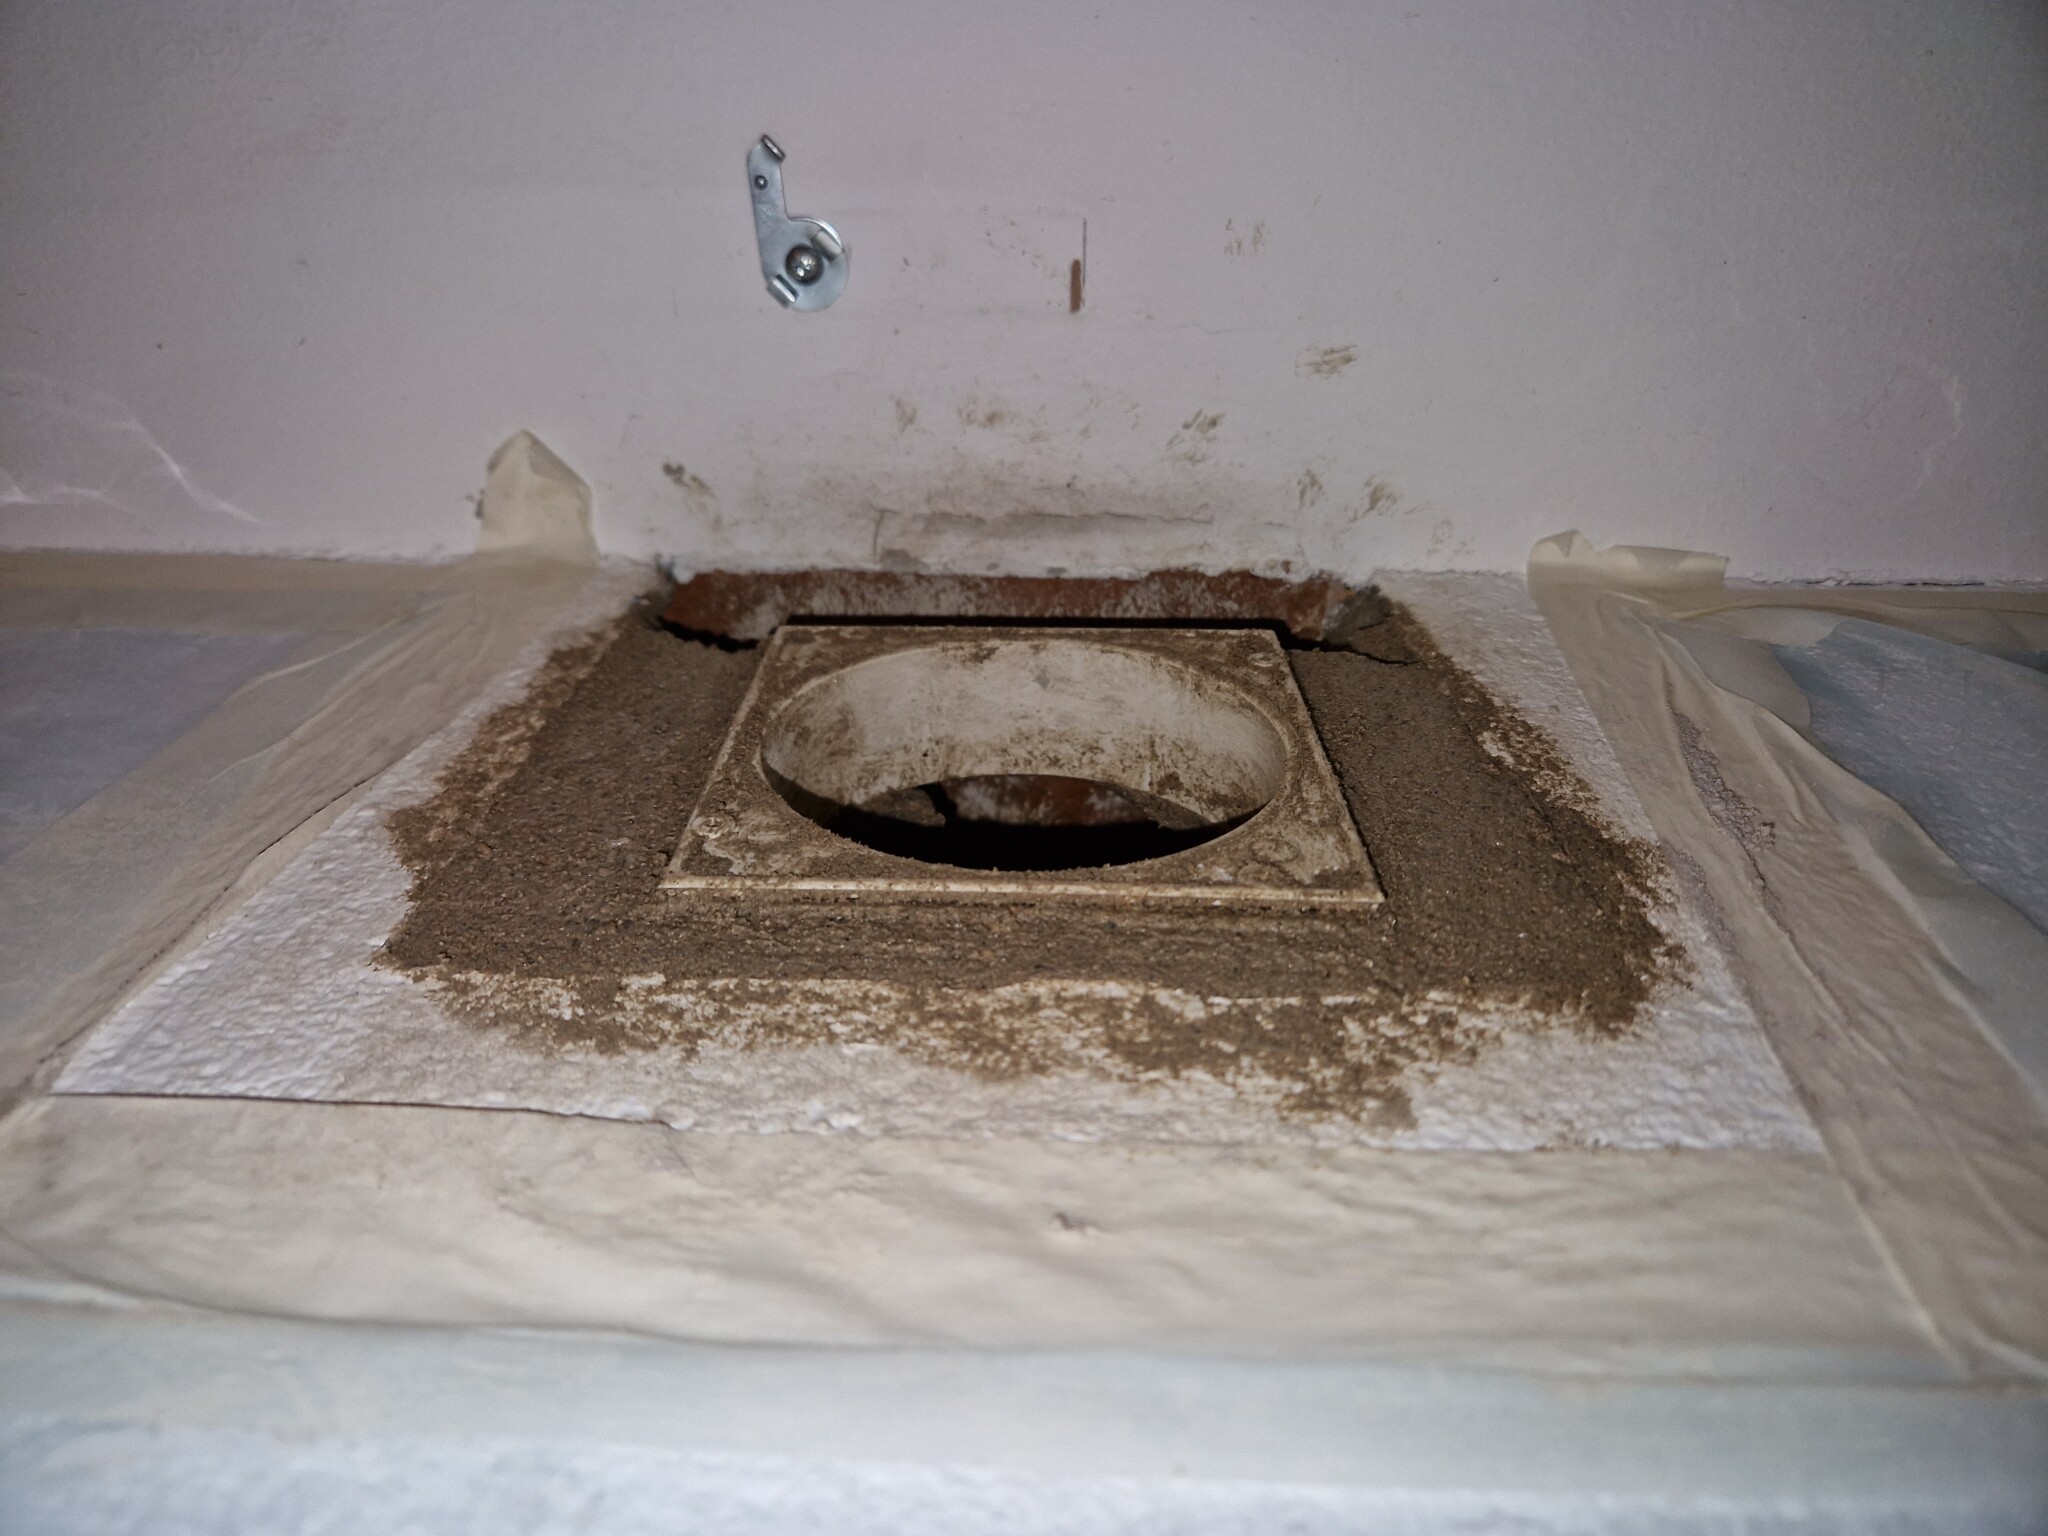
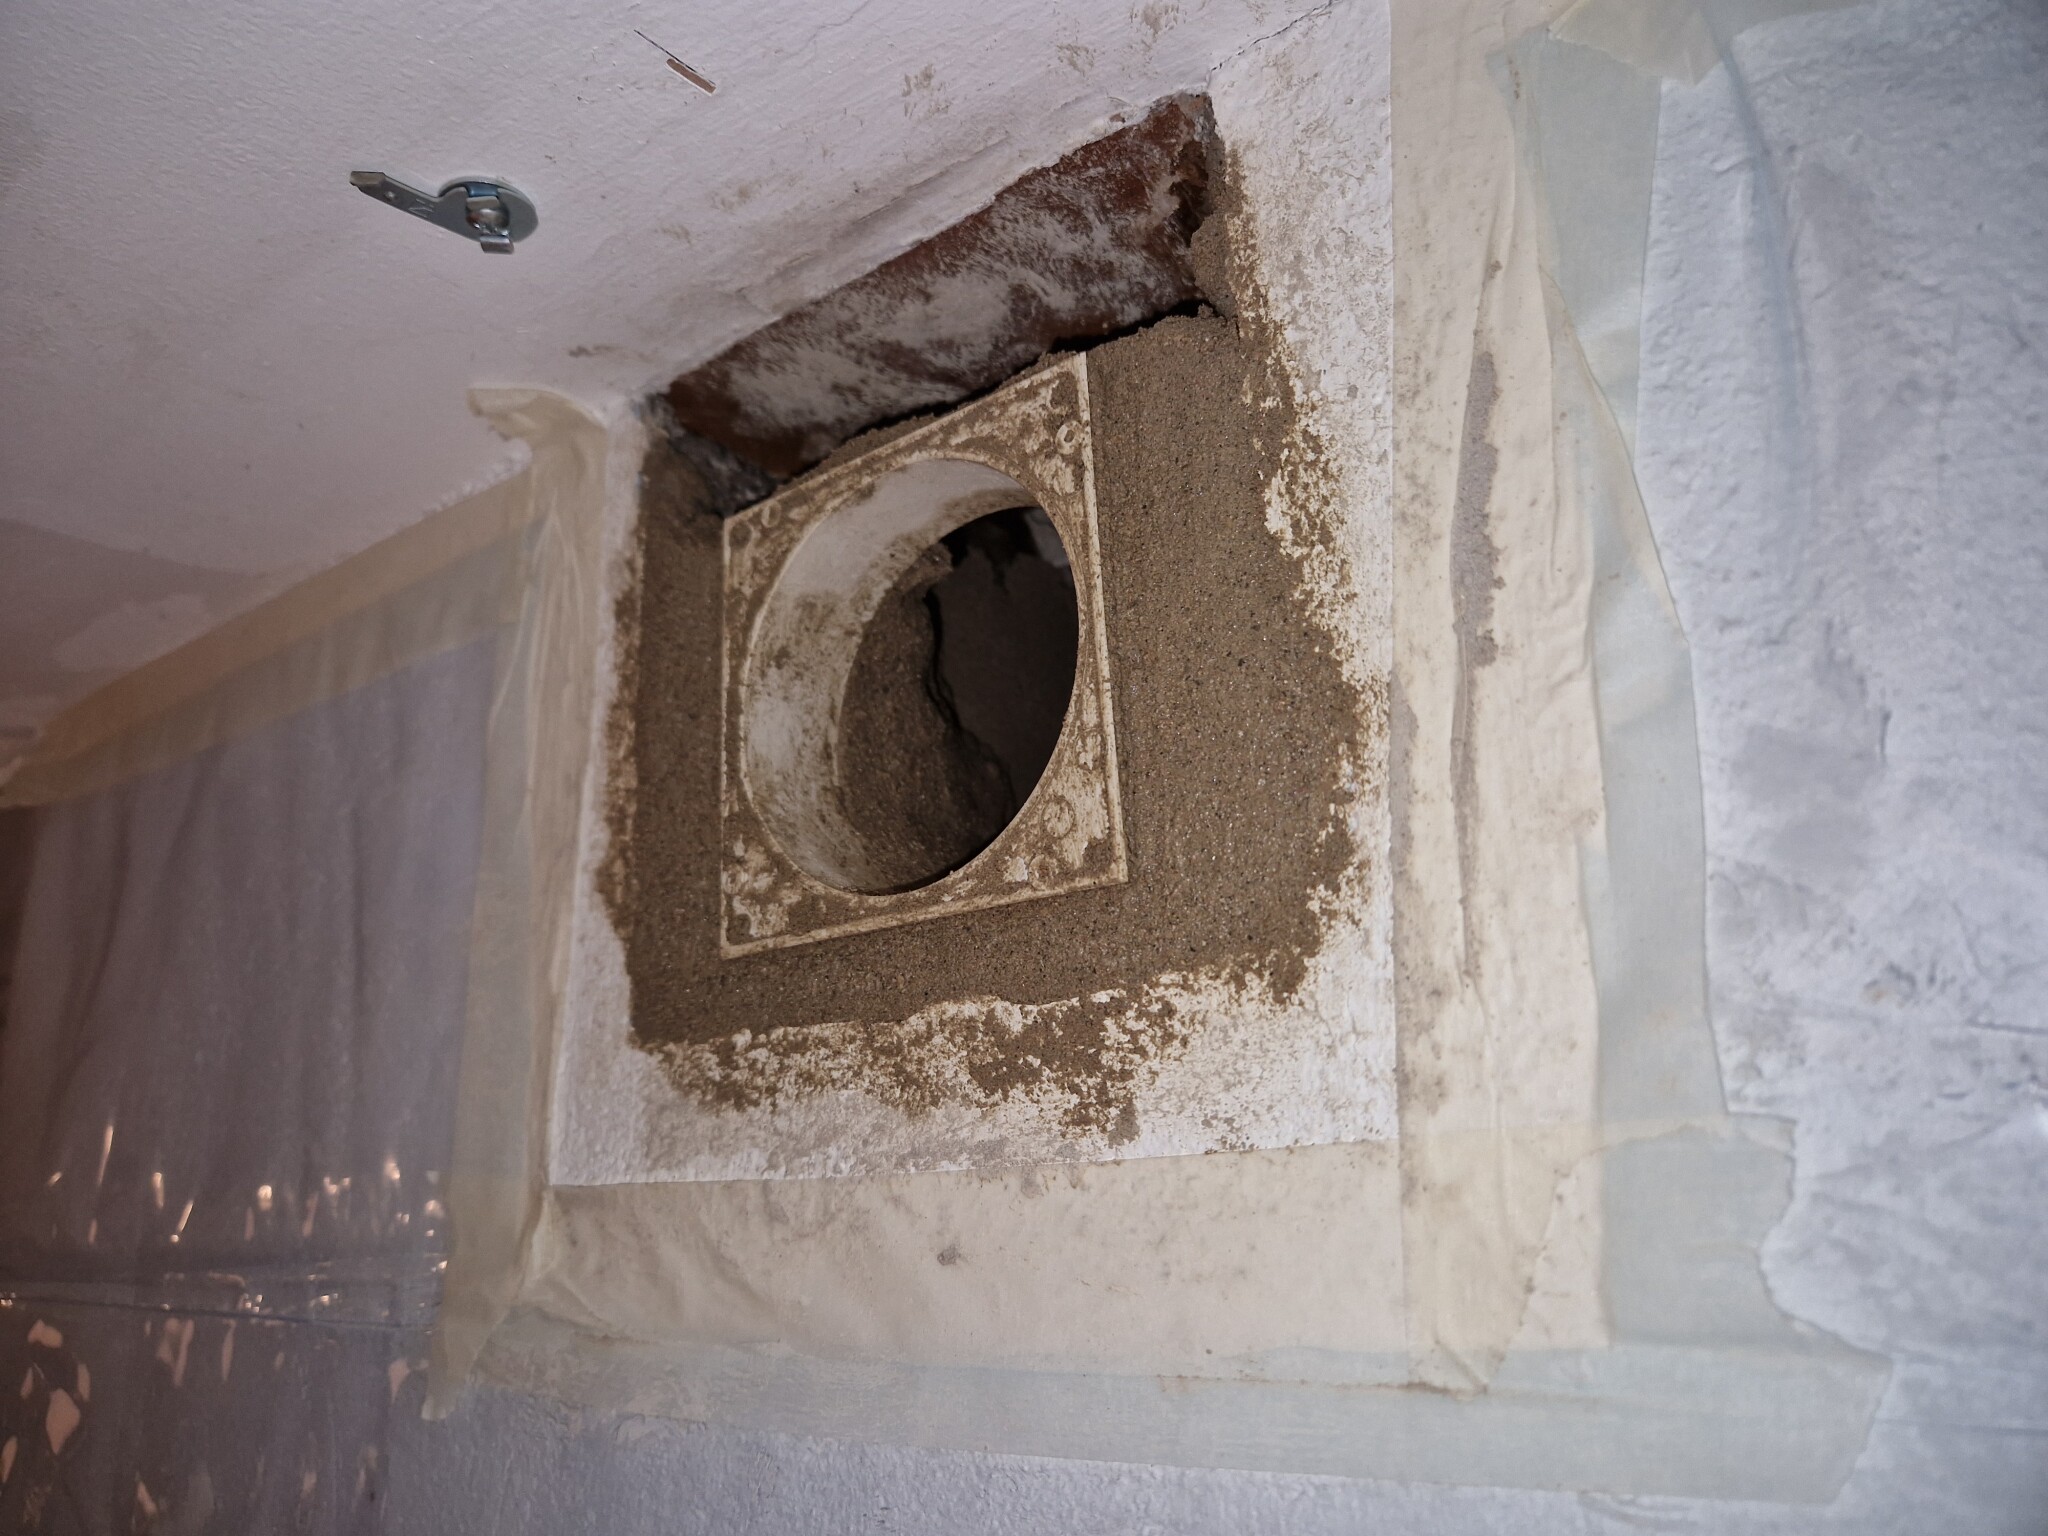
Okay, chopped away the old inner part, removed unnecessary plaster in the passageway, accidentally took away a bit too much so had to repair a bit on the outside as well!
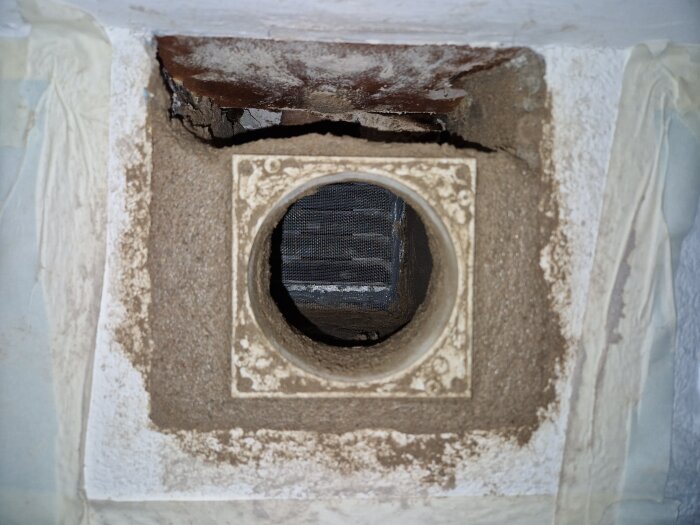
Cut and glued the insect net (alum) with MS Polymer.
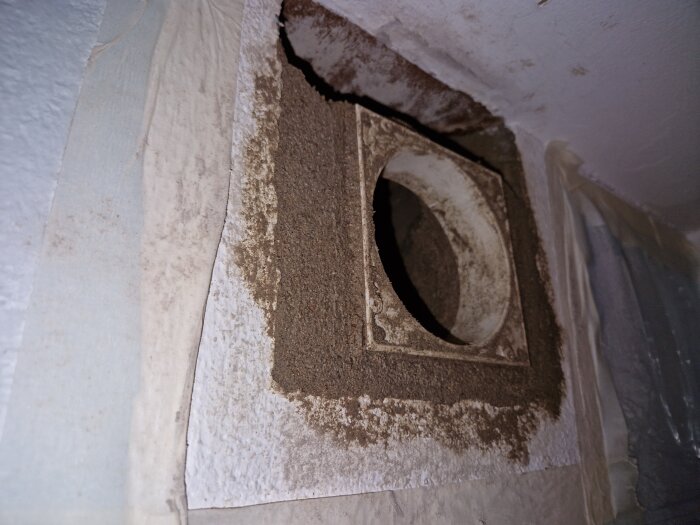
Started building up for the inner part but it really wasn't easy without some form of skeleton, you needed it to be quite thick and have to work with your hands to build it up sufficiently on the inside. The top part couldn't be placed now because the bottom part needs to cure a bit more, maybe it can be put there tomorrow.
Adjusted the pipe with a level so that it is straight in all directions.
In this case, the spout needs to stick out a bit for the inner part to snap on, in the worst case, I guess you can also screw it on. However.
I will water it a bit tomorrow so that it doesn’t crack.
I have 5 more identical vents to do, I’m not so sure I will do the same there, and if I do, I will likely build some form of structure to hold the inner part. It didn’t feel like this is how the professionals do it, probably most use foam sealer.
Edit: At the top of the passageway, there is some type of wood material, in the middle of the passageway there is a groove about 8 cm wide (where you can see some black paper hanging down, or whatever it is). I tried to fill this up with plaster but clearly, it didn’t work, it just fell down again. I hope it’s not a problem that air gets in between the inner walls there. Otherwise, I guess you could crumple up some durable plastic and push it up into the groove.
Click here to reply
Vi vill skicka notiser för ämnen du bevakar och händelser som berör dig.


Henningelvis said:
I would go with option 1, meaning mix a thicker mortar which I would then press the inner part into. Option 2 seems more cumbersome and dusty and it's difficult to get the inner part to stay in place.