This year, we're finally going to tackle replacing the fence. I had a day off yesterday and took the opportunity to test-build (the frame for) one section to see what questions arise. Before building the rest, I plan to check these questions with the forum. A lot of it involves fastenings, as well as how much and where I should use the level.
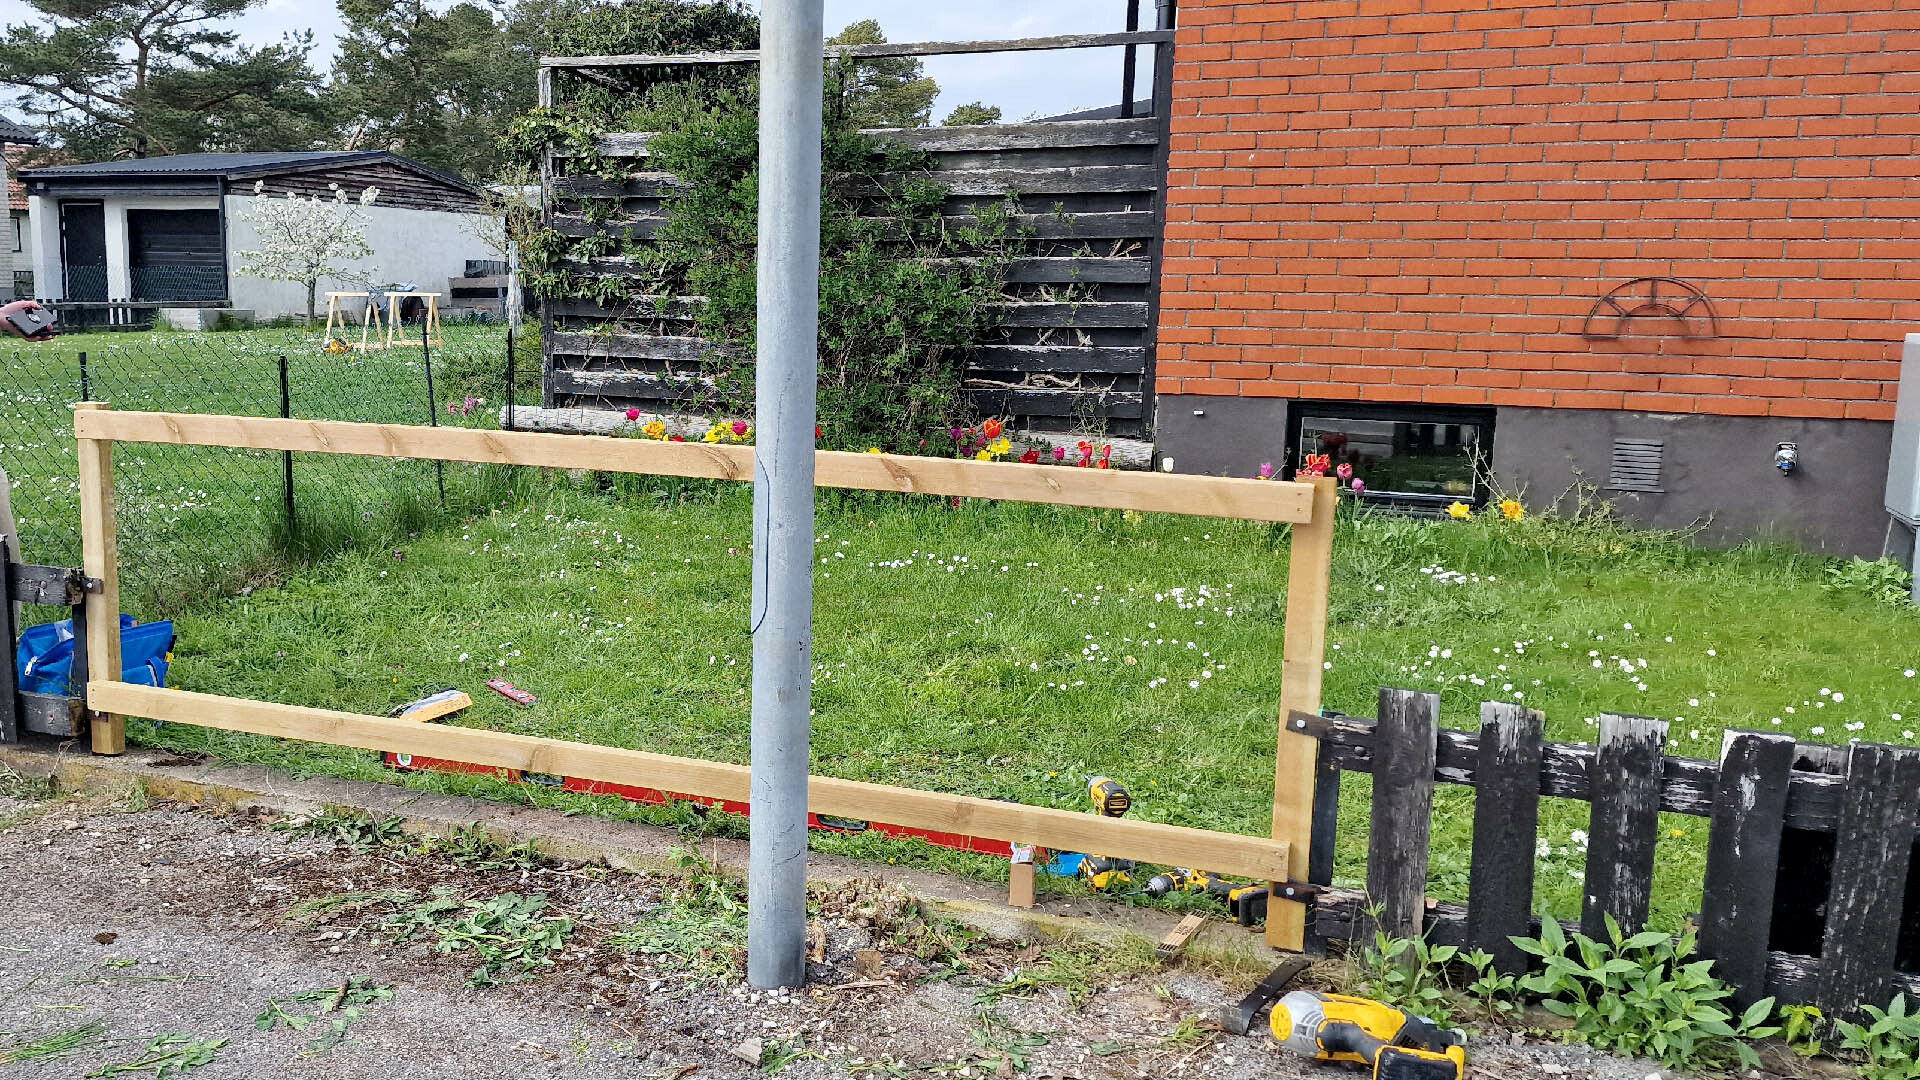
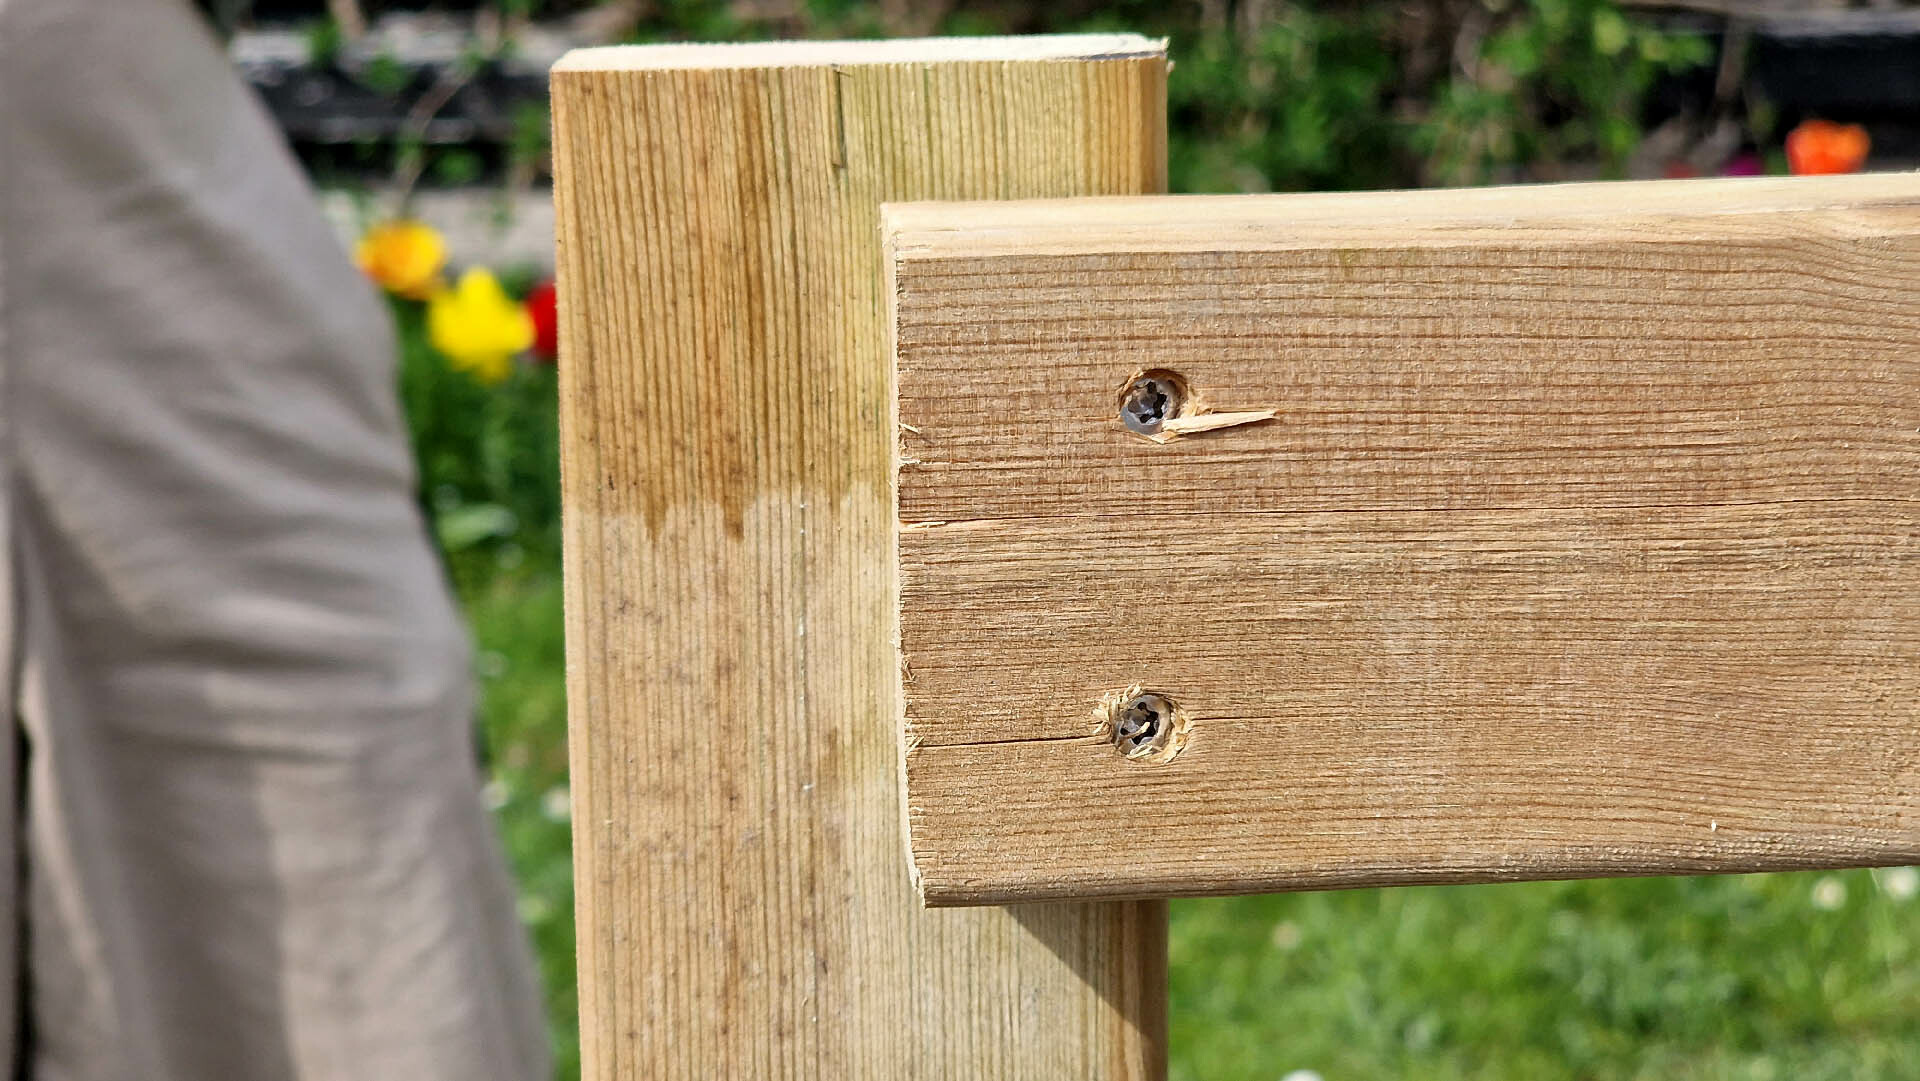
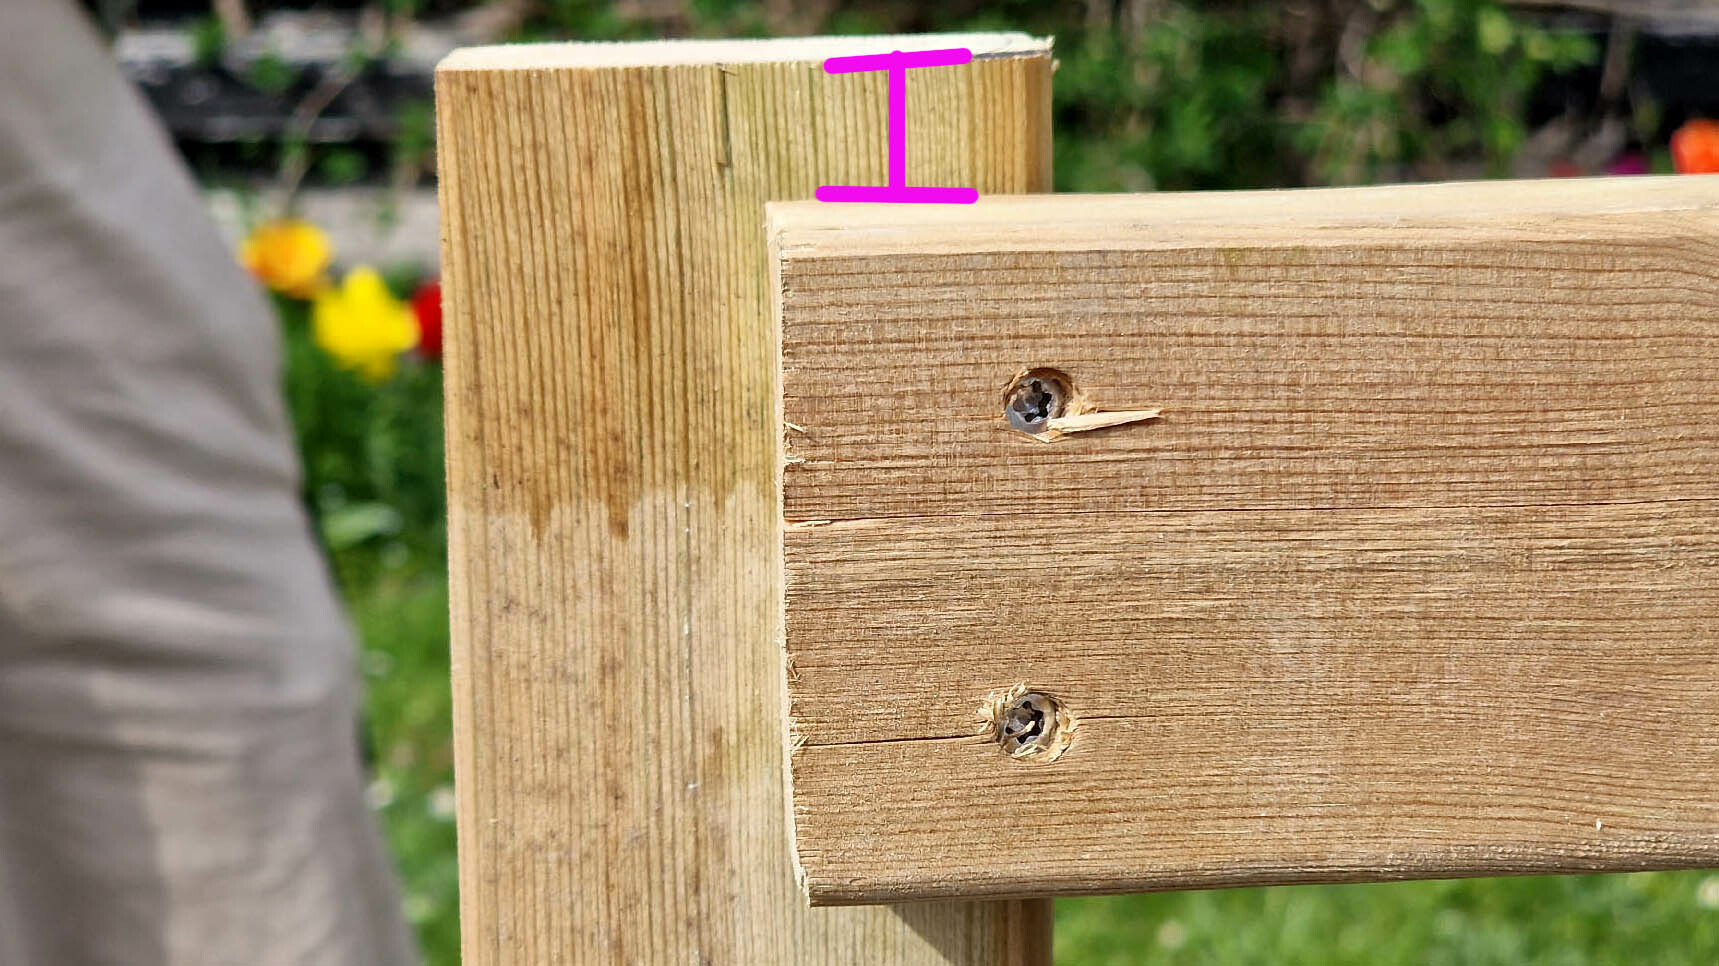
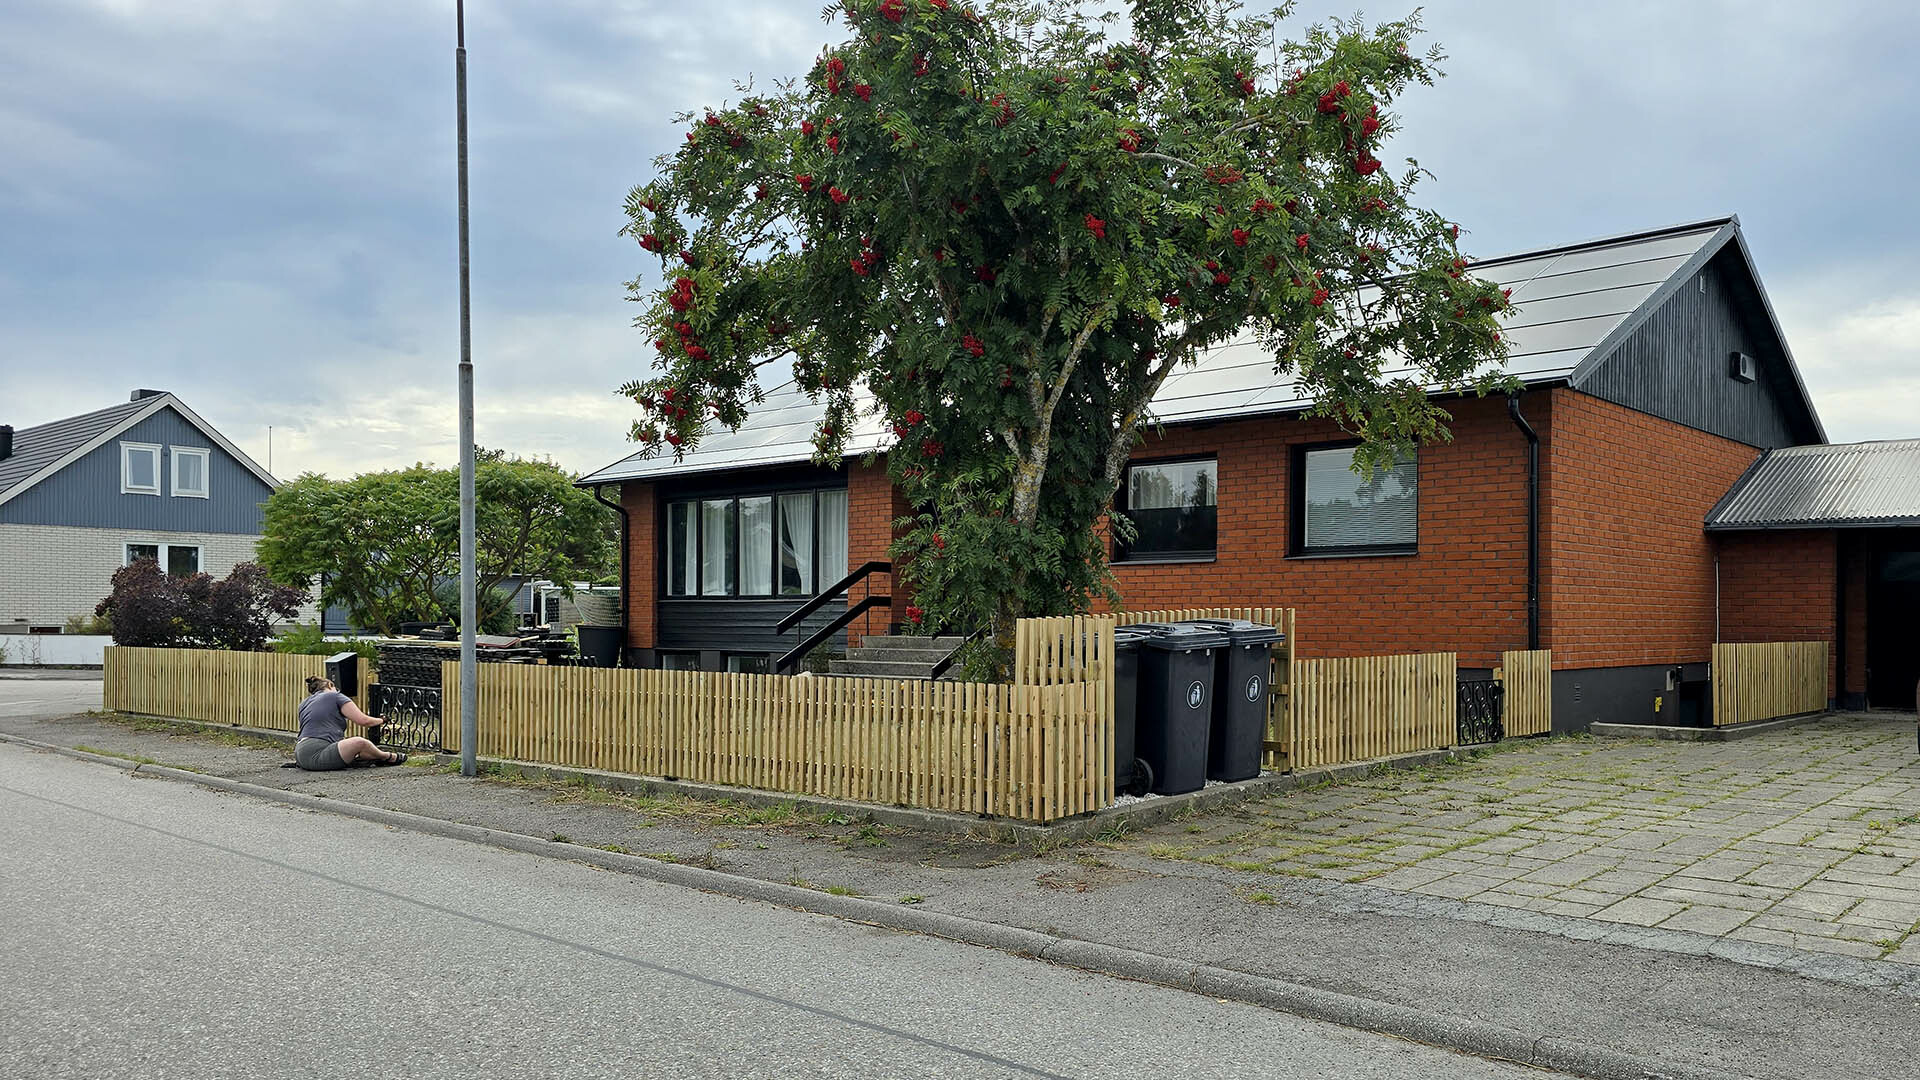
The posts and beams are pressure-treated 45x70. The slats will be 45x28, sticking up ~100mm over the beam.
The total height of the fence will be around ~110cm, with a distance between the posts of ~2.9 meters.
I dip all cut surfaces in oil.
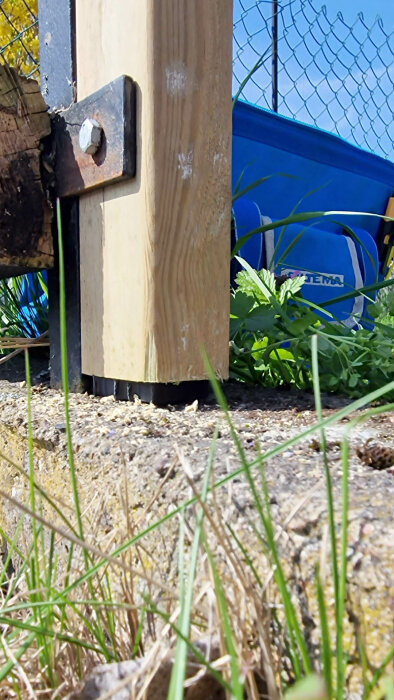
1. Place the posts on 1cm shimming block, good or useless?
My thought: raise them off the ground to avoid absorbing moisture and provide some support if the fastening is insufficient.
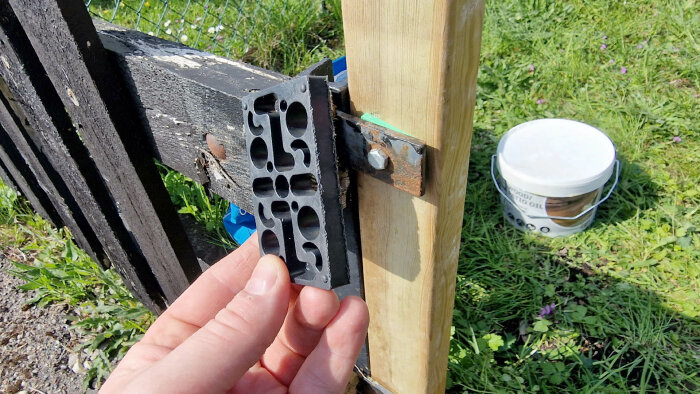
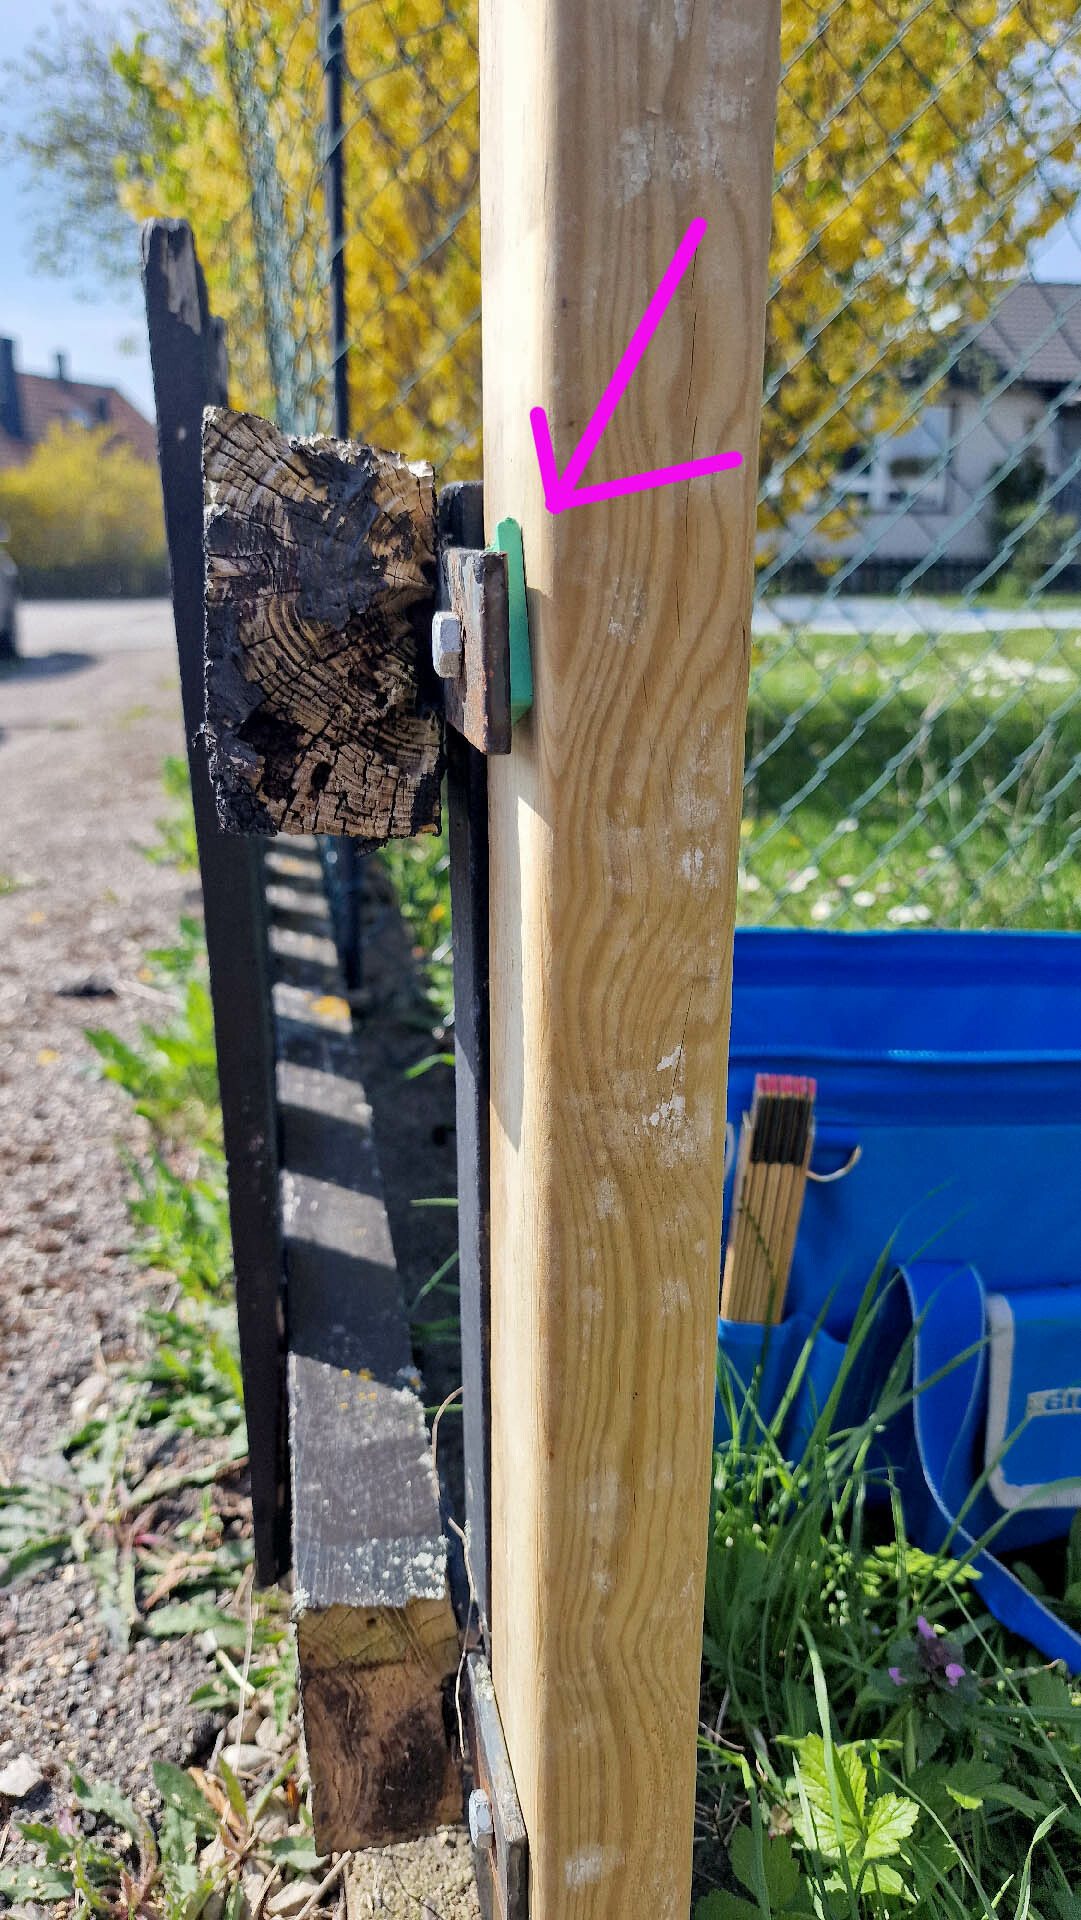
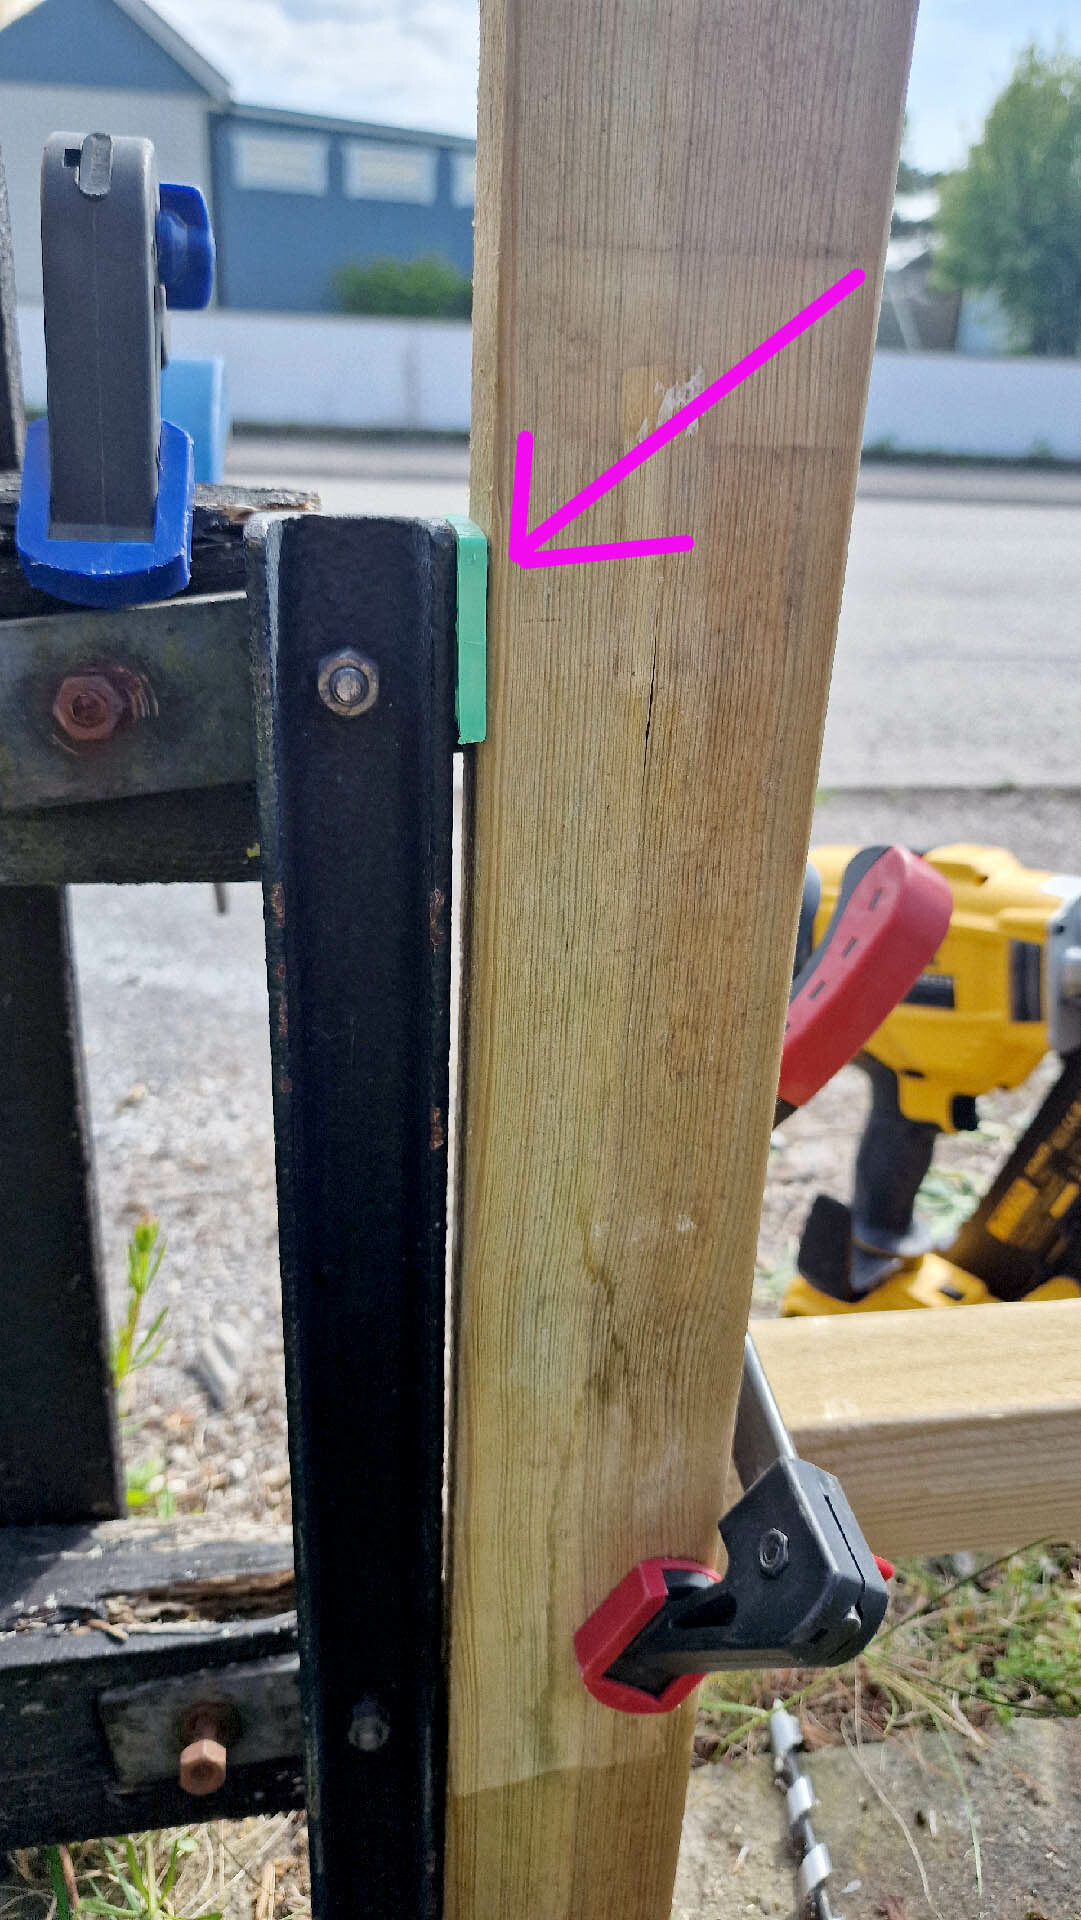
2. I'm securing the posts with 8x50mm coach screws, 2 per post. Will that be enough, or do I need through-bolts?
3. Shim the posts to get them vertical, necessary or irrelevant?
I imagine that straight posts might make the rest of the work a bit easier (like the alignment of horizontal beams?) but... it might just be unnecessary fuss and risk making the fence short-lived with all those plastic pieces everywhere. As you can see, we're attaching to existing metal in the concrete, and there aren't large inclines involved.
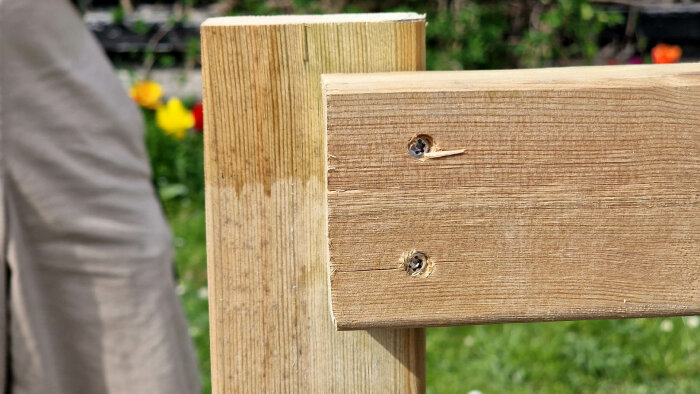
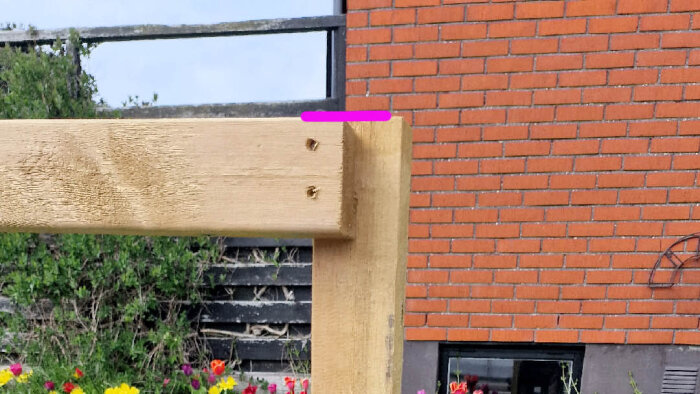
4. Fastening of beams to the posts. Is 2 decking screws (4.2x75mm stainless) enough?
I don't quite have room for through-bolts, I think. (screws slanted of course so that the decking screw grips into the post)
5. Does it matter at all if the beam is at the same height as the post or a bit lower?
Could there be issues with water? Should I leave room for adjustment to keep the beam level? (are level beams important?)
It was hard to know what would be best, but this summer we took a few weeks to finish building the fence with roughly the same strategy as above. So far, it works well!
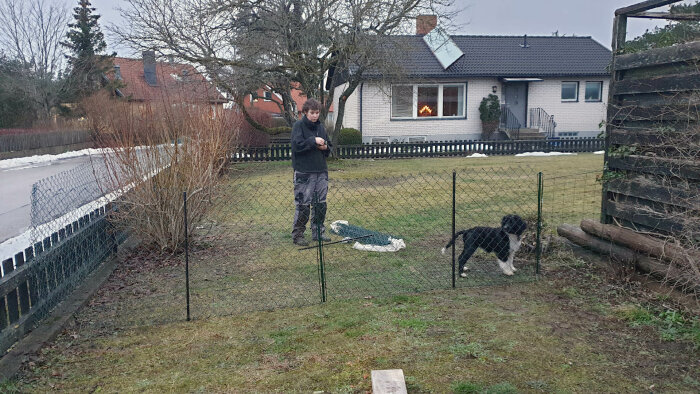
For context, we got a dog shortly after moving in, and then we put up a net along the 50-year-old knee-high fence. The plan was to build something new as soon as the weather got better - we bought the materials and then they sat for two years.
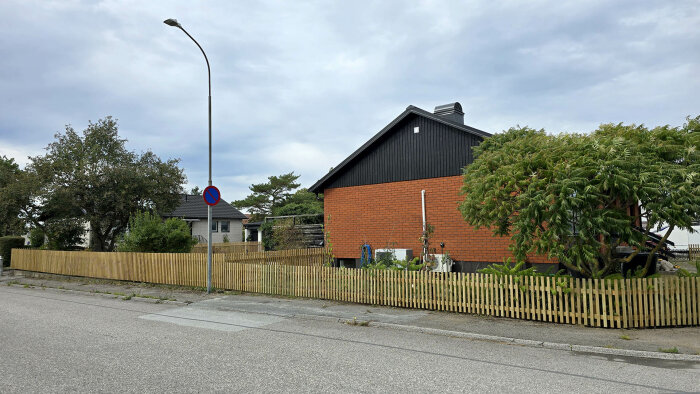
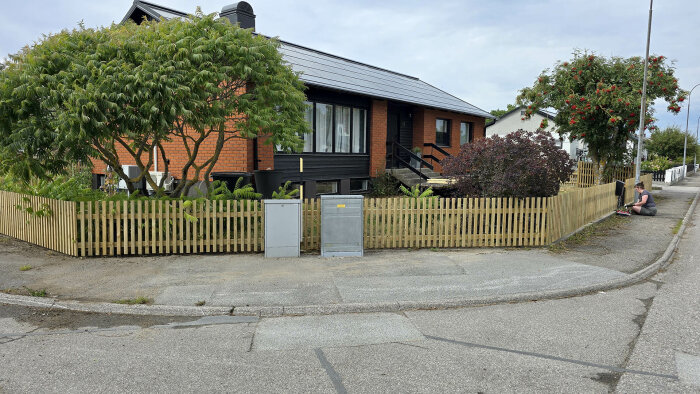
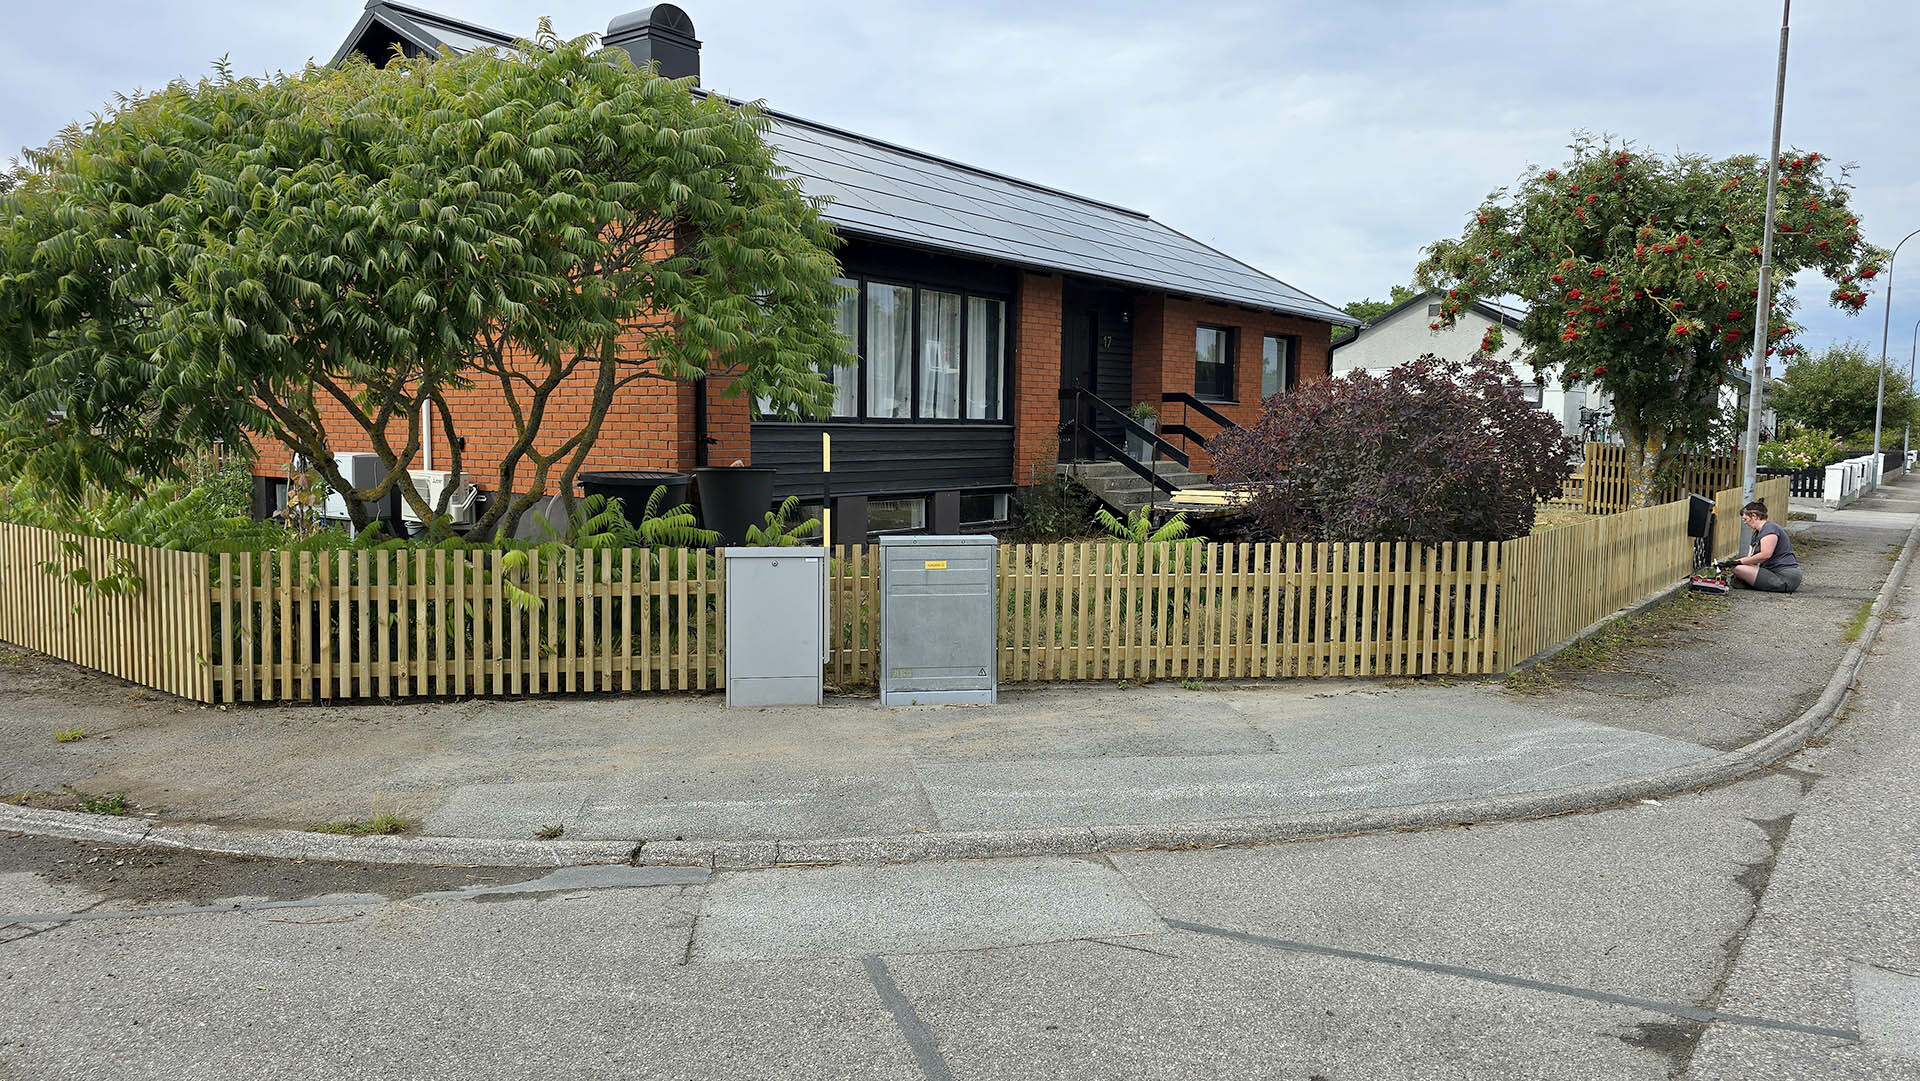
The new fence is simply pressure-treated wood, unpainted, to avoid any form of maintenance. We built it 110 cm high around the backyard where the dog runs.
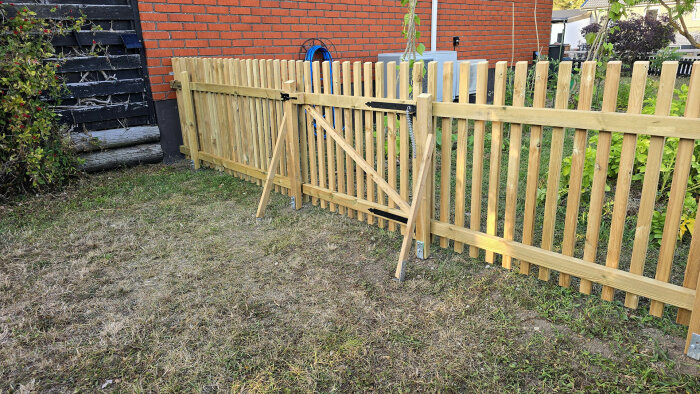
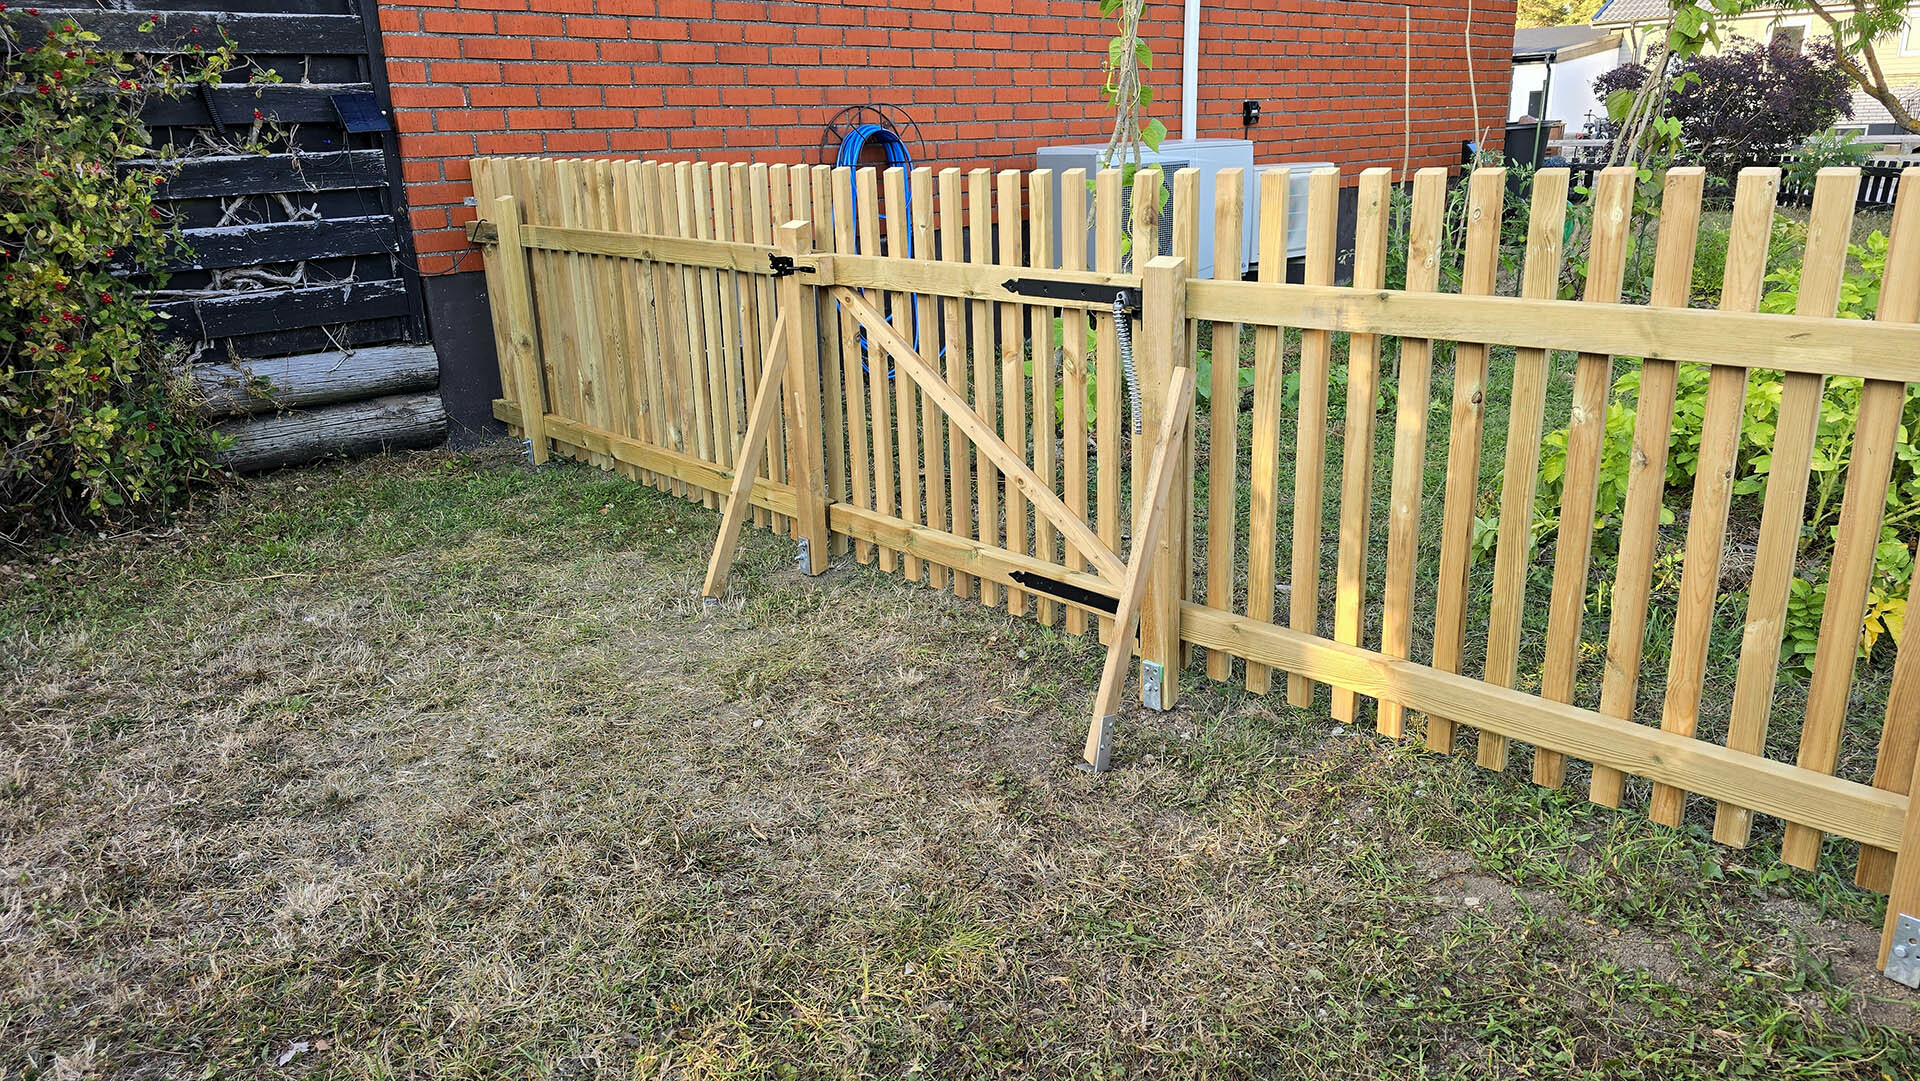
To delineate against the front, we set four post shoes in concrete and built a gate. Lesson learned from that: post shoes are not ideal for this purpose because it doesn't become entirely stable. If I were to do it again, I would have instead set in H-beams or something similar for better stability.
At the front, we chose to build a lower fence, about 80 cm high.
We also took the opportunity to create a new spot for the trash bin so it no longer needs to stand on the driveway. We made space for separate bins for paper and plastic, which means we no longer have boxes and plastic accumulating in the garage! In the bins, we use 410-liter trash bags, and when they're full, we just lift them out and take them to the recycling center. Waste management became 100% smoother!.
Maybe next year’s project will be to get a cheap welder and try to raise the small steel gates at the front to match the height of the fence. It would be fun to learn a bit of metalworking!
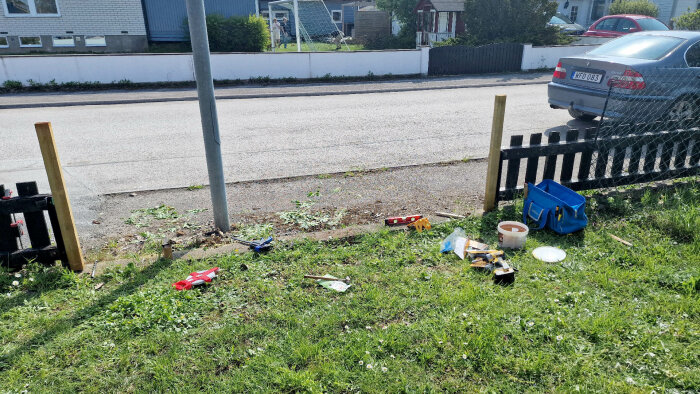
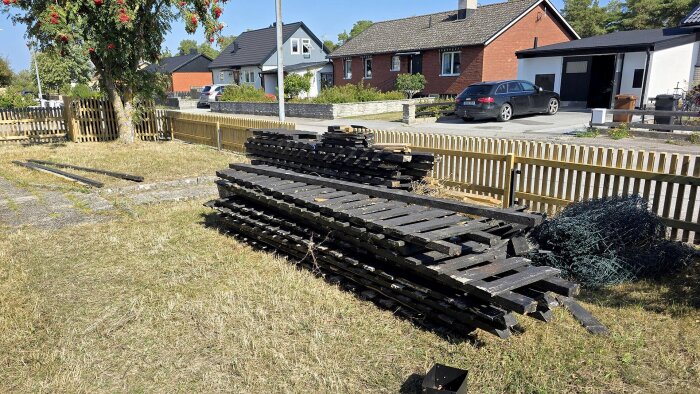
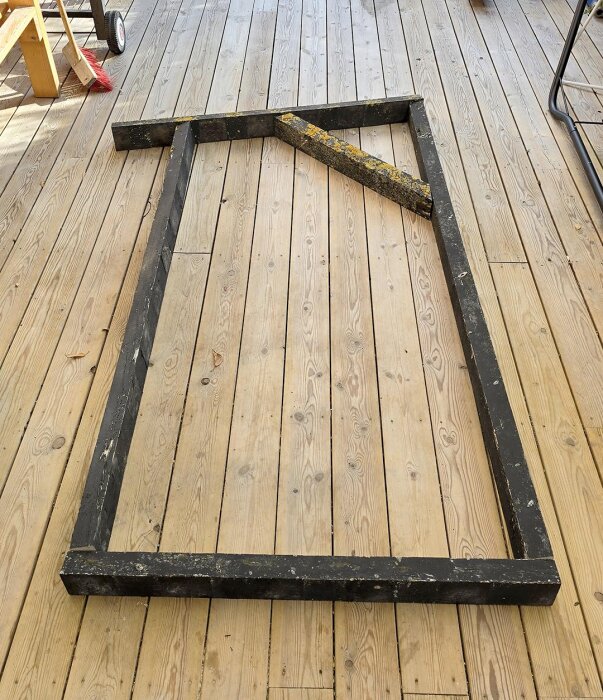
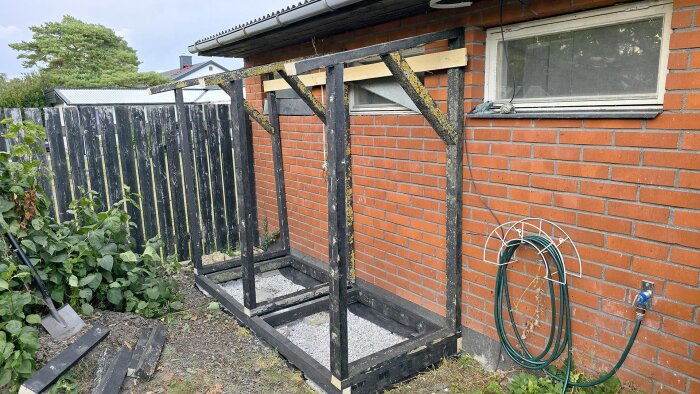
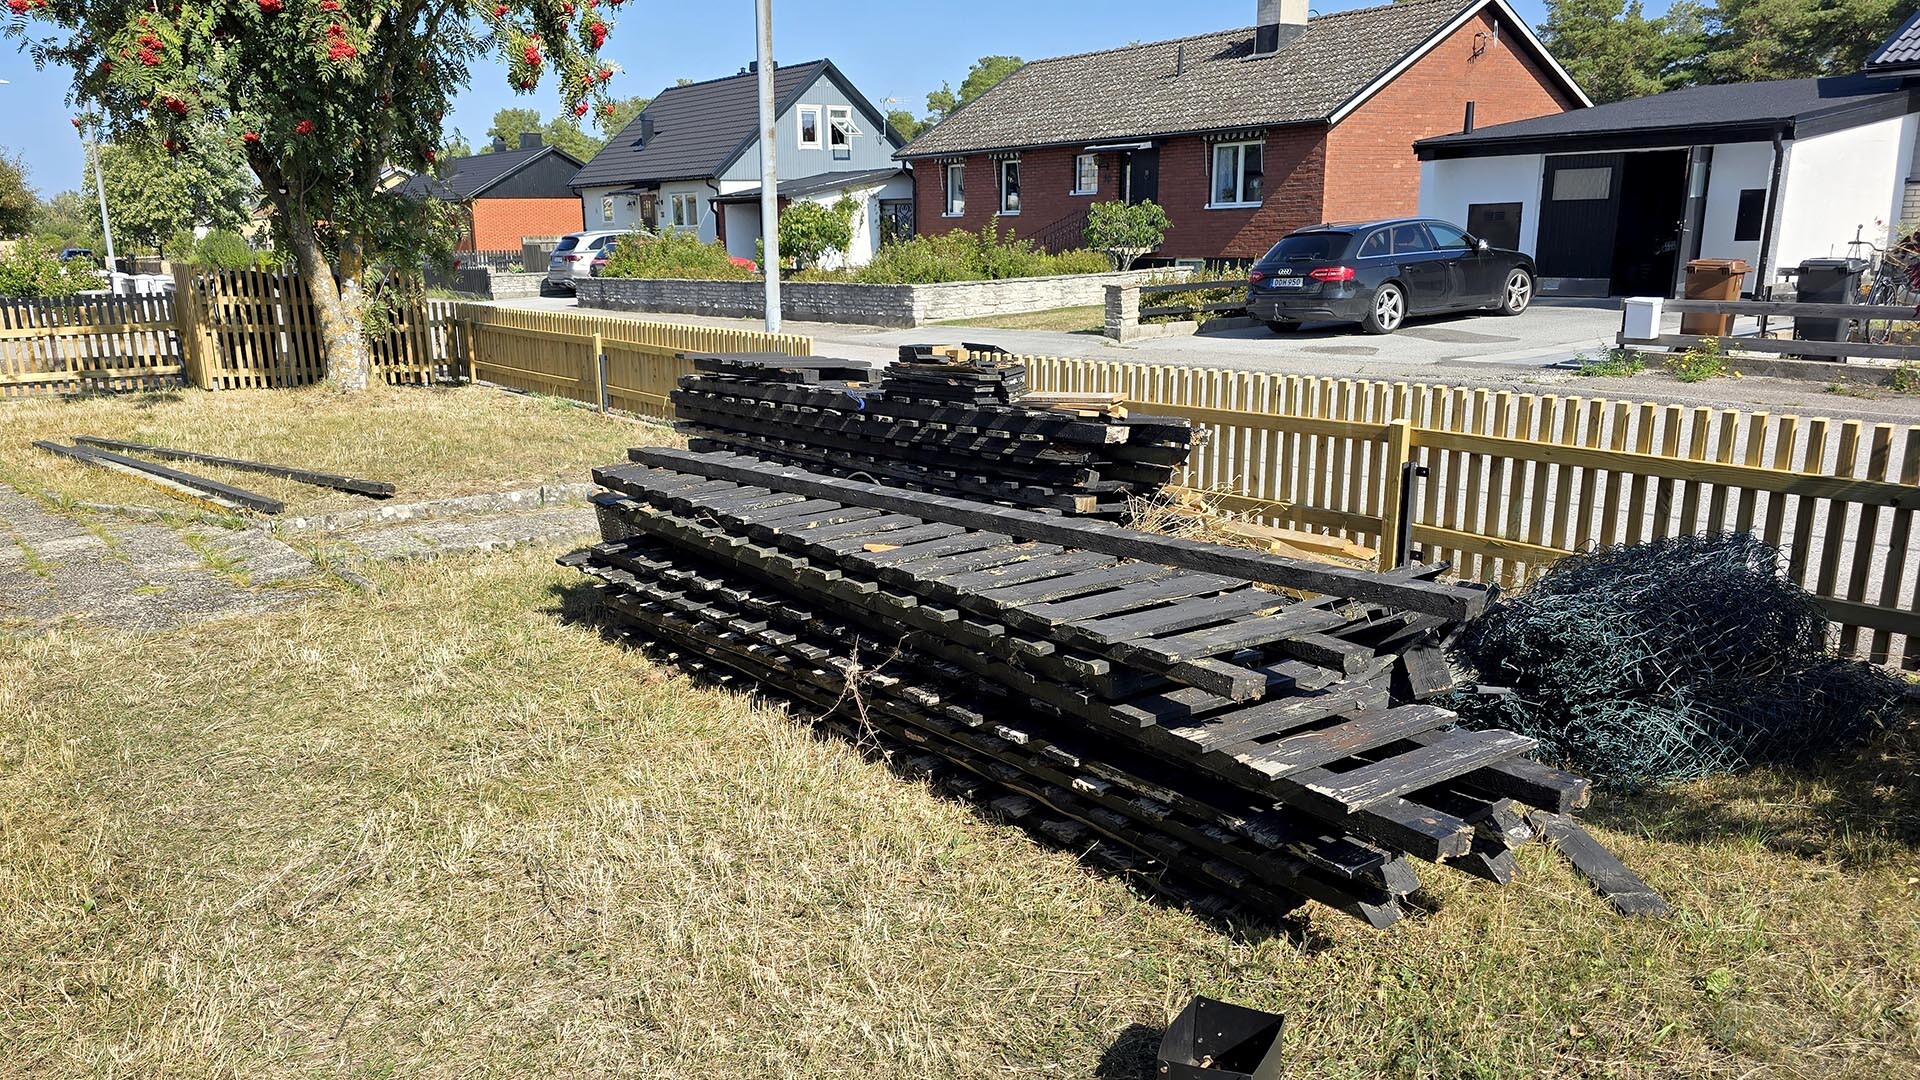
After taking down the old fence, we were left with a pile of junk on the lawn. The old slats were completely worn out, but the rails were basically in good condition – except for being bent and having some moss. There was also a bit of rot around the bolt holes, but that’s easy to cut away.
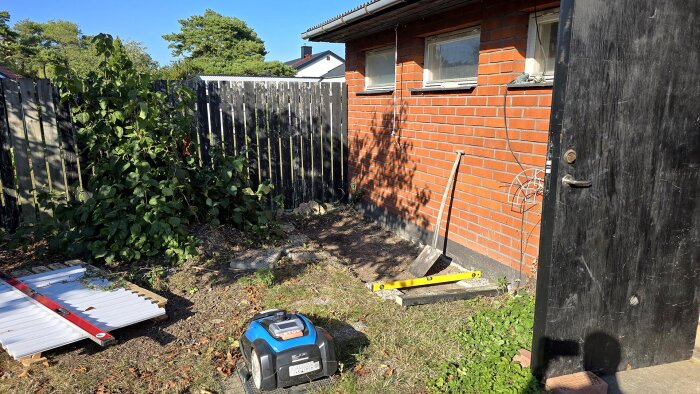
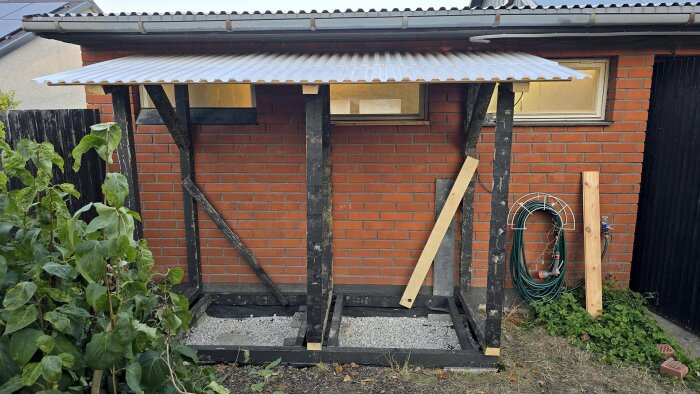
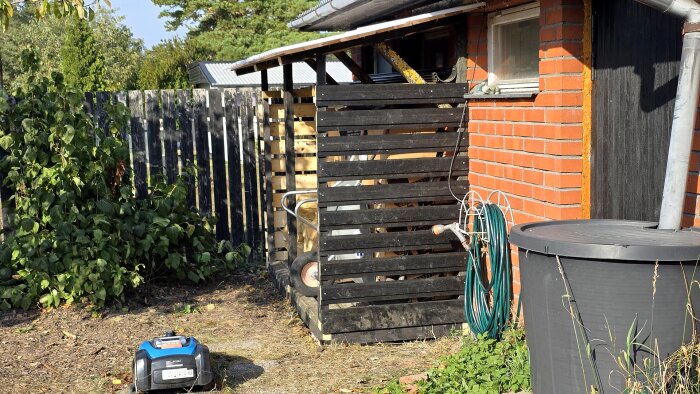
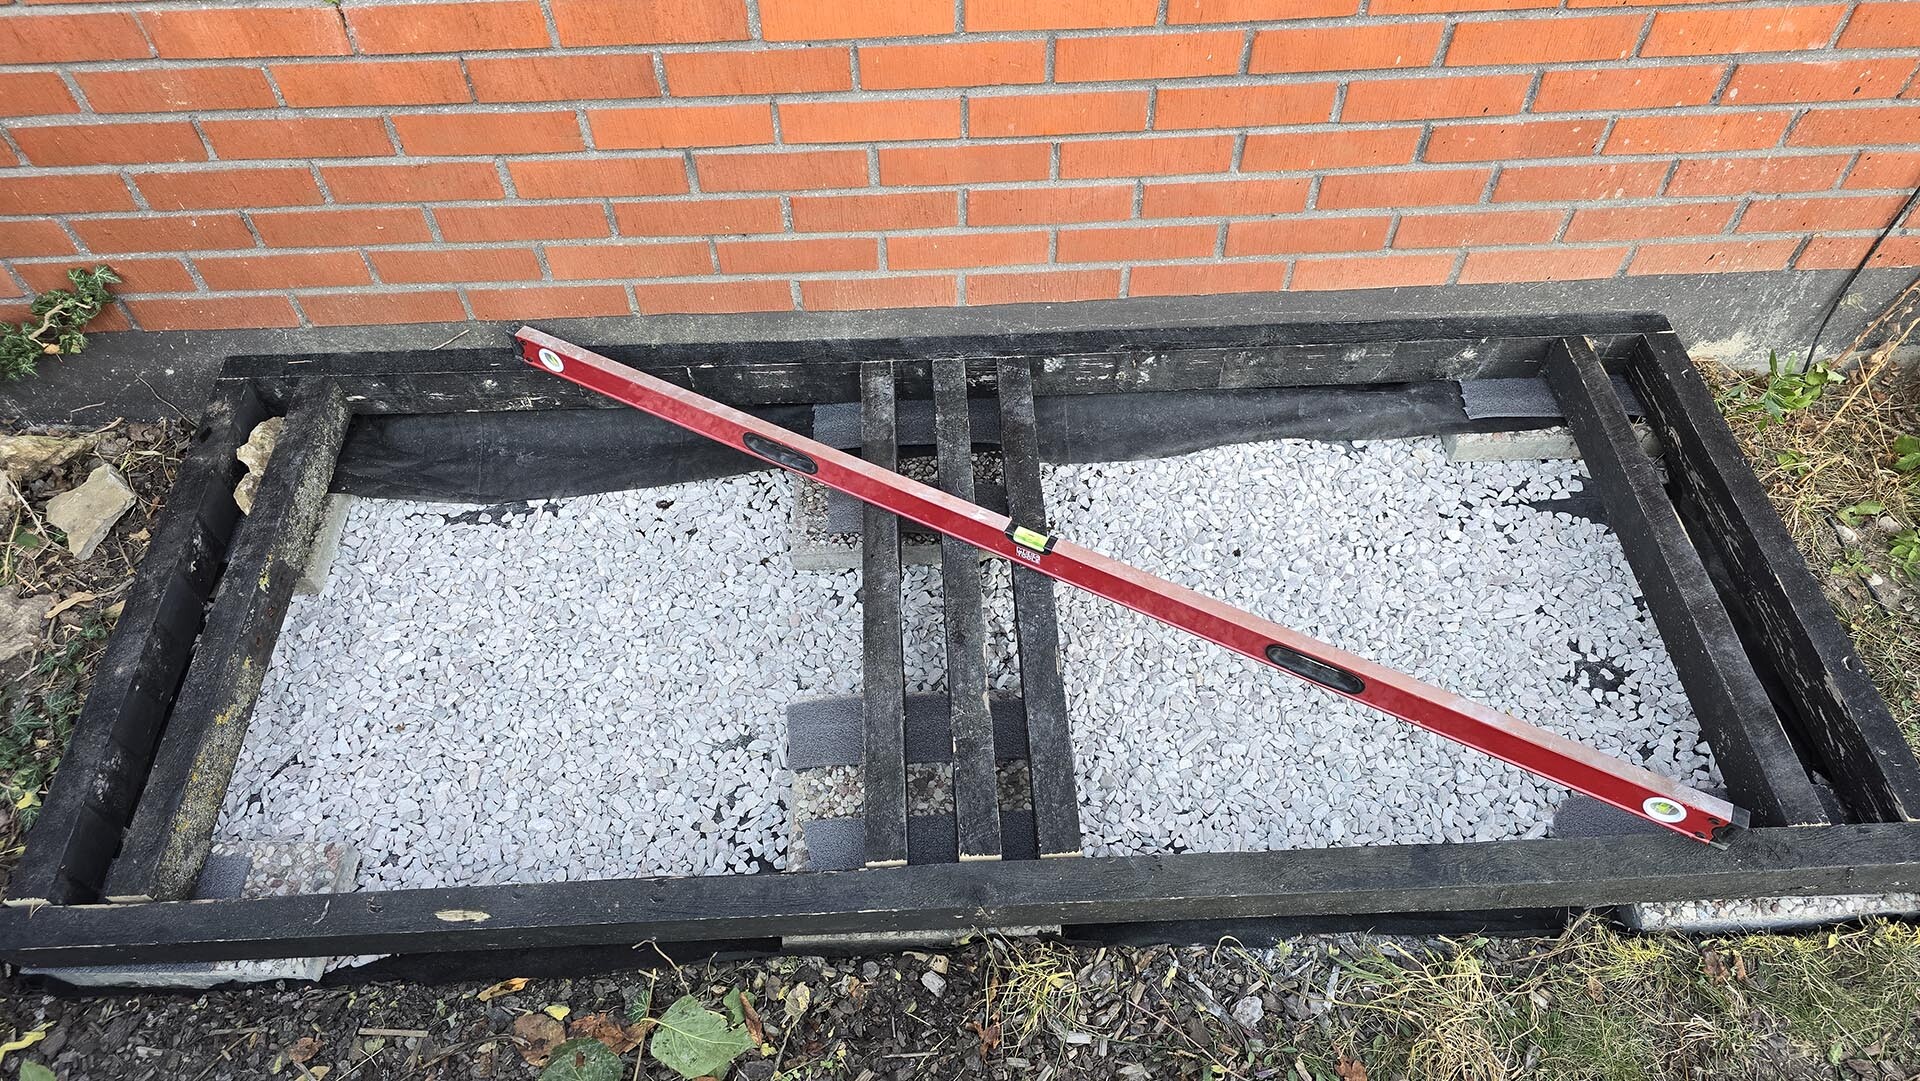
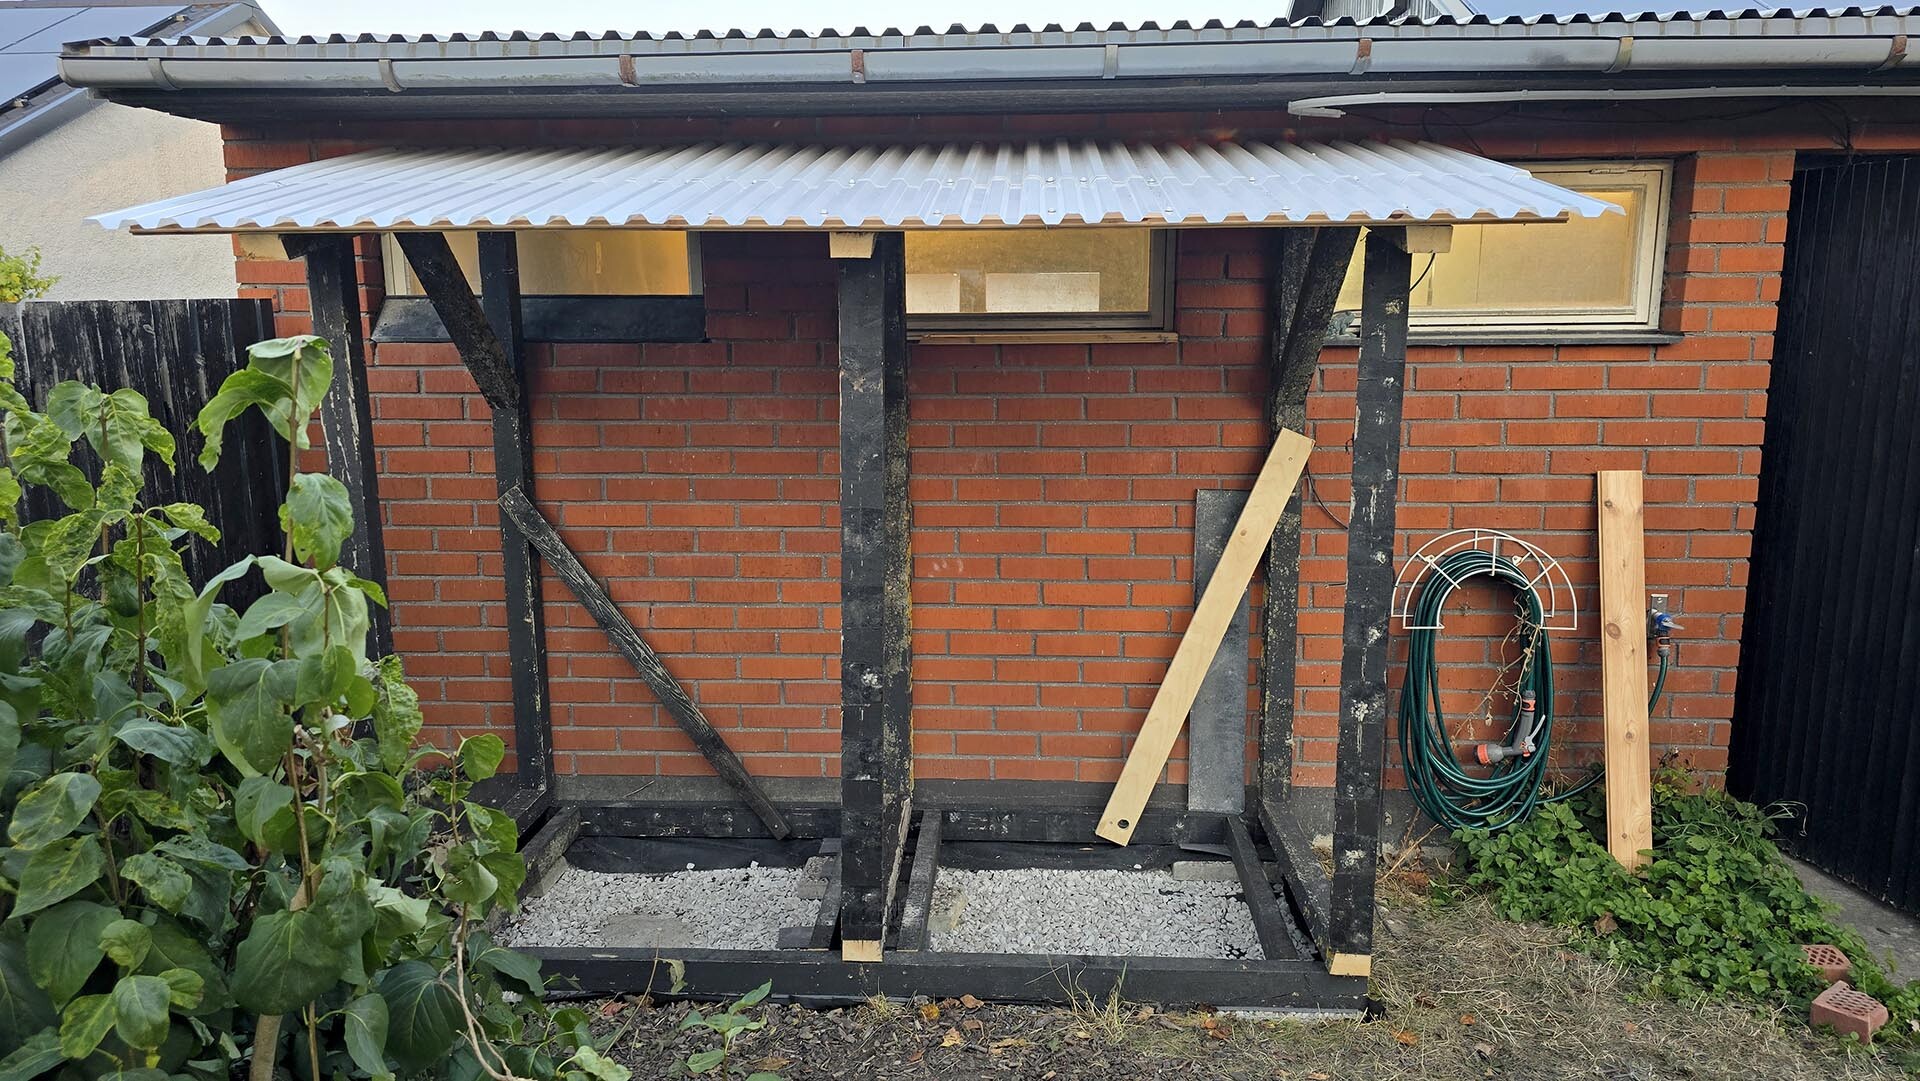
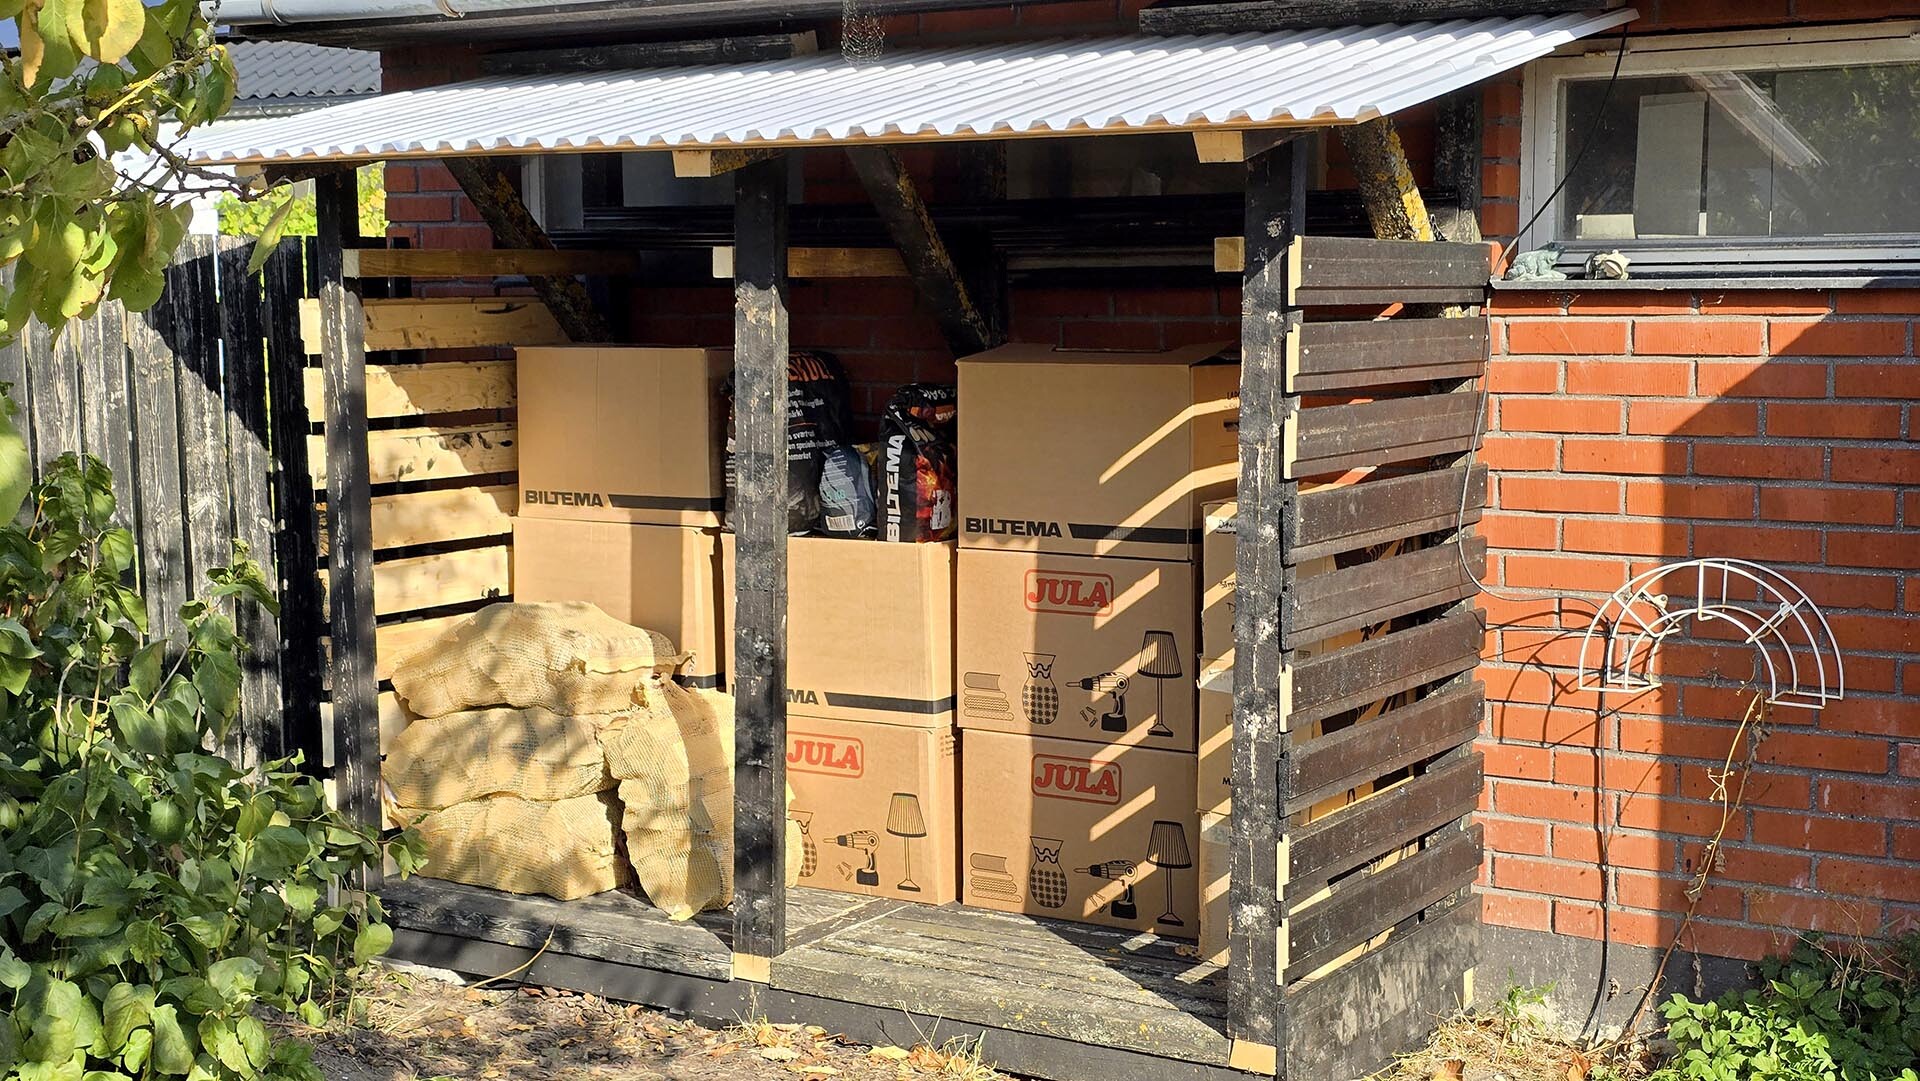
Instead of having to haul away all the dismantled material, I decided to build a woodshed out of it. I purchased a blueprint to base it on and excavated and graveled a spot behind the garage for a stable foundation.
I also had some leftover roofing from when we replaced the deck roof, so I thought I’d use that as the roof for the woodshed.
The sides of the woodshed are made of leftover paneling from when I replaced the gable panels. I probably have some paint left from that project as well, so the plan is to coat the end grain with it for extra durability.
Last edited:
Click here to reply
Vi vill skicka notiser för ämnen du bevakar och händelser som berör dig.