Here you have someone with more will than experience, who has recently bought an apartment with significant renovation needs. So I will surely have more questions. But right now:
I am going to close up an 80 cm wide doorway in a 15 cm thick concrete wall. I have googled and read the old threads I've found on the topic, but I am still not completely clear (and the threads are old).
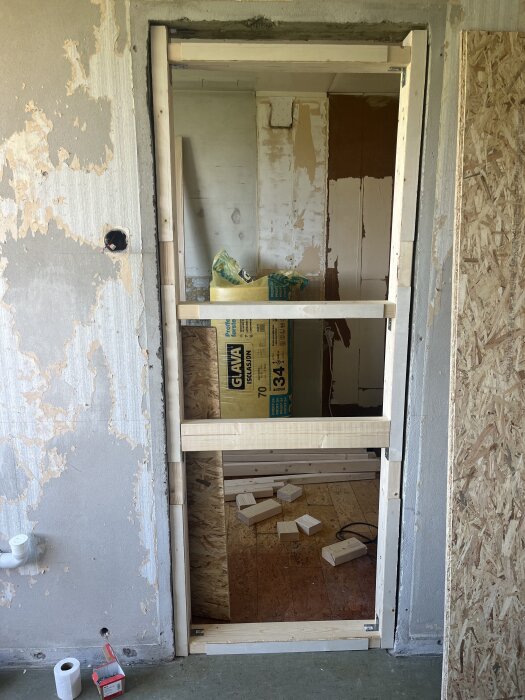
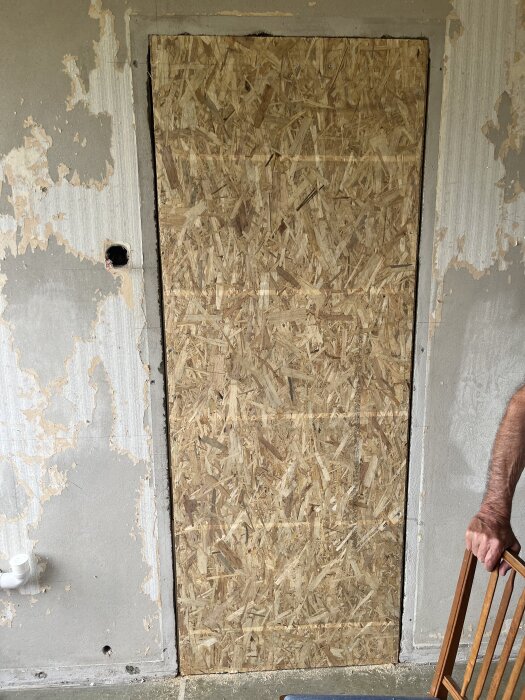
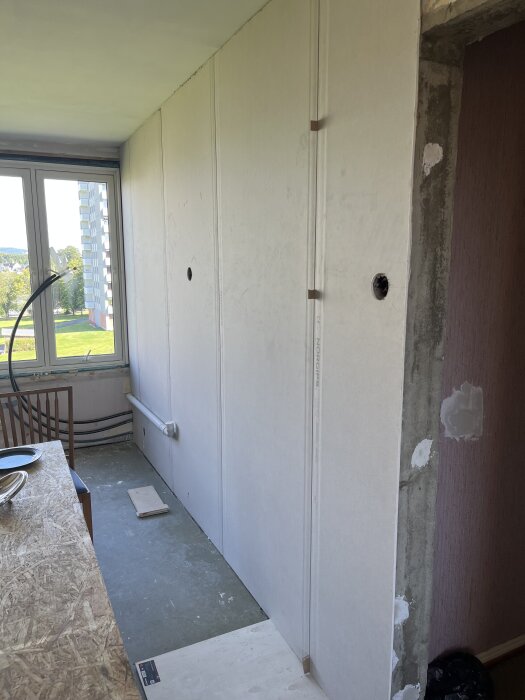
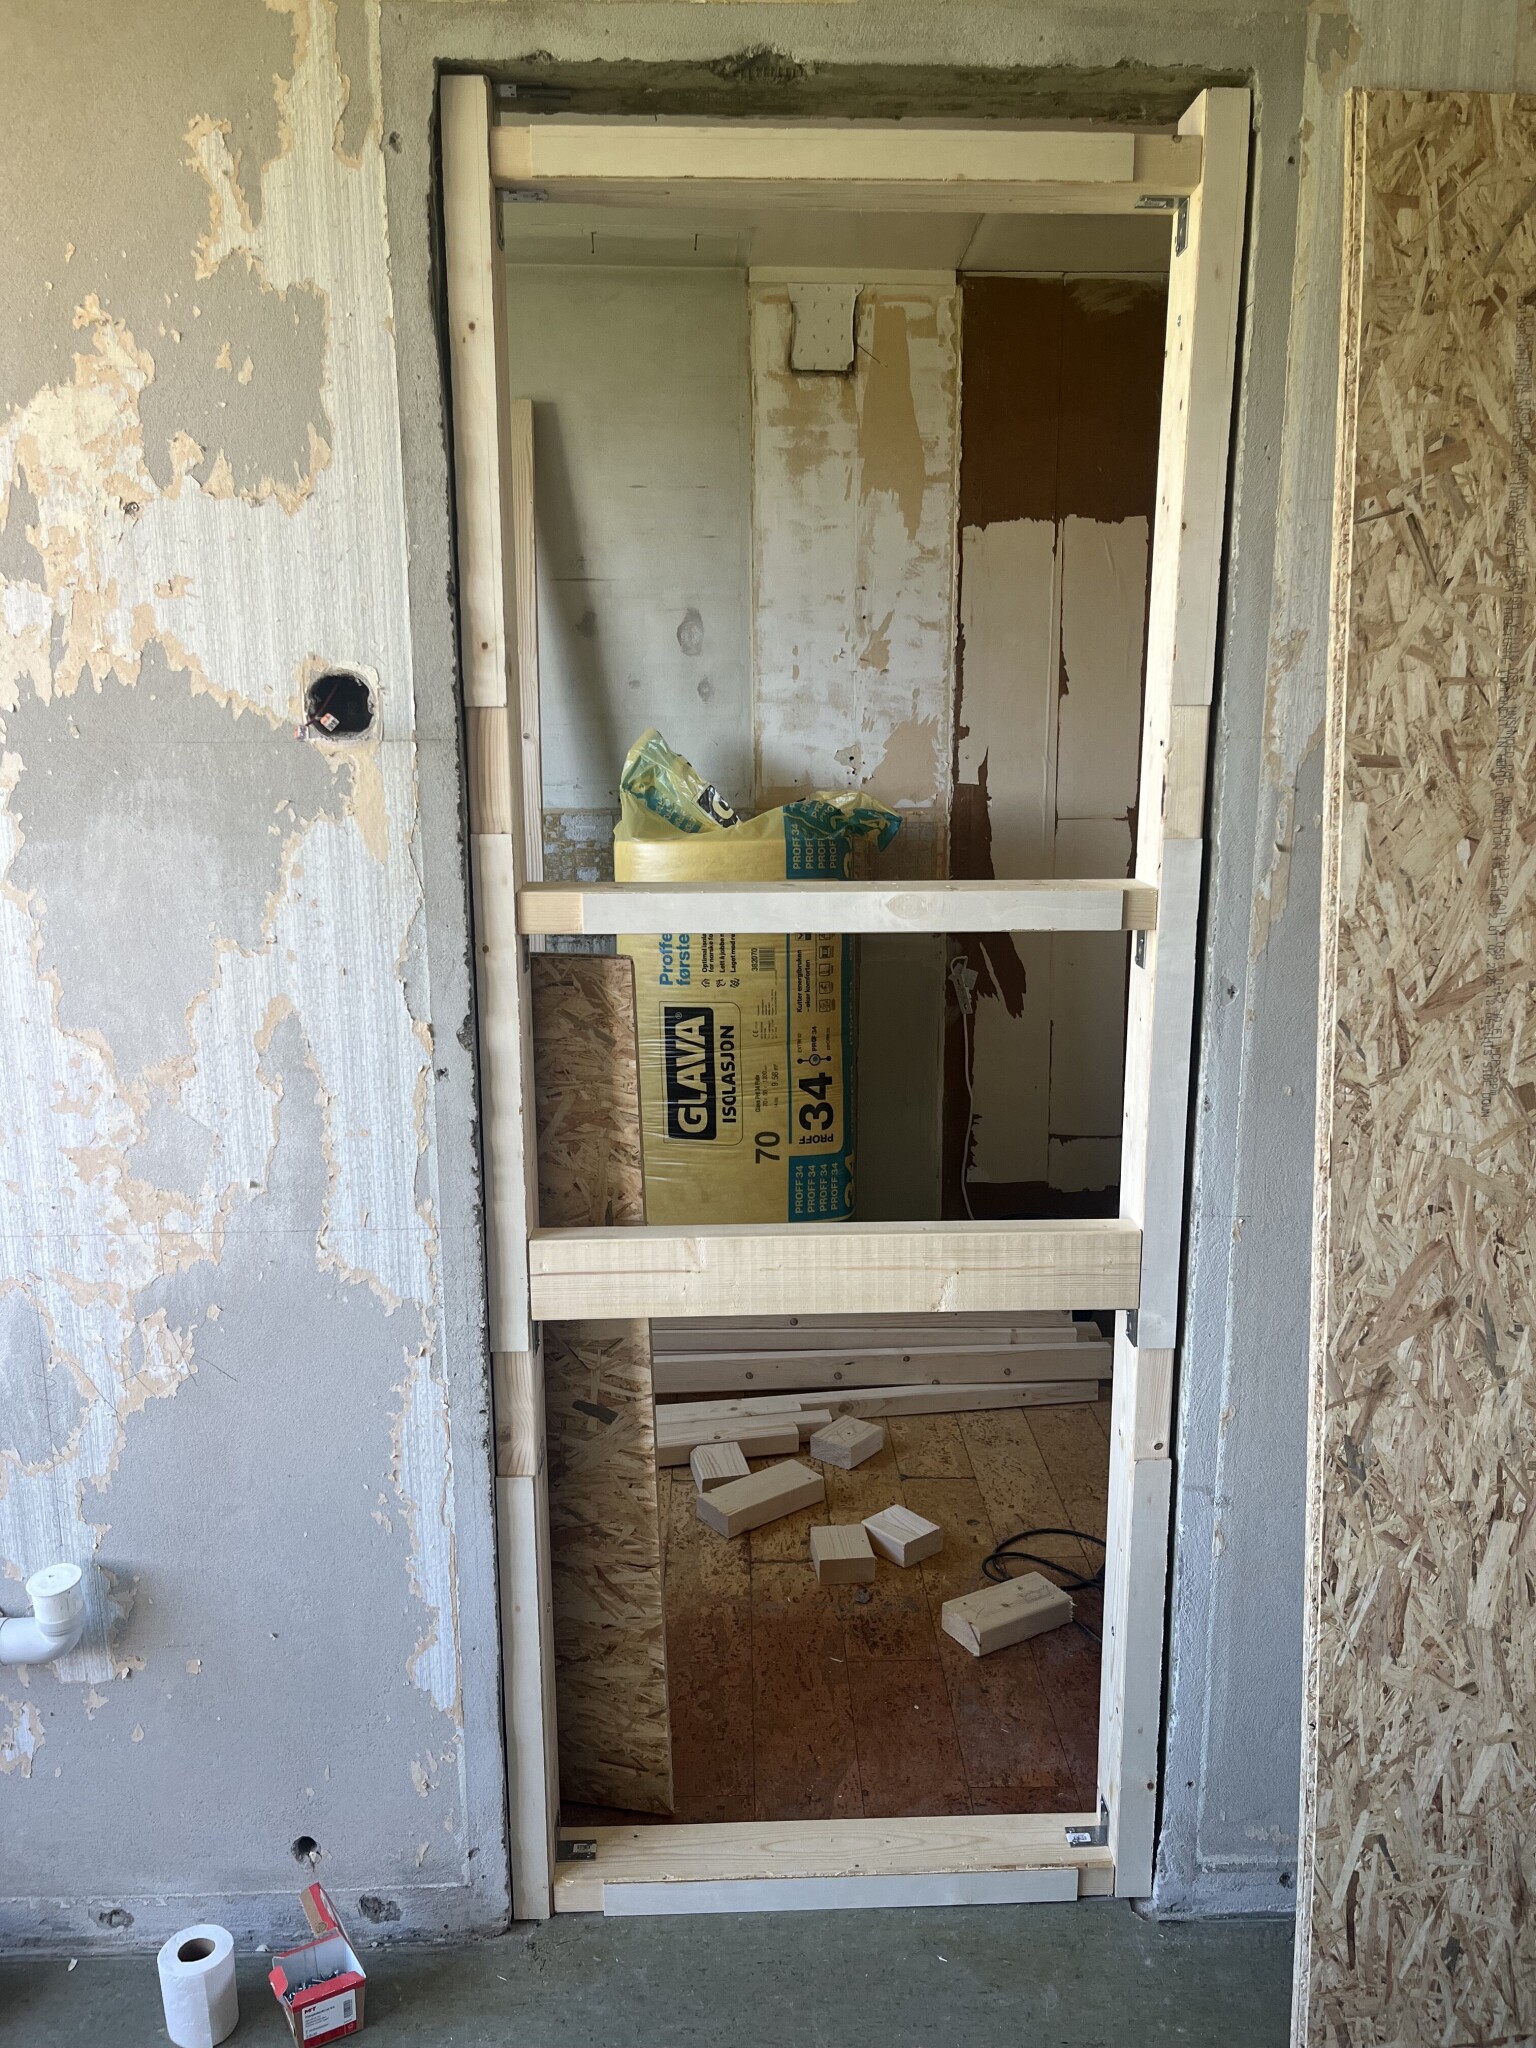
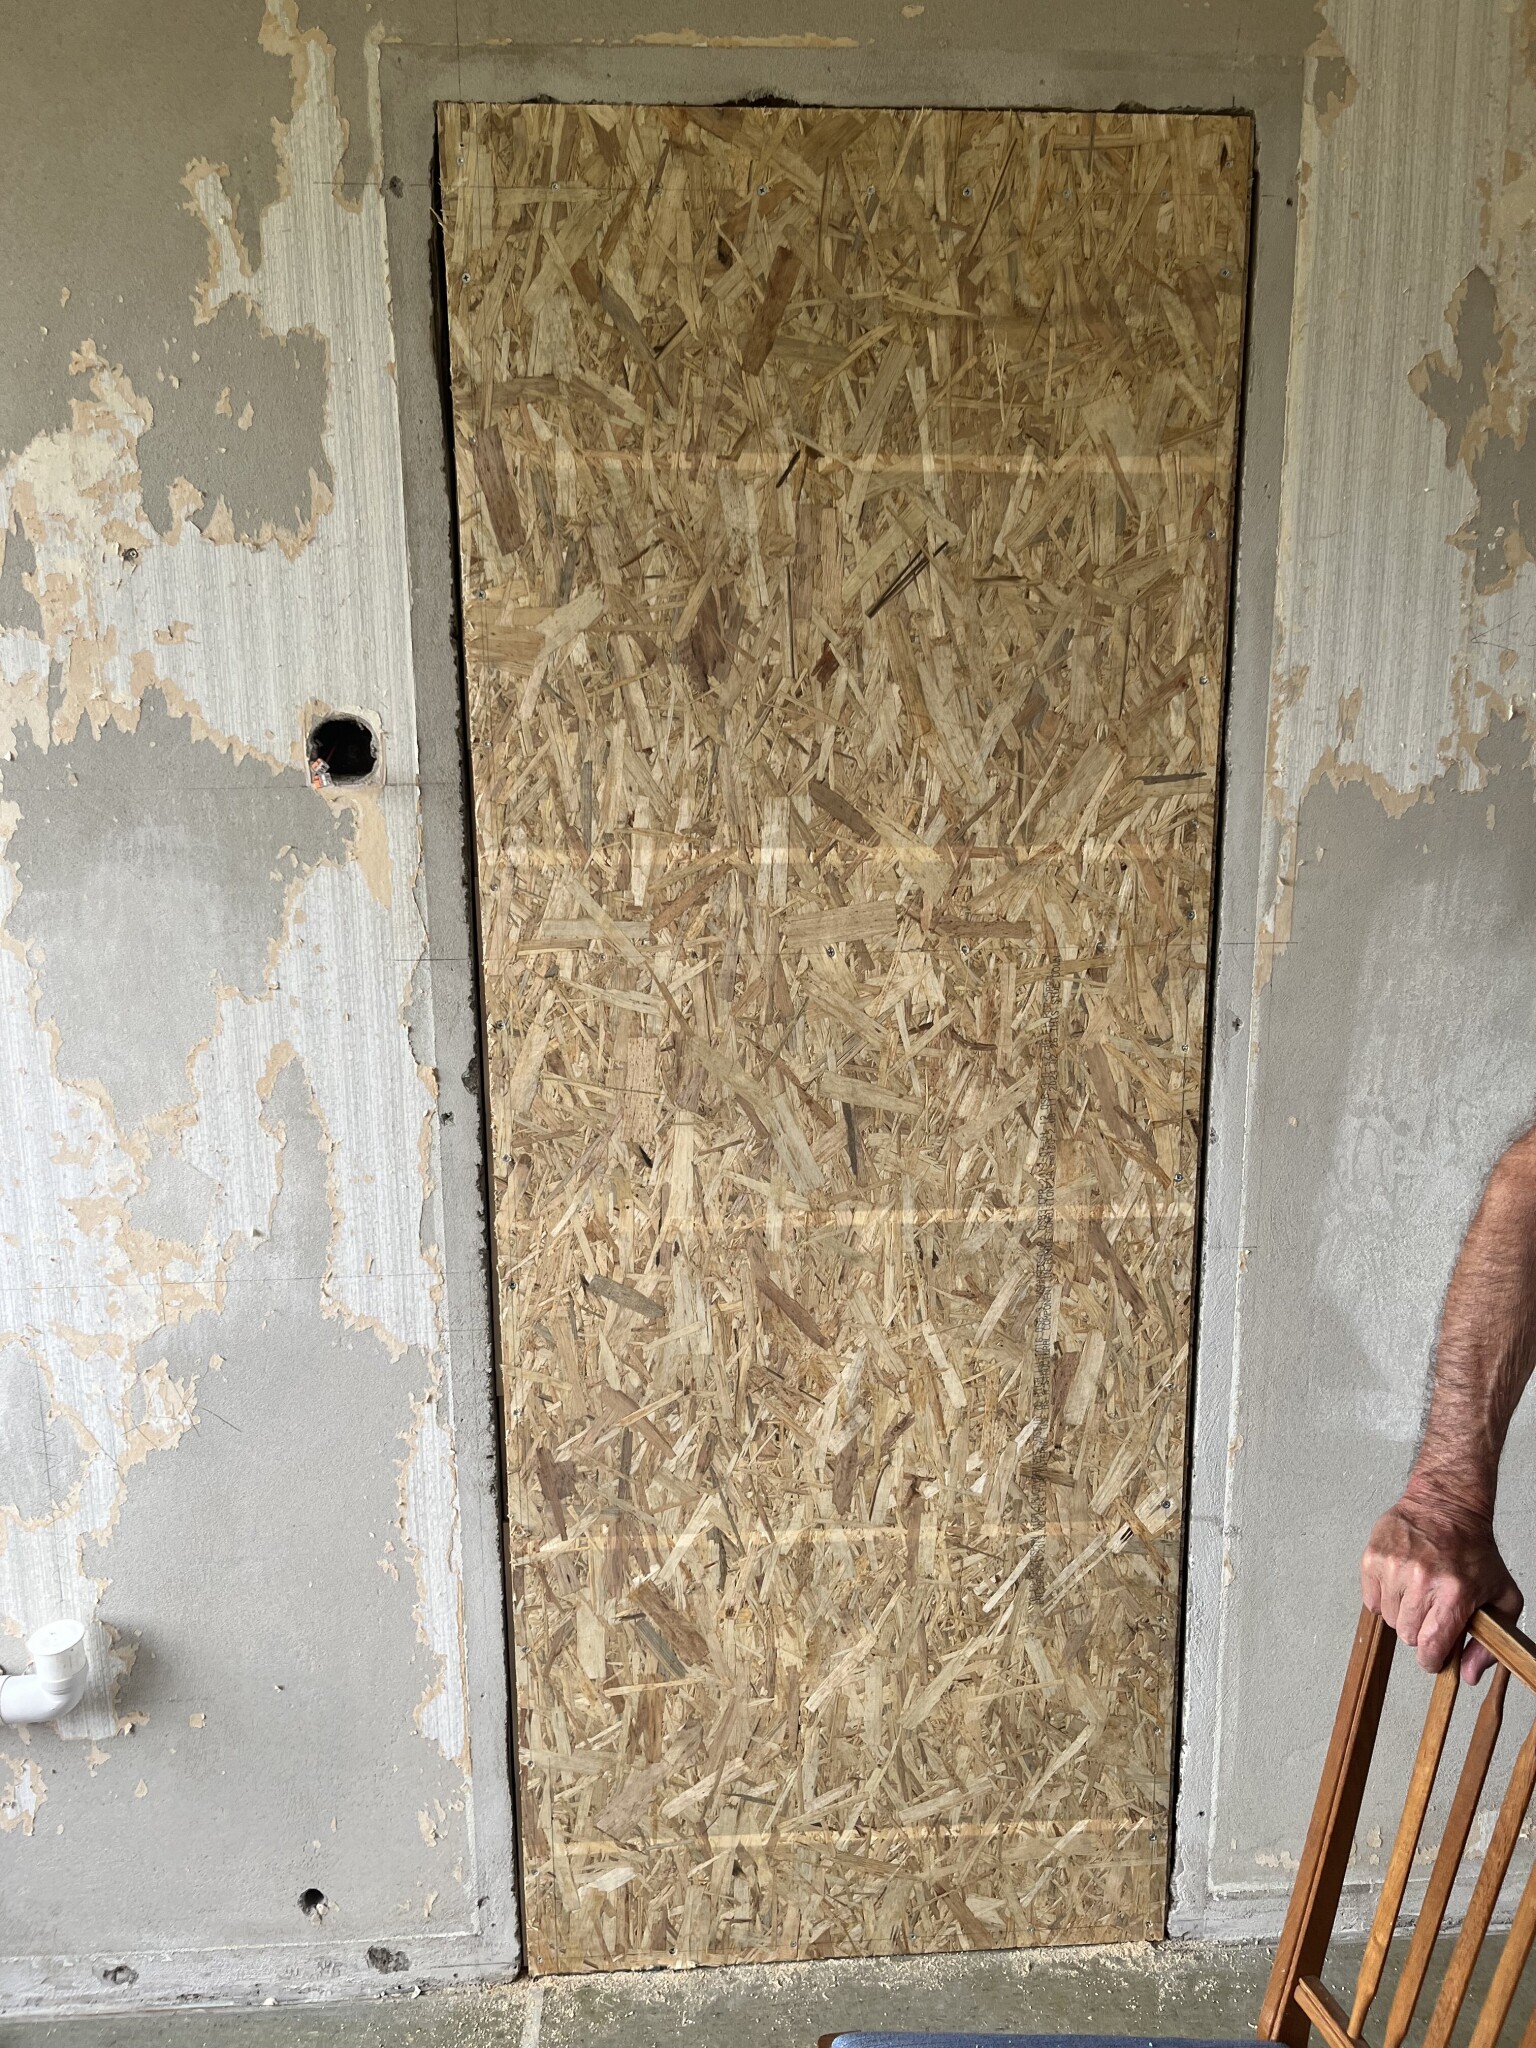
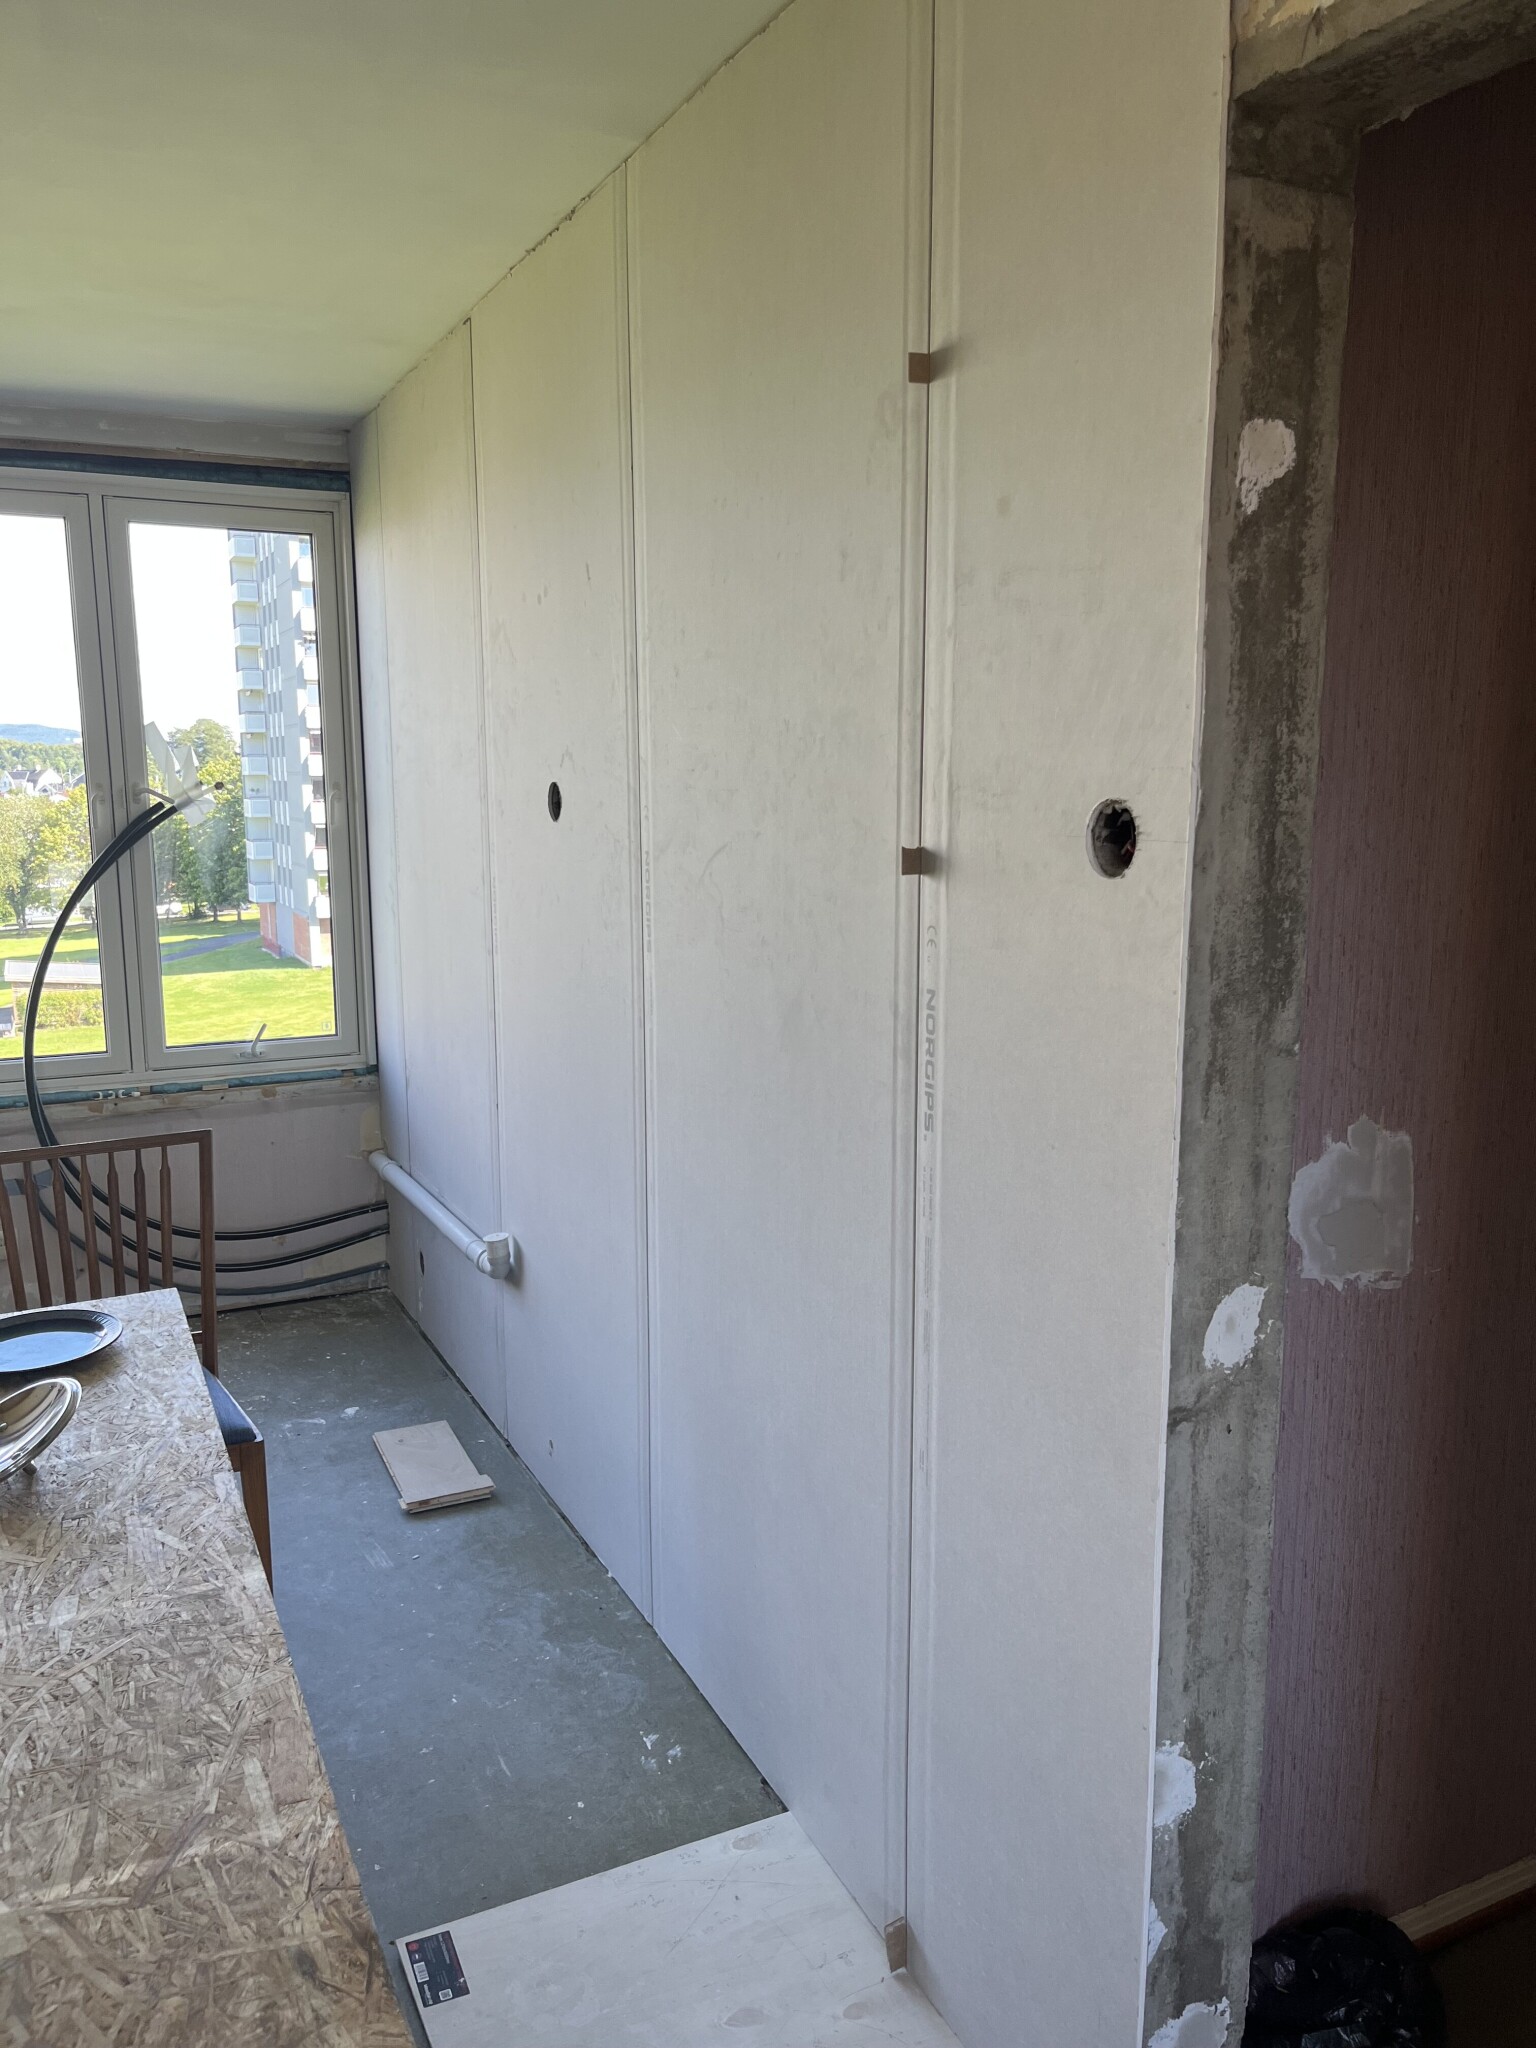
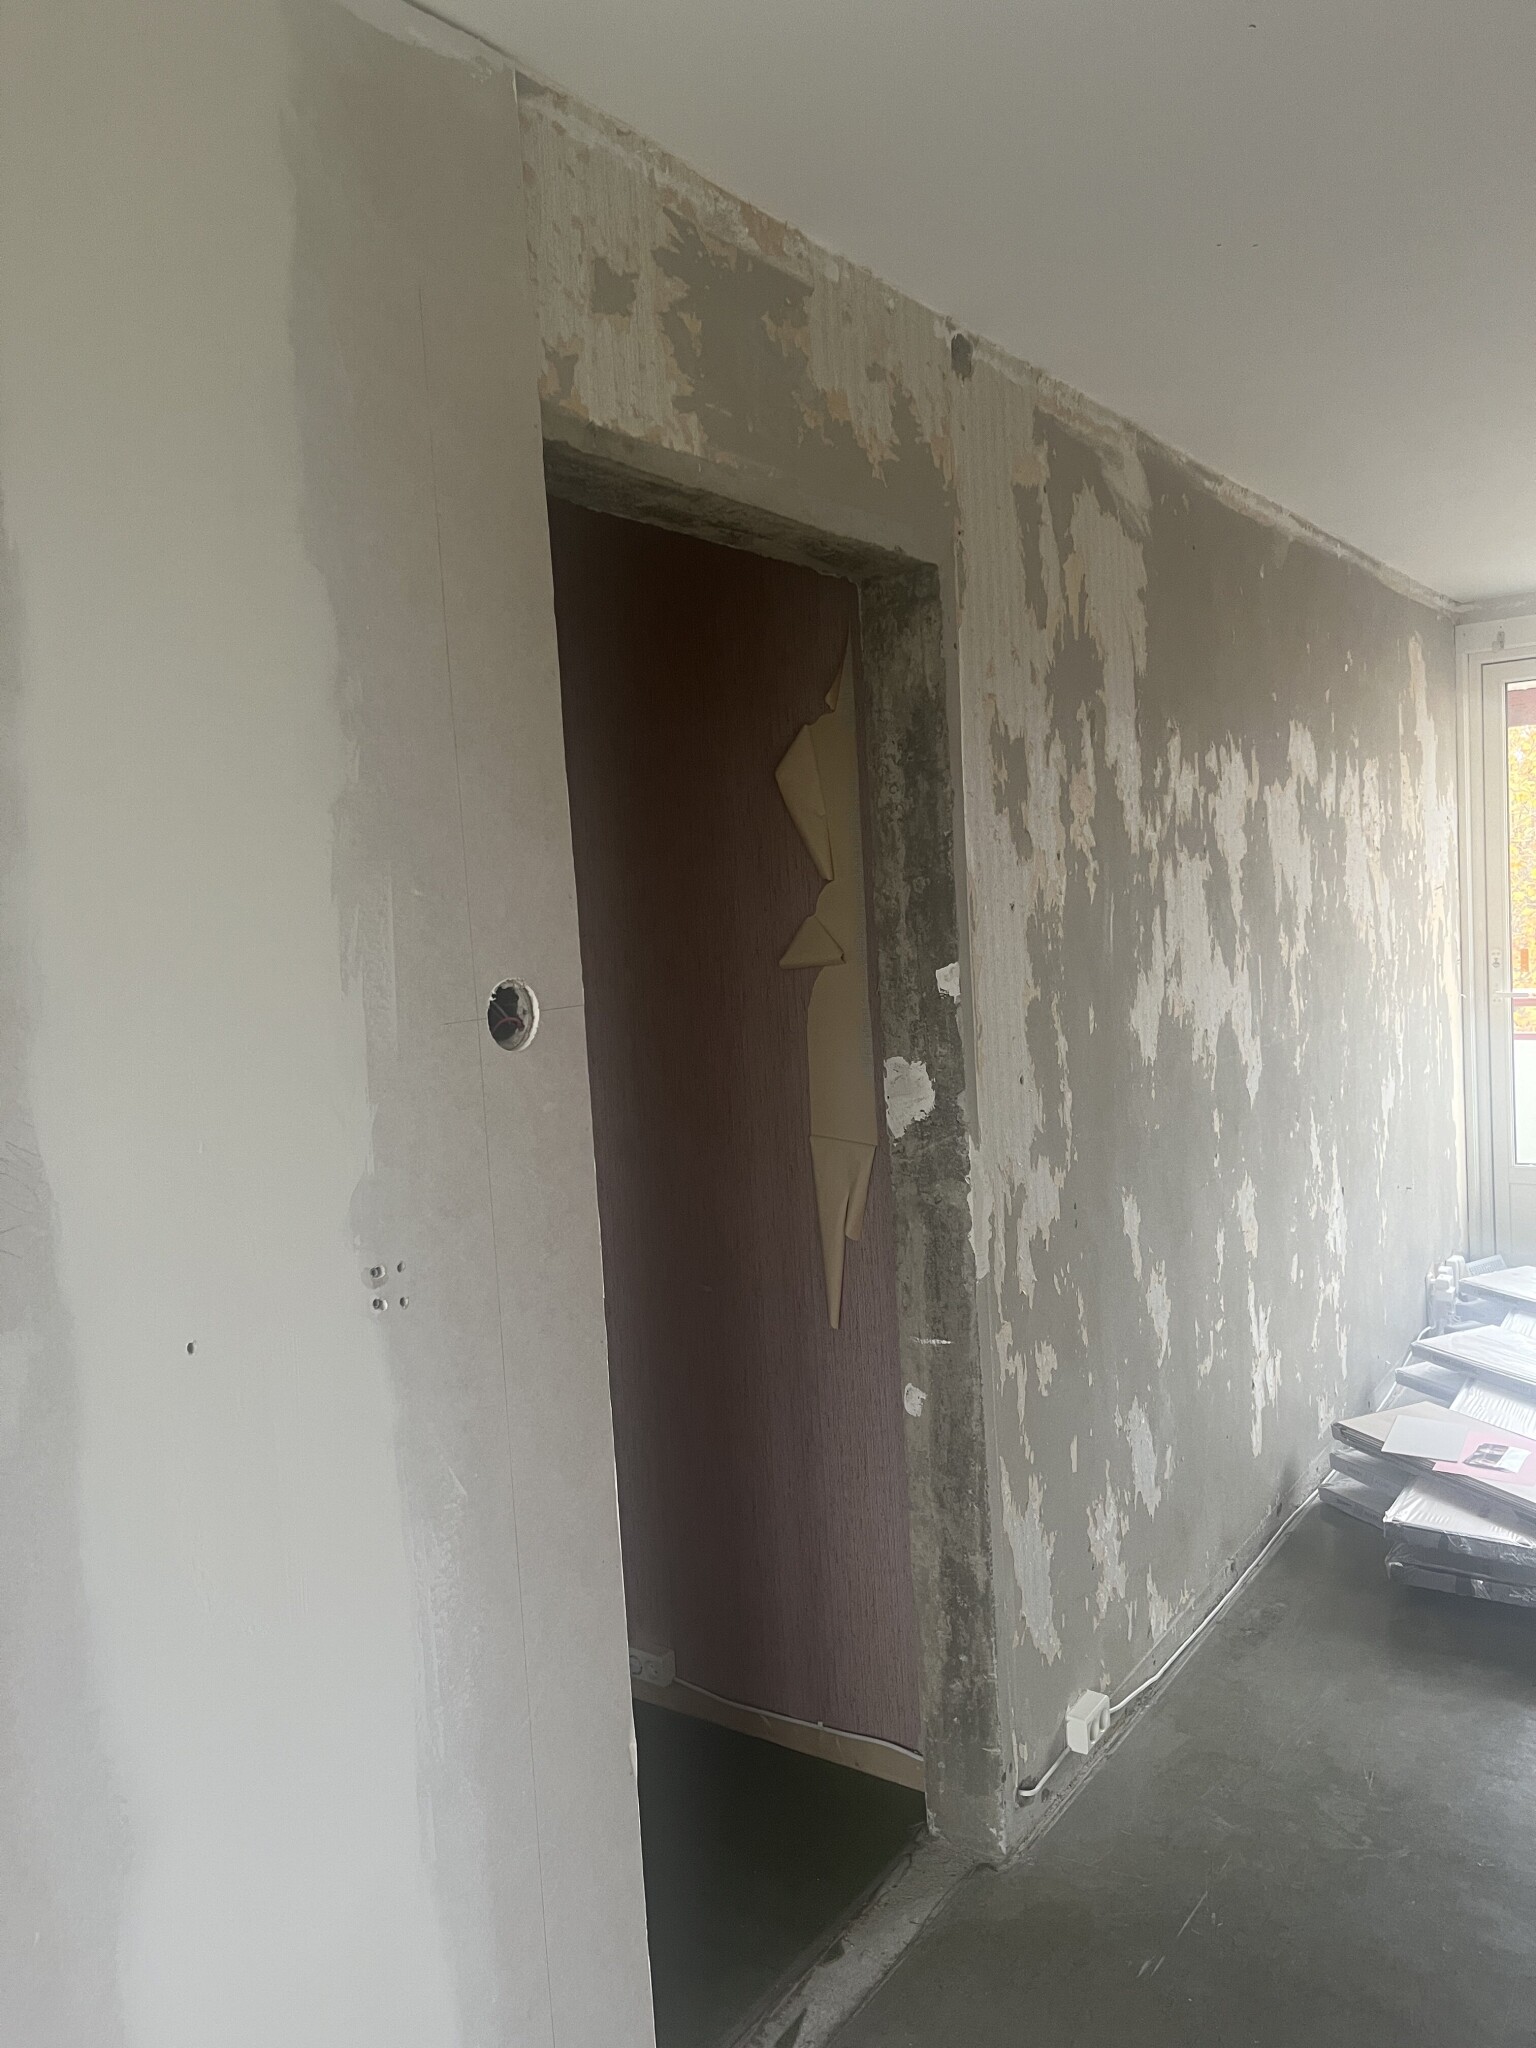
I have actually already started the work (see pictures). I have put up studs in the opening and an OSB board that aligns with the concrete wall. Then I placed renovation plasterboard over both the concrete wall and the OSB board which I fastened with dabs of gypsum adhesive, and I have filled the seams with paper tape. The wall is about 8 m long and I've completed about 3.5 m so far. On the other side of the doorway, the plan is to fill with mineral wool + OSB + renovation plasterboard as well (that wall is only just over 3 m long).
Now I've started to doubt my choice of closure method. I'm concerned about cracking due to the flexible material in the studs and OSB meeting the rigid material in the concrete wall. There is also quite a lot of work with the plasterboards, which I have to mount along the entire 8 m long wall to achieve an even result, as well as on the 3 m wall on the opposite side. The boards stick out 6.5 mm plus a few more mm because of the gypsum adhesive, which also creates some problems at the window frames, etc.
I'm considering whether I should tear everything down and start over? Build it up again with some kind of rigid material instead? Leca? Any thoughts?
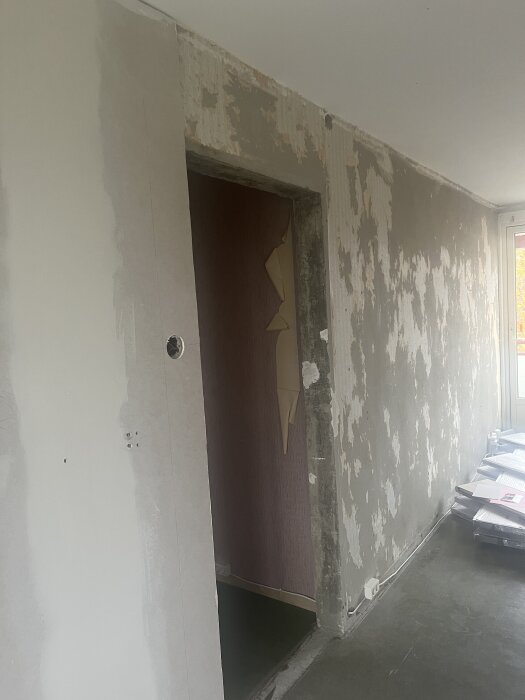
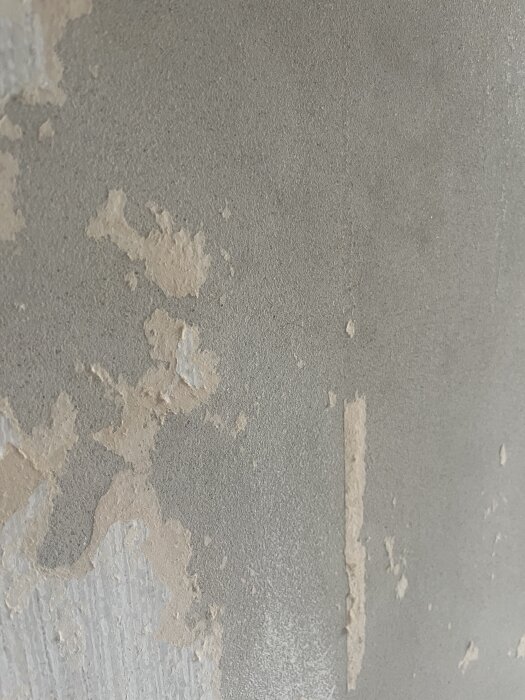
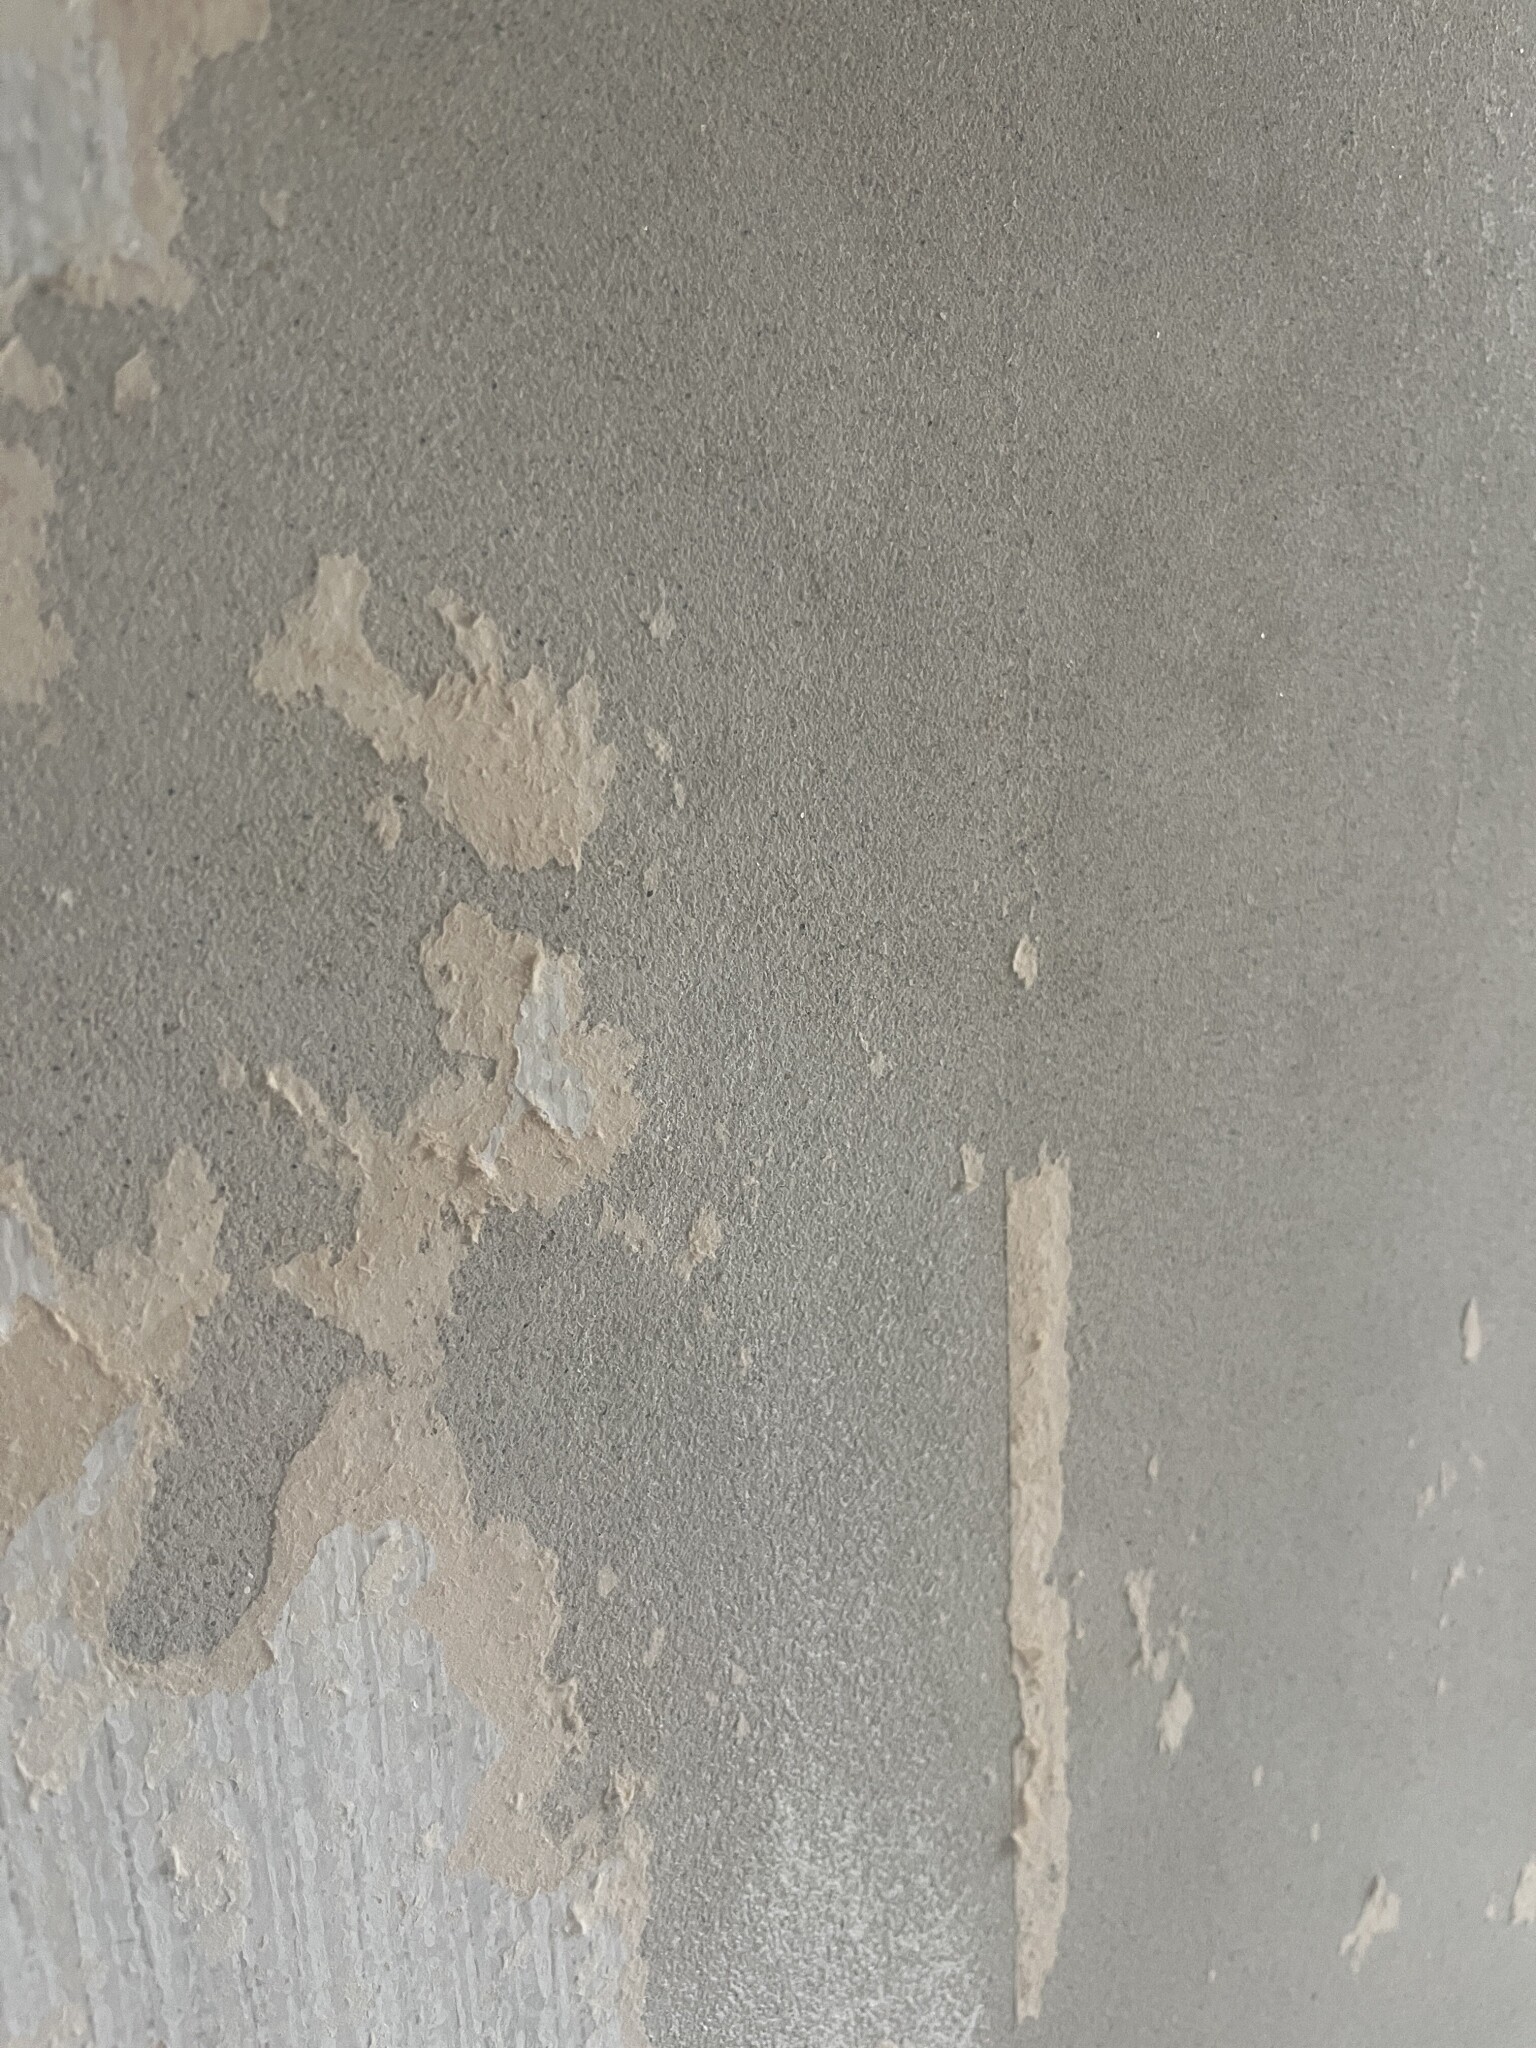
But then I would have to finish the entire wall to get a smooth, nice wall. I plan to paint it eventually. Without plasterboards, it's roughly plastered concrete with remnants of wallpaper (see images). How do I make the entire wall look nice if I skip the plasterboards? It needs to be seamless with the closed-up opening. Fill the entire wall? Renovation wallpaper? Something else?
Why do you want/need/require at all costs to hide that there was a door here? It would both save you a lot of work, be technically easier, and maybe even add something good and personal to both show and use the door niche? See here how nicely it can be done: https://nouw.com/johannascollection/bokhylla-i-en-igensatt-dorr-32971317
Now, I don't know if your door niche had such nice molding around it, but you get the idea. The bottom picture shows a modernist, molding-less variant with glass shelves and lighting You can choose the side of the wall where such a niche brings the most joy/benefit and doesn't disrupt the furniture arrangement otherwise.
It's also about a memory of what has been, and a little hint to the next resident (or yourself, if you/your family have changing needs) that there is, if needed, a possibility of communication here.
A closed door can always be opened again. A sealed wall is not as easy to tear down. Personally, I wouldn't even remove the door leaf, just put sealing strips for a little better soundproofing and lock the door - both to preserve the memory/possibility and to maximize niche depth.
Sorry if this comes too late, but if you've only plastered 3.5 m of the wall and are prepared to backtrack, maybe it's worth questioning the concept a bit more fundamentally. You still save more work in total, especially if you embrace, instead of trying to hide, the fine plastered surfaces on your concrete walls. For example, you have significantly more freedom to experiment with exciting types of paint, colors, and glazes than on plastered cardboard.
EDIT
I missed your question about how to clean the surfaces from wallpaper remnants, etc., if so. Most of it seems to come off nicely with hand power, at least judging by your pictures. What remains shouldn't be hard to remove unless someone has done something unusually funky/stupid. Tear off what you can. Pour really hot water into a mop bucket, possibly with a little dishwashing liquid, and soak what is stuck plentifully with a clean mop. If it seems to dry faster than it loosens, soak it again, tape a large bunch of plastic wrap over the whole thing, and wait a couple of hours. After that, most of it usually scrapes off, but be careful of the plaster surface (as well as the floor for the sticky wallpaper paste in the lumps/crumbs you pull off). If there are stubborn white spots left, you can combine soaking with steaming the wall.
Thanks for a great idea, Chrzan, with many good thoughts. I appreciate it. ☺️
However, in this case, that solution won't work. I need to install a kitchen along that wall, in front of the previous door, so I need a smooth surface with a stable wall where base cabinets and wall cabinets can be mounted. I've also already demolished and discarded both moldings and the door leaf (which were not in good condition).
Regarding the plaster on the walls, I feel that it's too rough in texture (for my taste), and there are nicks/holes/damages in some places that need to be evened out. The apartment consists of a mix of concrete walls and plasterboard walls (originally), and I want to create the same smooth surface on all walls so that they match each other when I eventually paint.
Hoping for more thoughts on closing up the door opening, regarding the risk of cracks with the current rehab plaster solution vs. starting over and building instead? 🙏
How do I make the whole wall look nice if I skip drywall? It also needs to blend in with the bricked-up opening.
If you have properly framed & secured the studs at 25-30 cc (25-30 cm between screws/fastening), and then use 12 mm plywood (or 11 mm OSB as you have now used).
Then apply renovation drywall over the door opening so that it extends at least 30-40 cm on both sides of the door opening, & from floor to ceiling. (the drywall is an inert material & will not crack due to minor movements)
You can attach the drywall over the door opening with Gypsum mortar mixed & comb out the mixed Gypsum mortar with a notched trowel of 8 mm on the wall & over the OSB board.
Then press the renovation drywall in place & shift it slightly right & left (so it adheres firmly & the mortar underneath distributes itself)
The day after when it has dried, drive in 12-15 drywall screws in the renovation drywall section with OSB behind.
Then apply a wide joint compound to the drywall seam which is about 7-8 mm down to 0 & meets the existing concrete wall, over a stretch of about 80 cm. (make it longer if you need.
This becomes completely invisible & the substrate becomes strong & professionally done.
You only drywall entire walls if the wall is hopelessly bad, before wallpapering.
My advice goes much faster & requires significantly less effort.
& mounting a kitchen is no problem as long as your OSB is properly secured also to the studs, & if you need to reinforce, place a piece of plywood from behind where the upper cabinets will be fastened.
If you have secured the studs properly & fastened the studs 25-30 cc (25-30 cm between screws/fastening), and then use 12 mm plywood (or 11 mm OSB as you have used).
Then the renovation plaster over the door opening so that it extends at least 30-40 cm on both sides of the door opening, & from floor to ceiling. (plaster is a dead material & will not crack due to small movements)
You can fix the plaster over the door opening with Gypsum mixed mortar & comb out the mixed Gypsum mortar with a notched trowel of 8 mm on the wall & over the OSB board.
Then press the renovation plaster in place & press it a little left & a little right (so that it adheres properly & the mortar underneath distributes itself).
The day after when it has dried, you can screw 12-15 drywall screws into the renovation plaster section that has OSB behind it.
Then you apply a wide spackle over the renovation plaster joint which is then about 7-8 mm to 0 & meets the existing concrete wall, over a distance of approximately 80 cm. (make it longer if you need to).
This will be completely invisible & the substrate will be strong & professionally done.
Drywall an entire wall only if the wall is hopelessly bad, before wallpapering.
My advice is much quicker & requires significantly less effort.
& mounting a kitchen is no problem as long as your OSB is properly fastened also in the studs, & if you need to reinforce, place a piece of plywood from behind where the upper cabinets will be fastened.
Hi jawen,
Thanks for the response and great tips.
The drywall is already mounted, as you can see in the picture, above the door opening and 3.5 m of the wall. I used a different plaster than you suggested (https://www.maxbo.no/gipsbruk-25-kg-norgips-p944419/) and also did not use a notched trowel, instead, I applied the plaster according to this guide: https://gds.se/material/gipsskivor/limma-upp-gipsskivorna.
I made sure the boards extended about 50 cm on each side of the door opening, so check on that.
However, I have not secured the boards with any drywall screws into the OSB, but that's easily fixed now afterwards.
Unfortunately, the studs are not fastened as tightly as with 25-30 cc, but the framework is still accessible from the other side of the wall, where I have not yet covered with drywall, so I could secure the studs better from there with nail plugs. I have placed a transverse stud where the base cabinets will be fastened, while the wall cabinets are high enough to be fastened to the concrete wall above the door opening.
As seen in the pictures, I have drywalled 3.5 m of the wall up to a doorway (which will remain). Having the drywall evenly over these 3.5 m, I believe in this case I must, since I will be installing a kitchen here and need the wall behind to be completely straight. But I could spackle the joint over that doorway, about 80 cm, and thus avoid drywalling the rest of the wall. That thought/idea hadn't previously occurred to me. Thanks!
Is there agreement from others here on the forum that I will avoid cracking in this way? 😅 (I have read older threads that say this works fine, and other older threads that say it results in cracks and one should build with leca blocks, hence my confusion)
that you should build with leca-blocks, hence my confusion)
Lecablock & solid concrete will also be able to move differently, as the solid concrete is a "slower" material than Leca stone. That is, if the temperature rises in the concrete, it will rise slowly due to the mass, and Leca, which has an insulating property, would heat up even more slowly. The two materials would never move the same. = not better!
TTiran said:
the base cabinets should attach,
The weight of the base cabinets is supported by the plinth/adjustable legs, so only very little of the load is taken up in the fixing that is done into the wall.
TTiran said:
But I could plaster the seam there over the door opening, about 80 cm
I absolutely think you should do that!
TTiran said:
I used a different gypsum mix than you suggest
Gypsum gets a lot of air mixed in, which makes it significantly more workable both in terms of plastering and any sanding.
(Pure gypsum mixes are hard to work with and are not as flexible in small movements).
The teeth of the notched trowel allow you to get better coverage behind the gypsum board, as the notching allows for better distribution of the material. (but it is what it is now and what you've done will also work)
If you're still worried about future cracking, you can plaster over the renovation gypsum over the door opening and then embed a substantial piece of reinforced fiberglass mesh. Apply 2-3 mm of plaster and work the mesh in with a trowel, letting the fiberglass mesh extend 50 cm on both sides of the door opening.
Plaster a second time after an hour when it has set.
Lecablock & solid concrete will also be able to move differently, as solid concrete is a "slower" material than Lecablock. That is, if the temperature were to rise in the concrete, it would rise slowly due to the mass, & Leca, which has an insulating property, would heat up even more slowly. The two materials would never move the same. = not better!
I didn't know that! I've tried googling just that, but couldn't find anything, thanks for the info!
Jjawen said:
The weight of the base cabinets is taken up by the plinth/adjustable legs, so only very little of the load is taken up in the fixation made in the wall.
Very true.
Jjawen said:
I think you should absolutely do that!
Great!
Jjawen said:
Gypsum gets a lot of air mixed into it, making it significantly easier to work with in both spackling & sanding if necessary.
(Pure gypsum mortar is hard to work with & isn't as flexible with small movements).
The notches of the tile adhesive comb make it possible to get better coverage behind the gypsum board, as the notches make material distribution more possible. (but it is what it is now & what you've done will also work)
Ah ok, then I'll definitely remember both Gypsum and the adhesive comb for next time. Especially on the opposite side of the wall, the doorway needs to be covered there too.
Jjawen said:
If you're still worried about future cracking, you can plaster the renovation gypsum over the doorway & then work in a substantial piece of reinforced fiberglass fabric. Apply plaster 2-3 mm and work the fabric in with a trowel, letting the fiberglass fabric extend 50 cm on both sides of the doorway.
Plaster again after an hour once it has set.
Ok, thanks! That sounds like a good tip because, yes, I'm still a bit worried. What type of plaster should I use then? And should the fabric be in one large piece and (besides the 50 cm on both sides) go all the way up to the ceiling?
Ok, thank you! It feels like a good tip because yes, I'm still a bit worried. What kind of filler should I use then? And should the fabric be in one large piece and (apart from 50 cm on both sides) go all the way up to the ceiling?
Use regular wall filler & the full width of the reinforcement mesh (usually 1 m wide) Cut long pieces about 170 cm in length & work them in 👍
Use regular wall filler & reinforcement mat's full width (usually 1 m width)
Cut long pieces about 170 cm in length & work it in 👍
Ok, thanks! To be completely sure I understood correctly; 170 cm is the width and 1 m the height, then? So about 2.5 pieces of 170 cm over each other to the full ceiling height? 😅🙏
Ville bare skriva en uppdatering, ifall nån läser tråden och undrar. Jag bredspacklade in lite armerad glasfiberväv, samt fäste reglarna från baksidan med några extra spikpluggar. Väggen är nu finspacklad, målad och har ett kök monterat. Ser väldigt fint ut och det är ingen antydan till sprickbildning, inte hittills i alla fall.
Click here to reply
Vi vill skicka notiser för ämnen du bevakar och händelser som berör dig.