Hello!
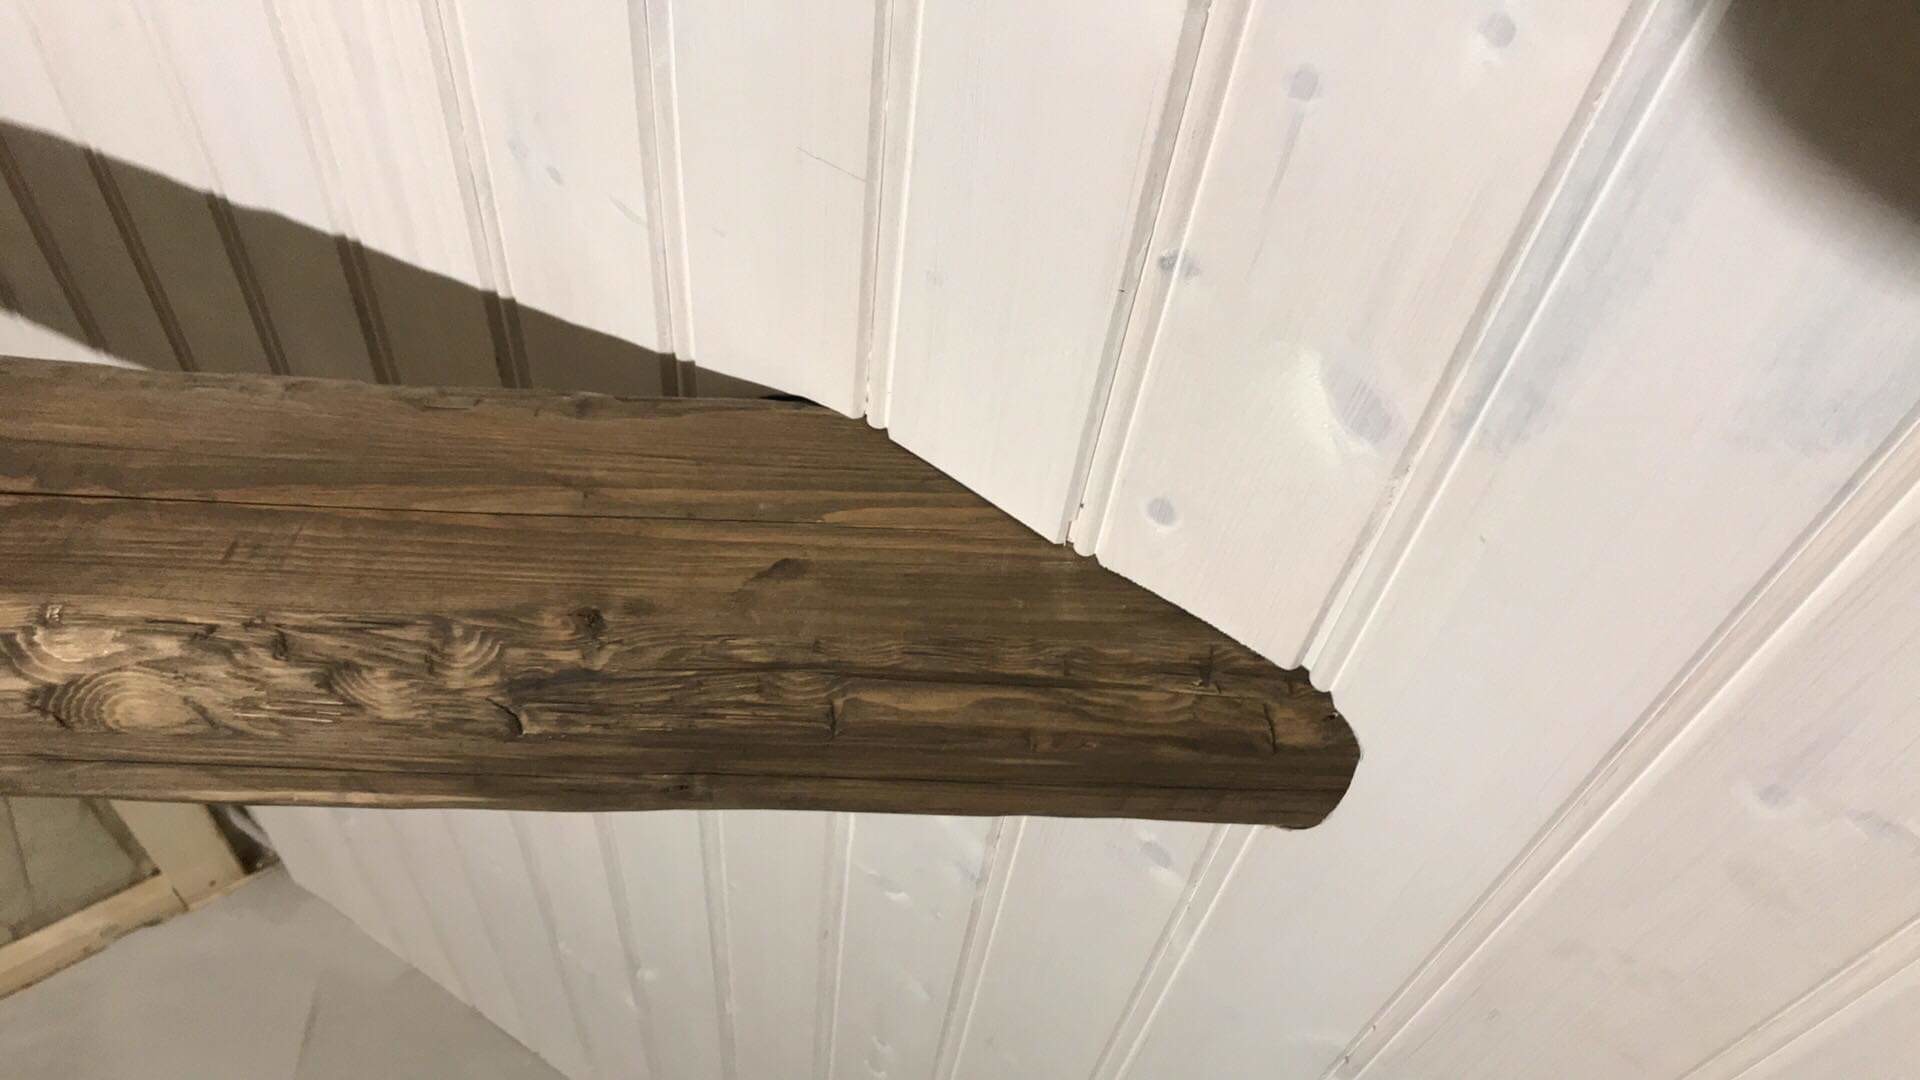
Has anyone solved the problem I have before? I'm trying to install beadboard on a ceiling, so far everything is going well, it's one of maaaany ceilings in the house that have gotten beadboard. The problem is that here I come to an old outer wall and the beams belonging to the old construction, which I decided to keep. I think it's nice and cool. Now I just need to install the beadboard on the ceiling...
I have a good jigsaw and a multi-cutter, but the problem is that parts of the cut need to be angled so that the beadboard lies flush against the timber. Another problem is naturally that the timber is uneven and tricky to get the beadboard to lie tightly against it in general. "We'll just put a little molding there" is practically a saying for this project, since it's an old house, but is it possible to do just that in a nice way against timber?
Hello!
Has anyone previously solved the problem I have? I'm trying to install beadboard on a ceiling, so far everything is going well, it's one of maaaaany ceilings in the house that have received beadboard. The problem is that here I am coming to an old outer wall and the beams that belong to the old construction, which I decided to keep. I think it's nice and cool. Now I just have to install the beadboard on the ceiling...
[image]
I have a good jigsaw and a multicutter, but the problem is that parts of the cut need to be angled for the beadboard to lie flush against the timber. Another problem is, of course, that the timber is uneven and tricky to get the beadboard to lie tightly against in general. "We'll put on a little trim" is almost a saying on this project, since it's an old house, but can you do just that in a nice way against timber?
If you imagine the next board to be set, it is indeed too wide. But I think it would look best if you cut out for the timber and miter the short sides of the cutout to get a tight fit against the timber.
However, it will probably be time-consuming to get it right
There is a technique that I have forgotten the name of, which is usually used when fitting a new log into an outer wall. It involves having a narrow steel rod (type) with a pencil at the end. You place the log in its position but outside the foundation and let the steel rod follow the bottom of the log that will lie above the new one. This way, you get all the irregularities on the new log, and it will then fit almost perfectly. Hard to explain, but I'll see if Google can help me
My in-laws had similar surface treatments on their previous house. The boards were "rough cut" and then a panel was sawed out that fitted nicely against the beam. It was painted in the same shade as the boards and routed at the outer edge if I remember correctly. Unfortunately, I don't have a picture from their house, but I remember it looked very good.
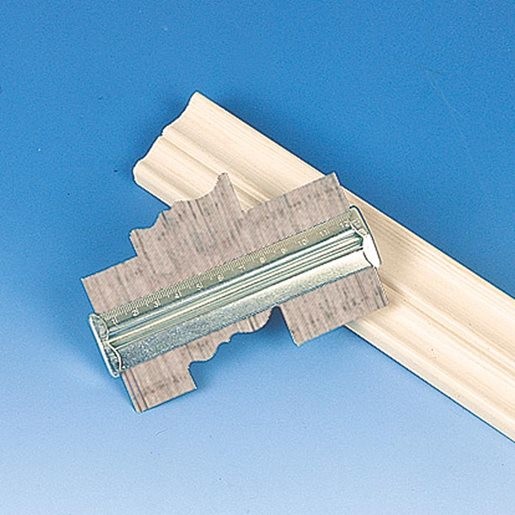
A contour gauge is probably a good tool in this case.
Good luck!
Thank you for all the great answers! I believe a steady hand and "mjukfog" is the leading tip right now, but if anyone has additional suggestions, they are gratefully received!
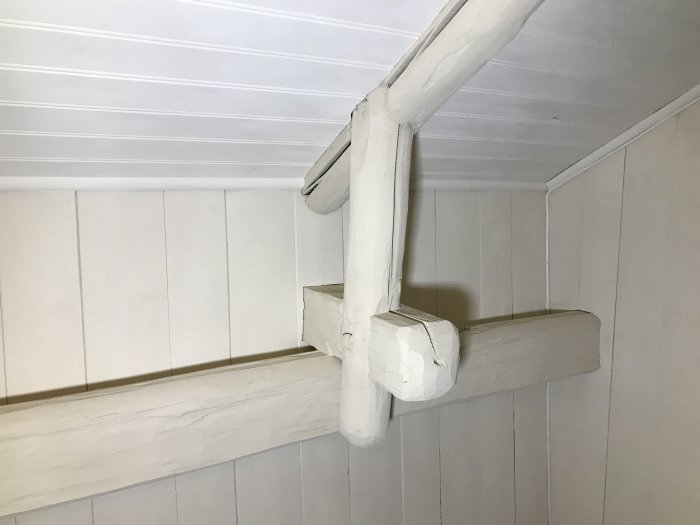
Old thread.. But there might be someone else looking for solutions to the same problem and finds this! So I'm sharing how we solved the problem.
Used a so-called contour gauge to copy the beams to the beadboard.
It was a bit tricky as there were several beams to fit along the same plank, but it turned out really tight and nice.
By the way, the ceiling is just primed in the picture, will be spray-painted later!
good job
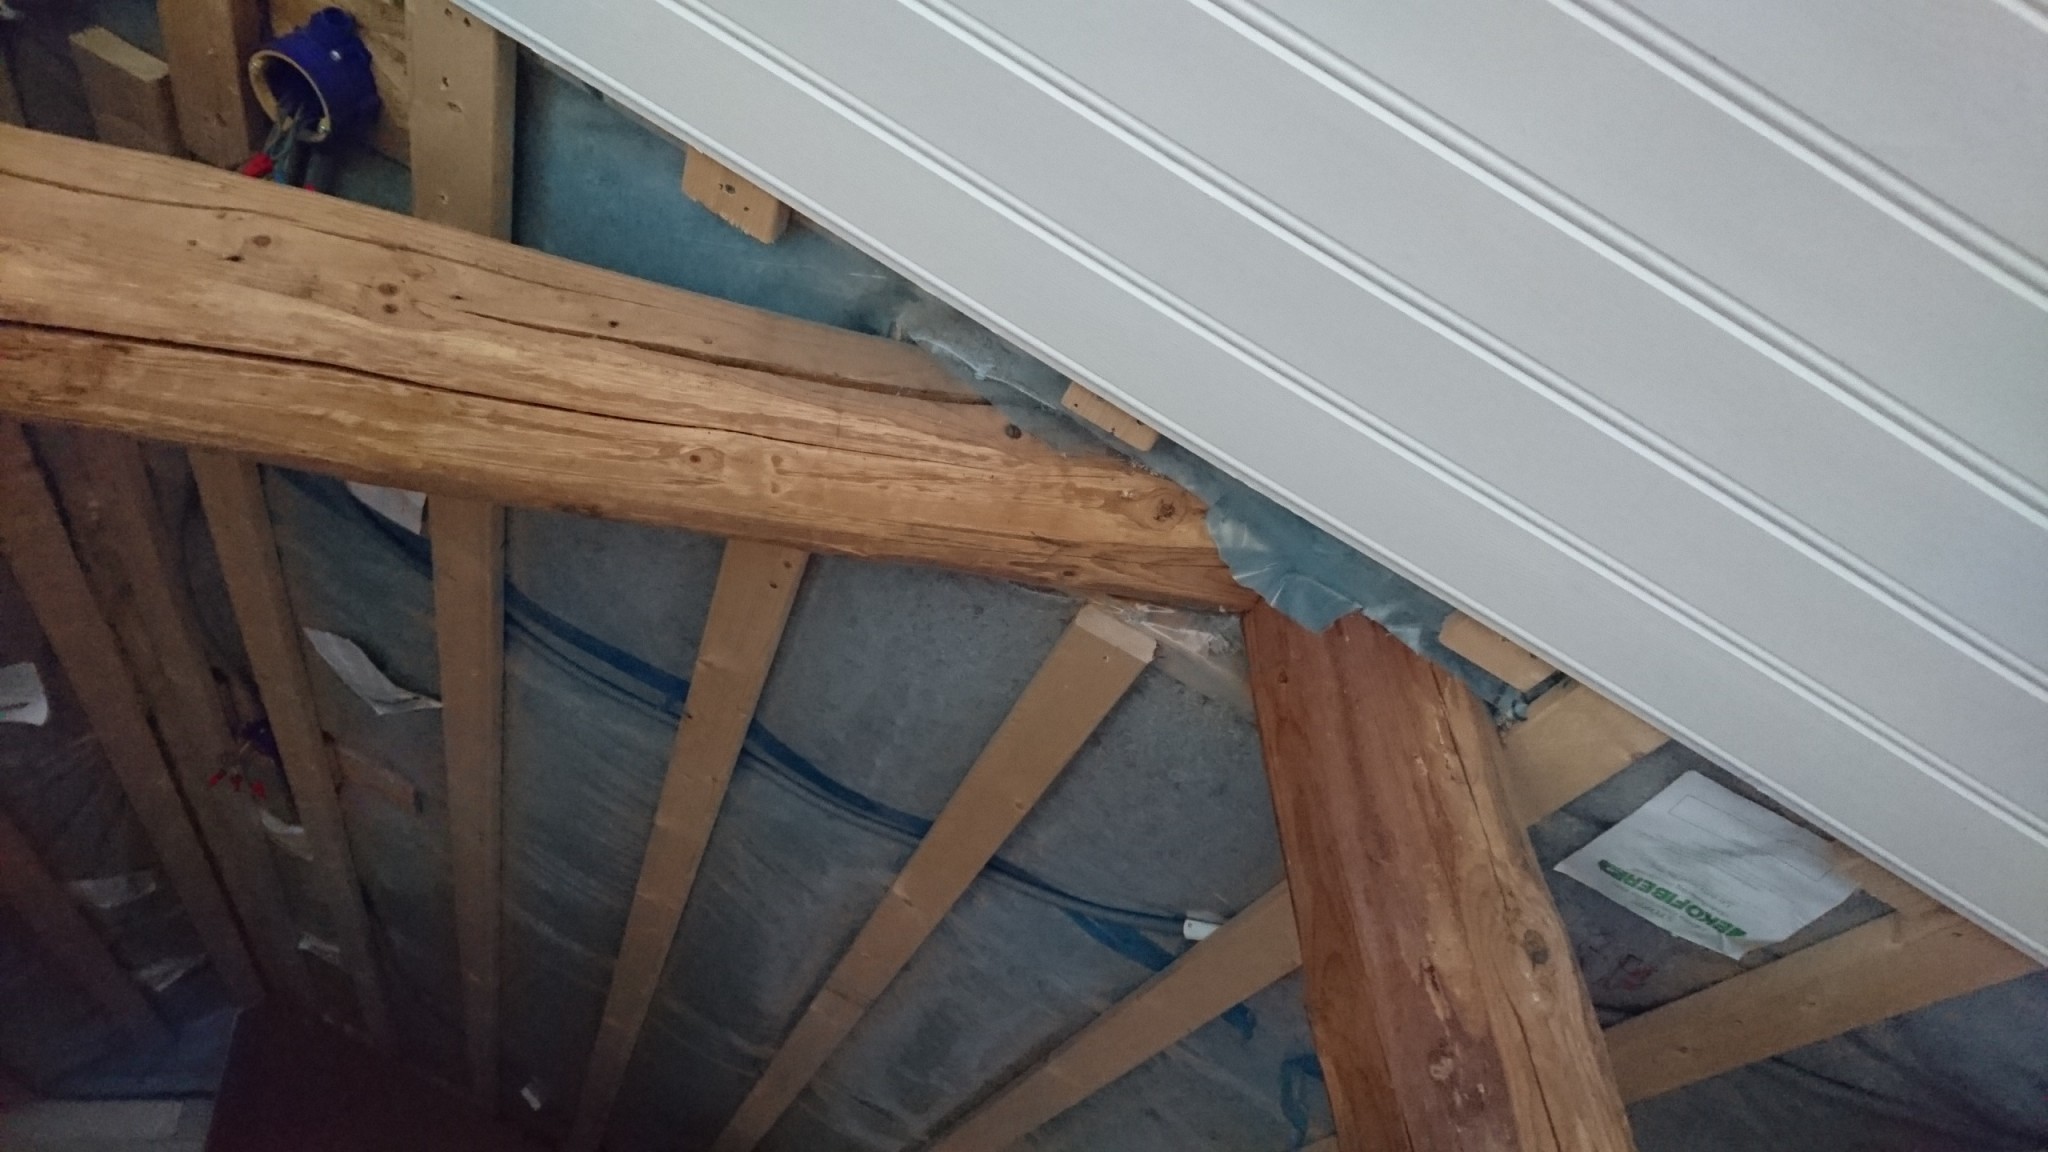
Another little variant that might be useful is to think the opposite!
-Uh how did he think now? Might be what someone who values order and clarity in concepts is thinking!
Well, instead of adapting the one that needs to fit the fixed base, you adapt the fixed part to the incoming one. And this can be advantageously utilized considering how the light falls, and other conditions, of course, like practical possibilities for example.
The truss that comes down into the wall is slightly sawn at the lower edge, but only just enough to fit the plank in place. And with that, you can hardly see that there's any gap at all.
This method can also be used, as in this case, to make it practically possible without splitting the fitting part.
Click here to reply
Vi vill skicka notiser för ämnen du bevakar och händelser som berör dig.

")