Everything is always more complicated than you think, said my better half...
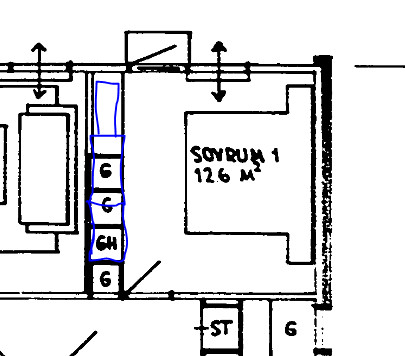
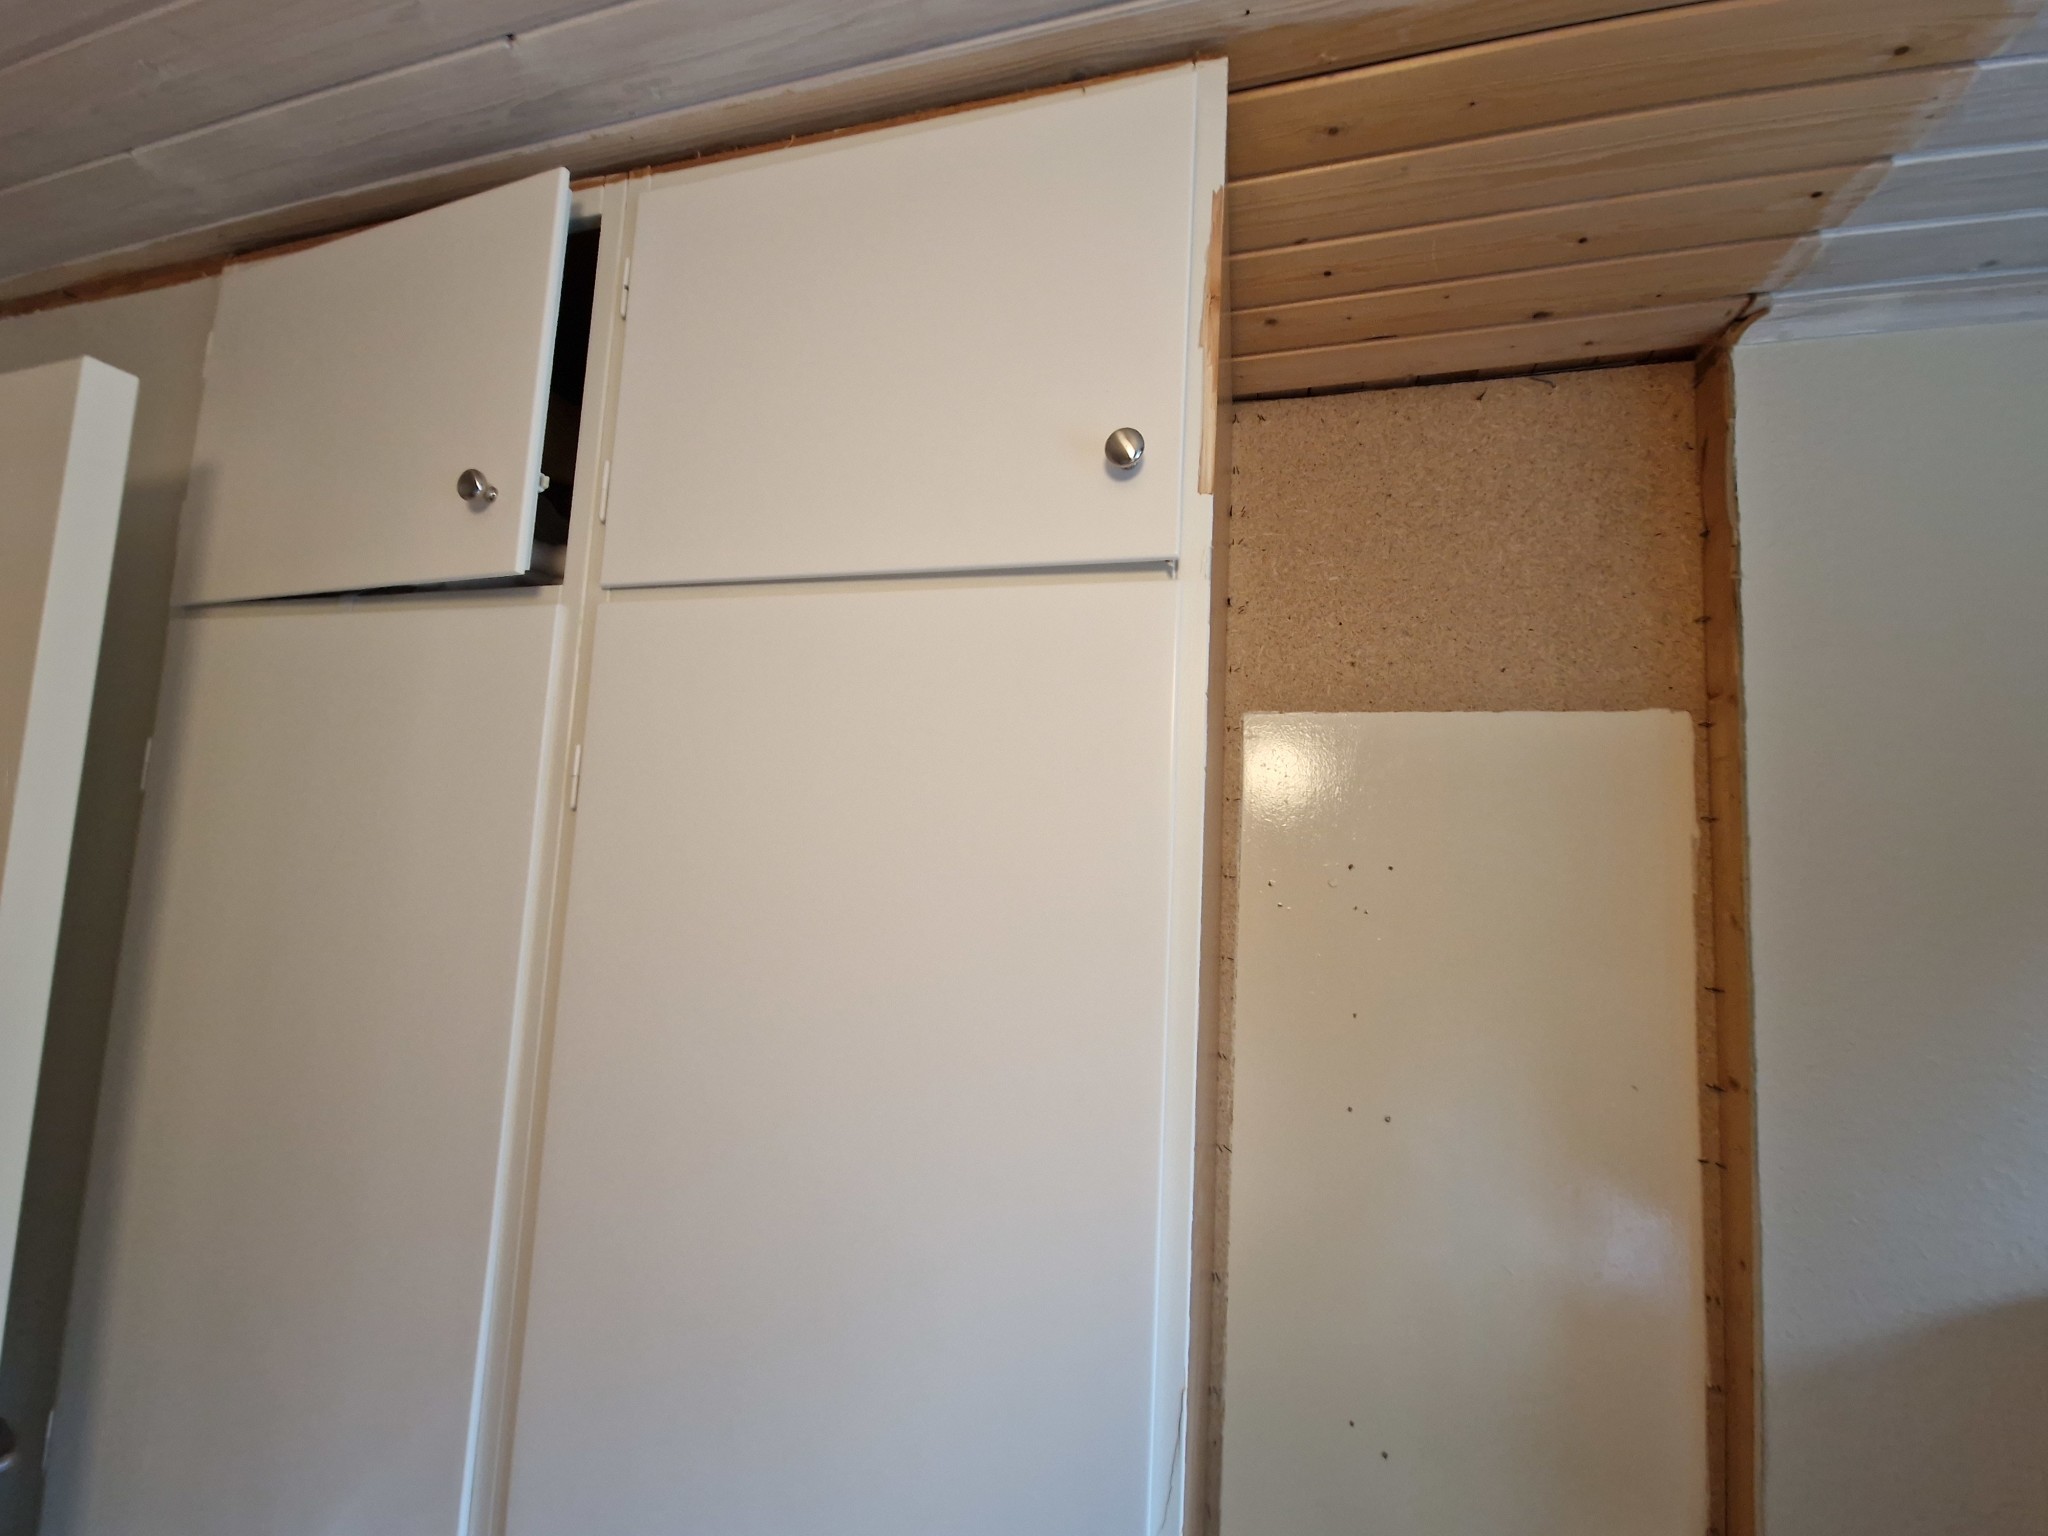
We have three built-in wardrobes that are to be replaced with new Ikea Pax. When I planned, I measured from the wall, and the new ones would come a few cm further out.
When I started tearing down, it soon becomes apparent that the old ones are built into the wall by 8 cm. The back of the wardrobe even seems to be part of a panel in the wall. That’s actually good, as the new ones can also be set further in.
The three wardrobes (3x60 cm wide) are squeezed between standing studs. Our new ones are 3x100.
I assume I need to keep the stud. I don’t know what it looks like on the other side of the panel, how far it is to the drywall on the other wall, if it’s framed there as well, etc.
What do I do now?
I'm considering moving the stud 20 cm to the right? So, I potentially increase the free span from at least 180 to 200. Then, I insert 2x100 into the wall and let the last 1x100 sit outside the existing drywall.
The other option I see is to put new drywall and place them outside, according to the original plan.
Everything is always more complicated than you think, said my better half..
We have three built-in wardrobes that are to be replaced with new Ikea Pax. When I planned, I measured from the wall, and the new ones would come out a few cm further. When I started tearing down, it soon became apparent that the old ones are built into the wall by 8 cm. The back panel of the wardrobe even seems to be part of a sheet in the wall. That's actually good, as the new ones can also go further in. The three wardrobes (3x60 cm wide) are squeezed between standing studs. Our new ones are 3x100. I assume I need to keep the stud. I don't know what it looks like on the other side of the sheet, how far it is to the drywall on the other wall, if it's set up there as well, etc.
What do I do now?
I'm thinking of moving the stud 20 cm to the right? Thus increasing the free span from at least 180 to 200. Then push 2x100 into the wall and let the last 1x100 lie outside the existing drywall. The other option I see is to add new drywall and place them outside, according to the original plan.
Answering here as well If you are going to have 3x100, then it would look best if they align with each other. I.e., outside the existing wall. If you were to attempt to move a stud by 20 cm, you would also need to fix the drywall on the other side of the wall. This might mean that you have to re-drywall parts of or the entire wall on that side as well.
Replying here too If you're going to have 3x100, it looks best if they align with each other. Meaning outside the existing wall. If you decide to move a stud by 20 cm, you'll also need to fix the drywall on the other side of the wall. Which could mean you have to redo parts of/ the whole wall even there.
Thank you so much for both answers!!
I didn't write all the details, so that people have the patience to read.
The purchased wardrobes are 3x100. However, only two are 58 deep, and one is 35. One is shallower to create a bit more space in front of the terrace door. If you can recess it into the wall, you might get away with a deeper version, but you could also recess the two deeper ones and leave the shallower one outside the existing wall.
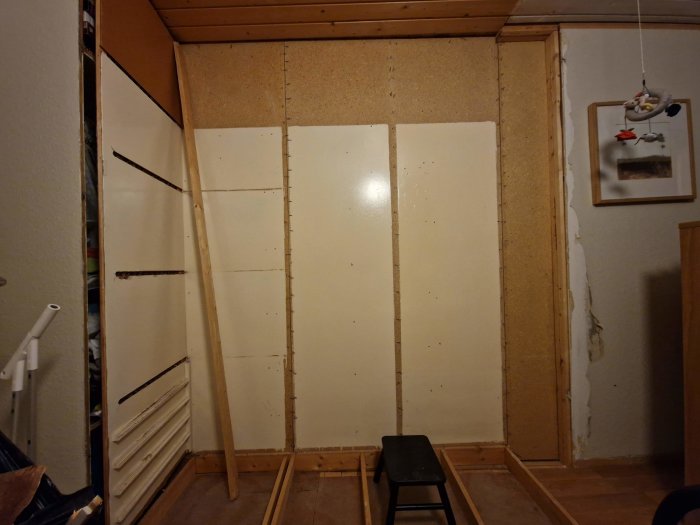
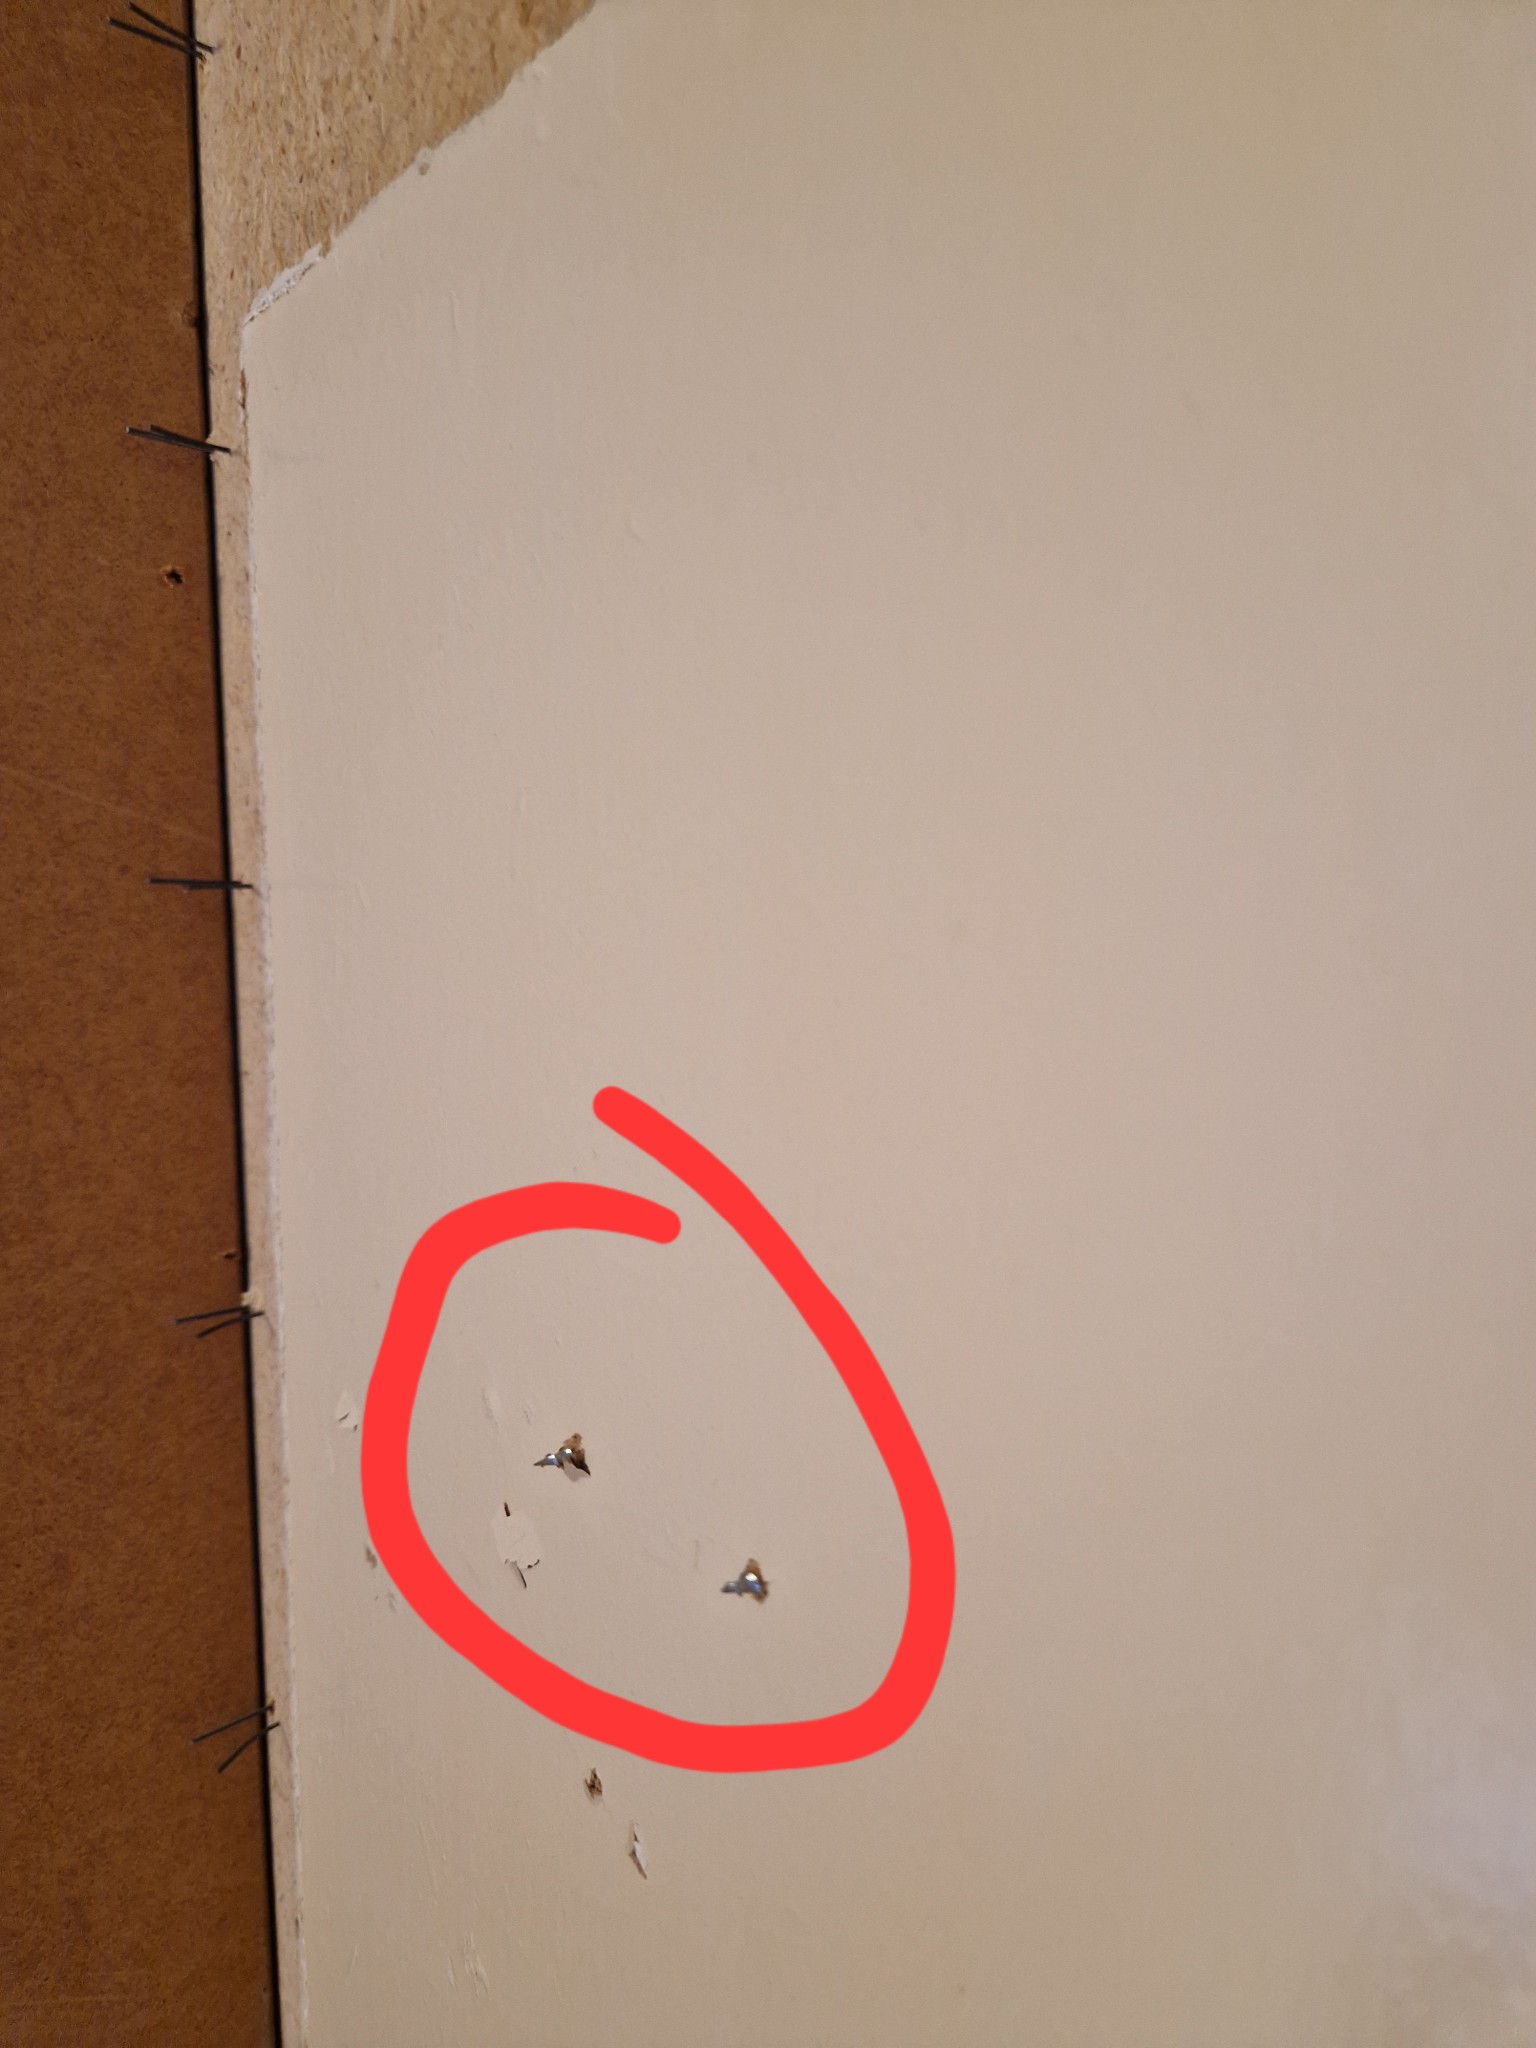
Thanks for pointing out that it might cause problems on the other side. I hadn’t thought of that. The drywall might not be attached to the stud. It seems a chipboard was used and the drywall was attached to it. In the photo in the first post, you can see double rows of screws where I guess the drywall is attached. Maybe only the chipboard is attached to the stud?
I didn't write all the details, to keep it easy to read.
The purchased wardrobes are 3x100. However, only two are 58 deep, one is 35. One is shallower so it will be a bit airier in front of the terrace door. If you can recess it into the wall, maybe you can get away with a deeper variant, but you might as well recess the two deeper ones and let the shallower one be outside the existing wall.
Thanks for the thought that it could ruin the other side. I hadn't thought of that.
It's not certain the drywall is attached to the stud. It seems they've placed a chipboard and attached the drywall to it. In the picture in the first post, there are double rows of screws, where I guess the drywall is attached. Maybe only the chipboard is attached to the stud?
[image]
Then I get it. It almost looks like the back of the wardrobe is still there. The large staples suggest that. It's not entirely unlikely that the drywall is placed directly on the back of the wardrobes. In my house, they've even skipped the drywall on the wardrobe, and the wardrobe itself is a continuation of the wall...
Do so that you tear everything apart and put up some new pictures, perhaps a better solution can be thought up
Don't understand what you mean...
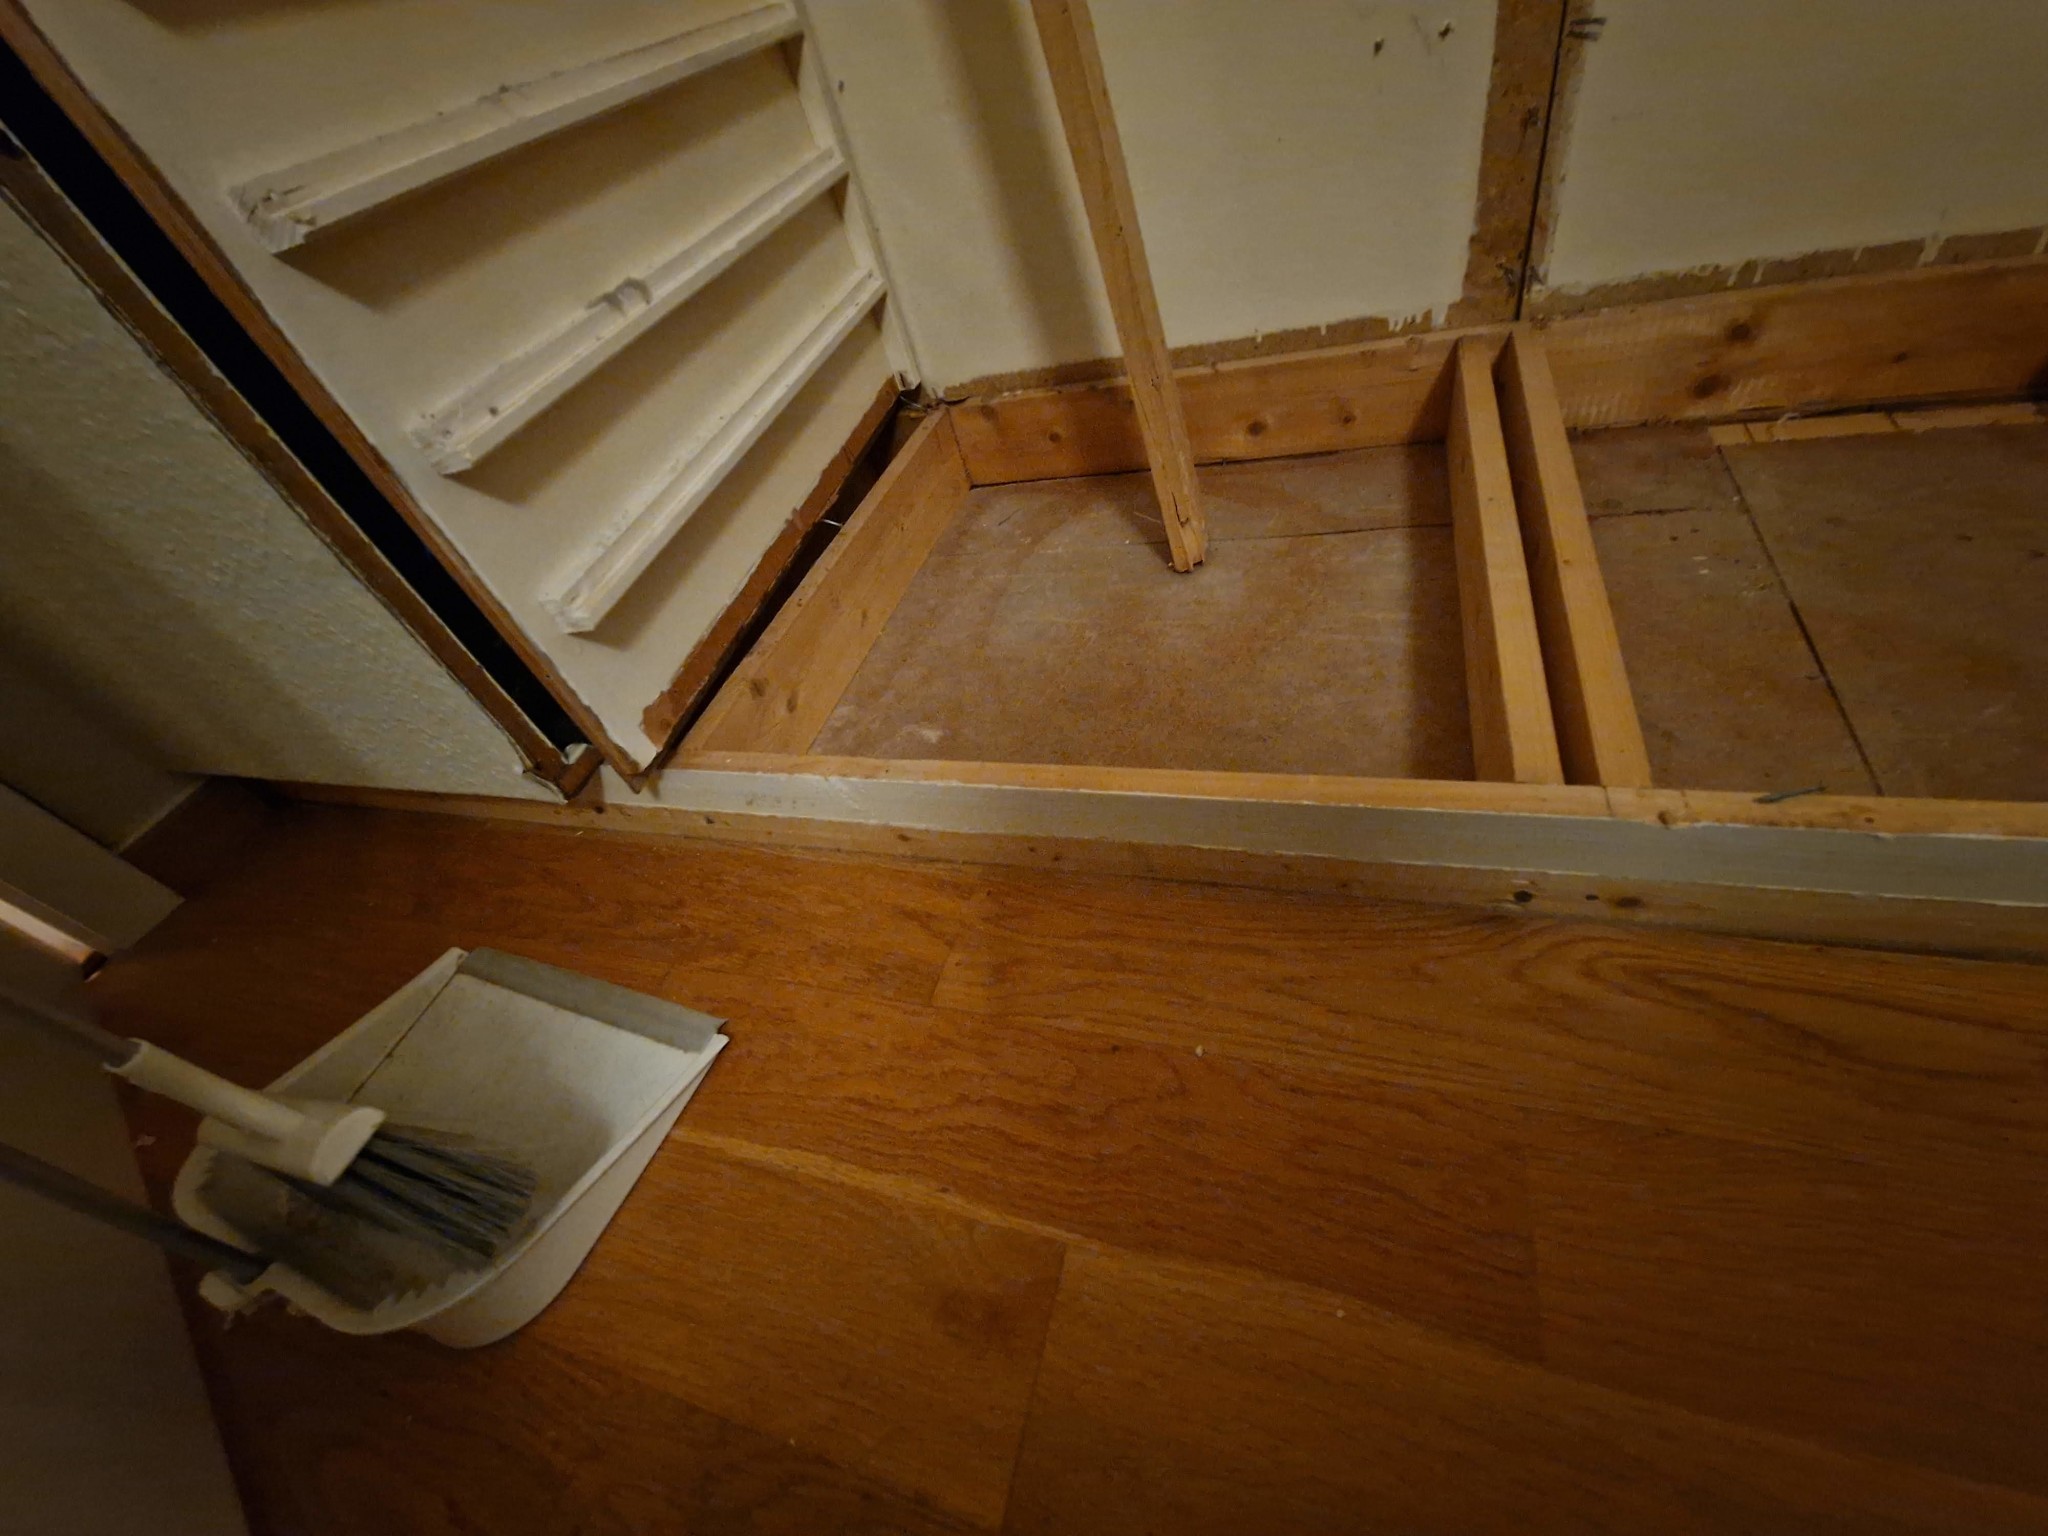
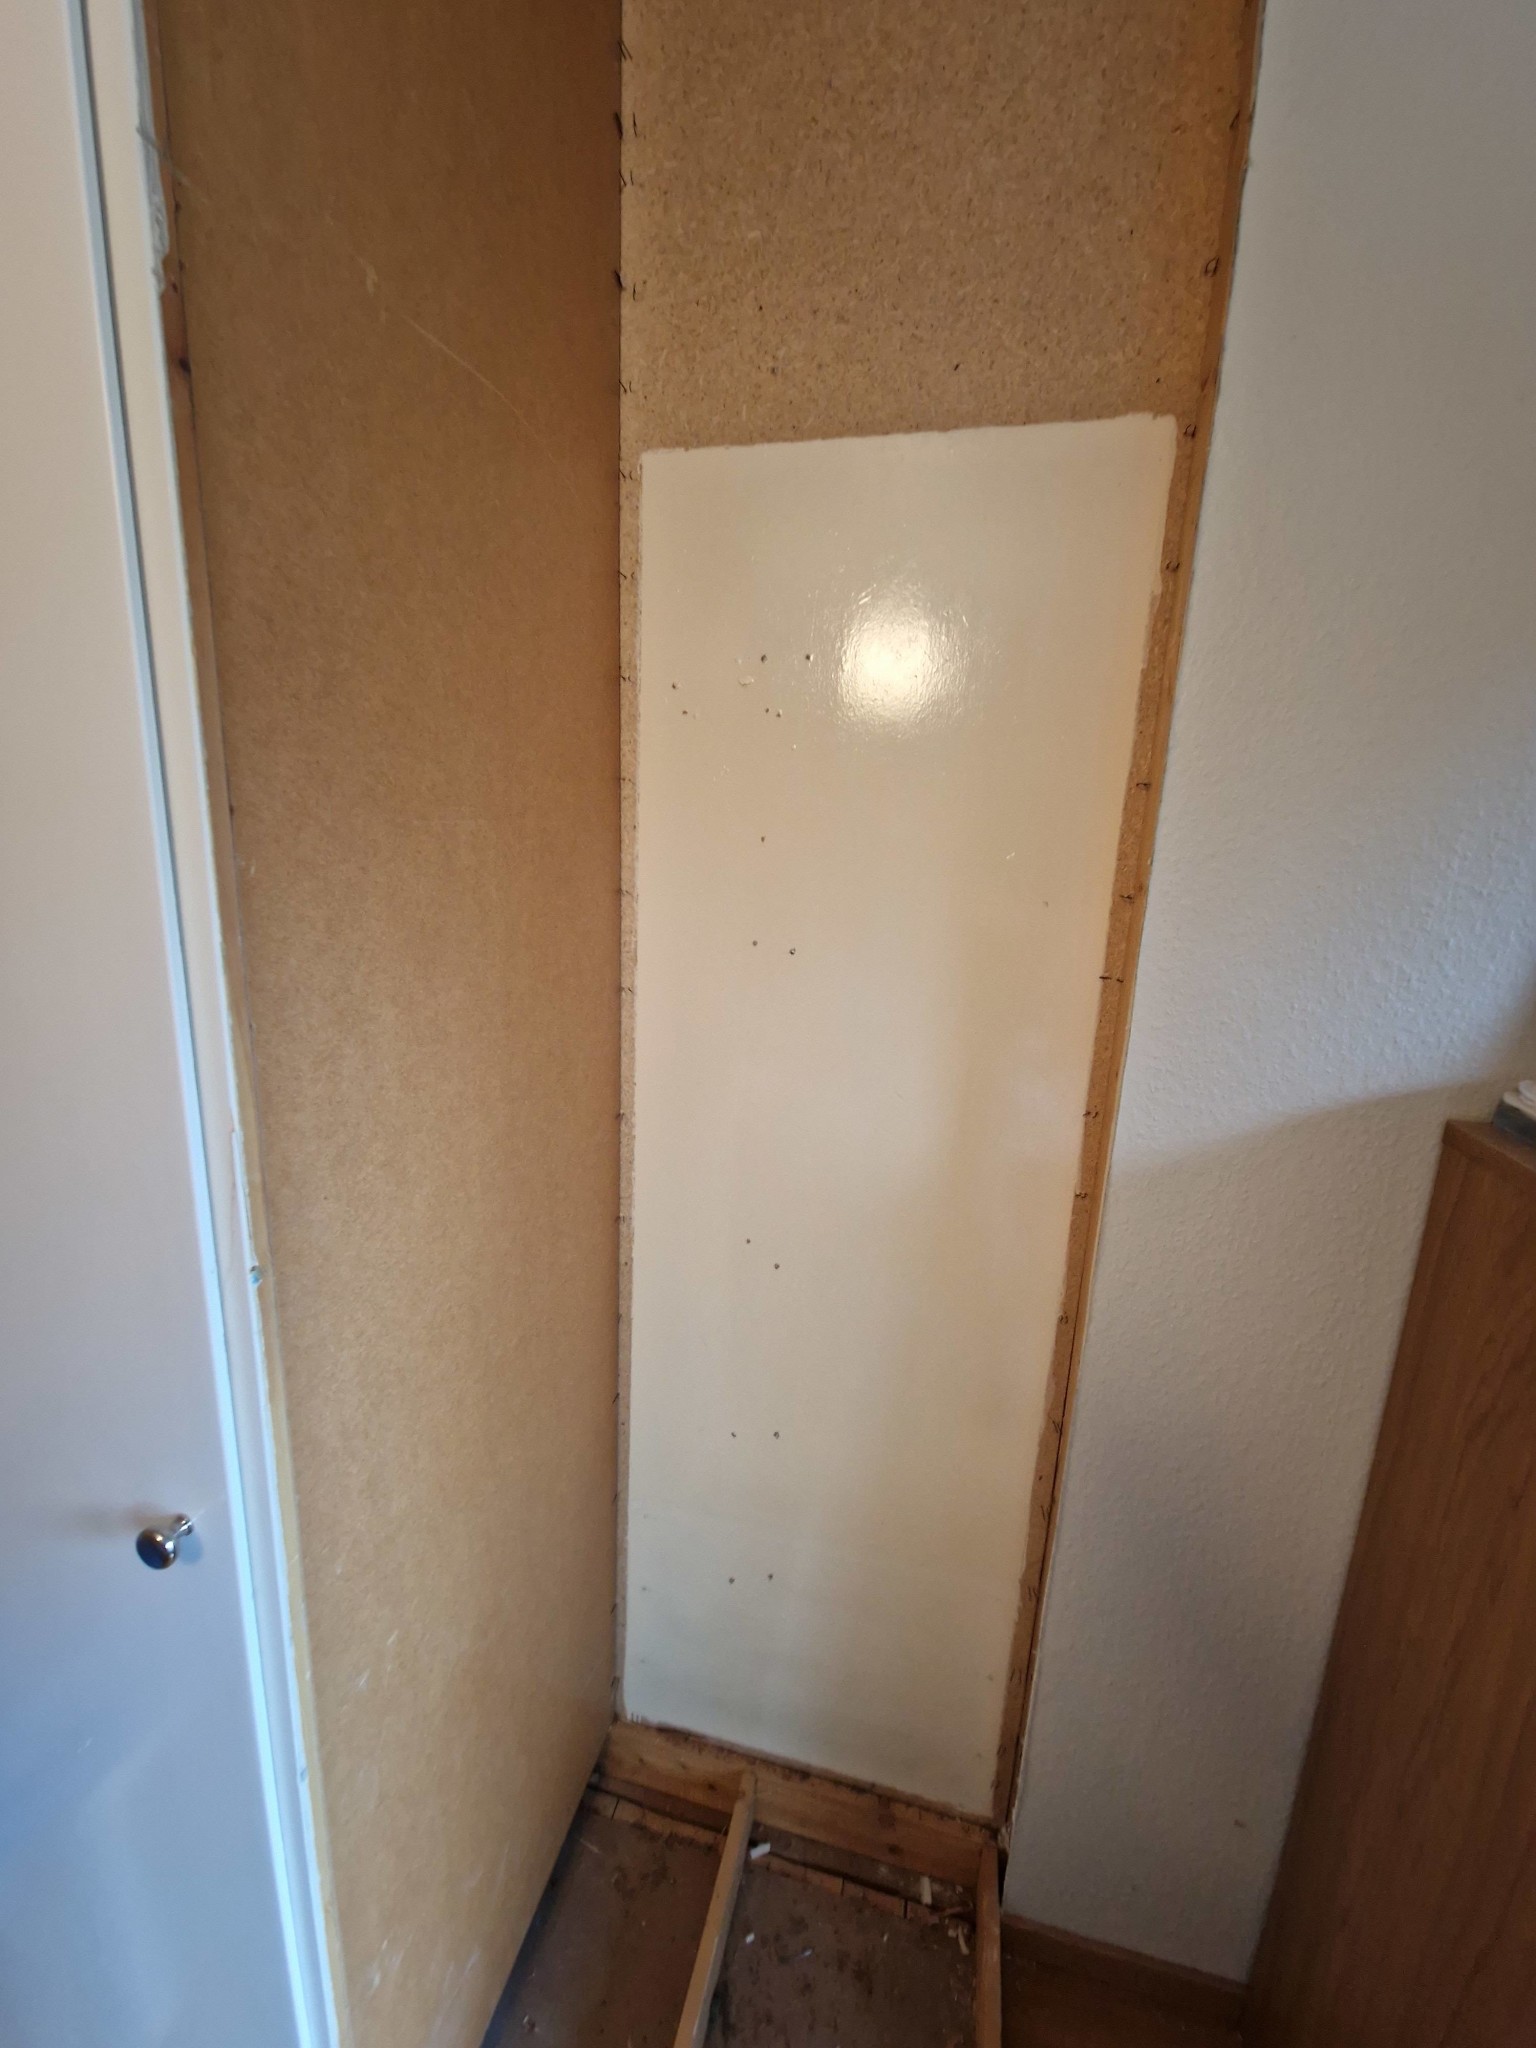
As it happens, I've now had more time to tear down...
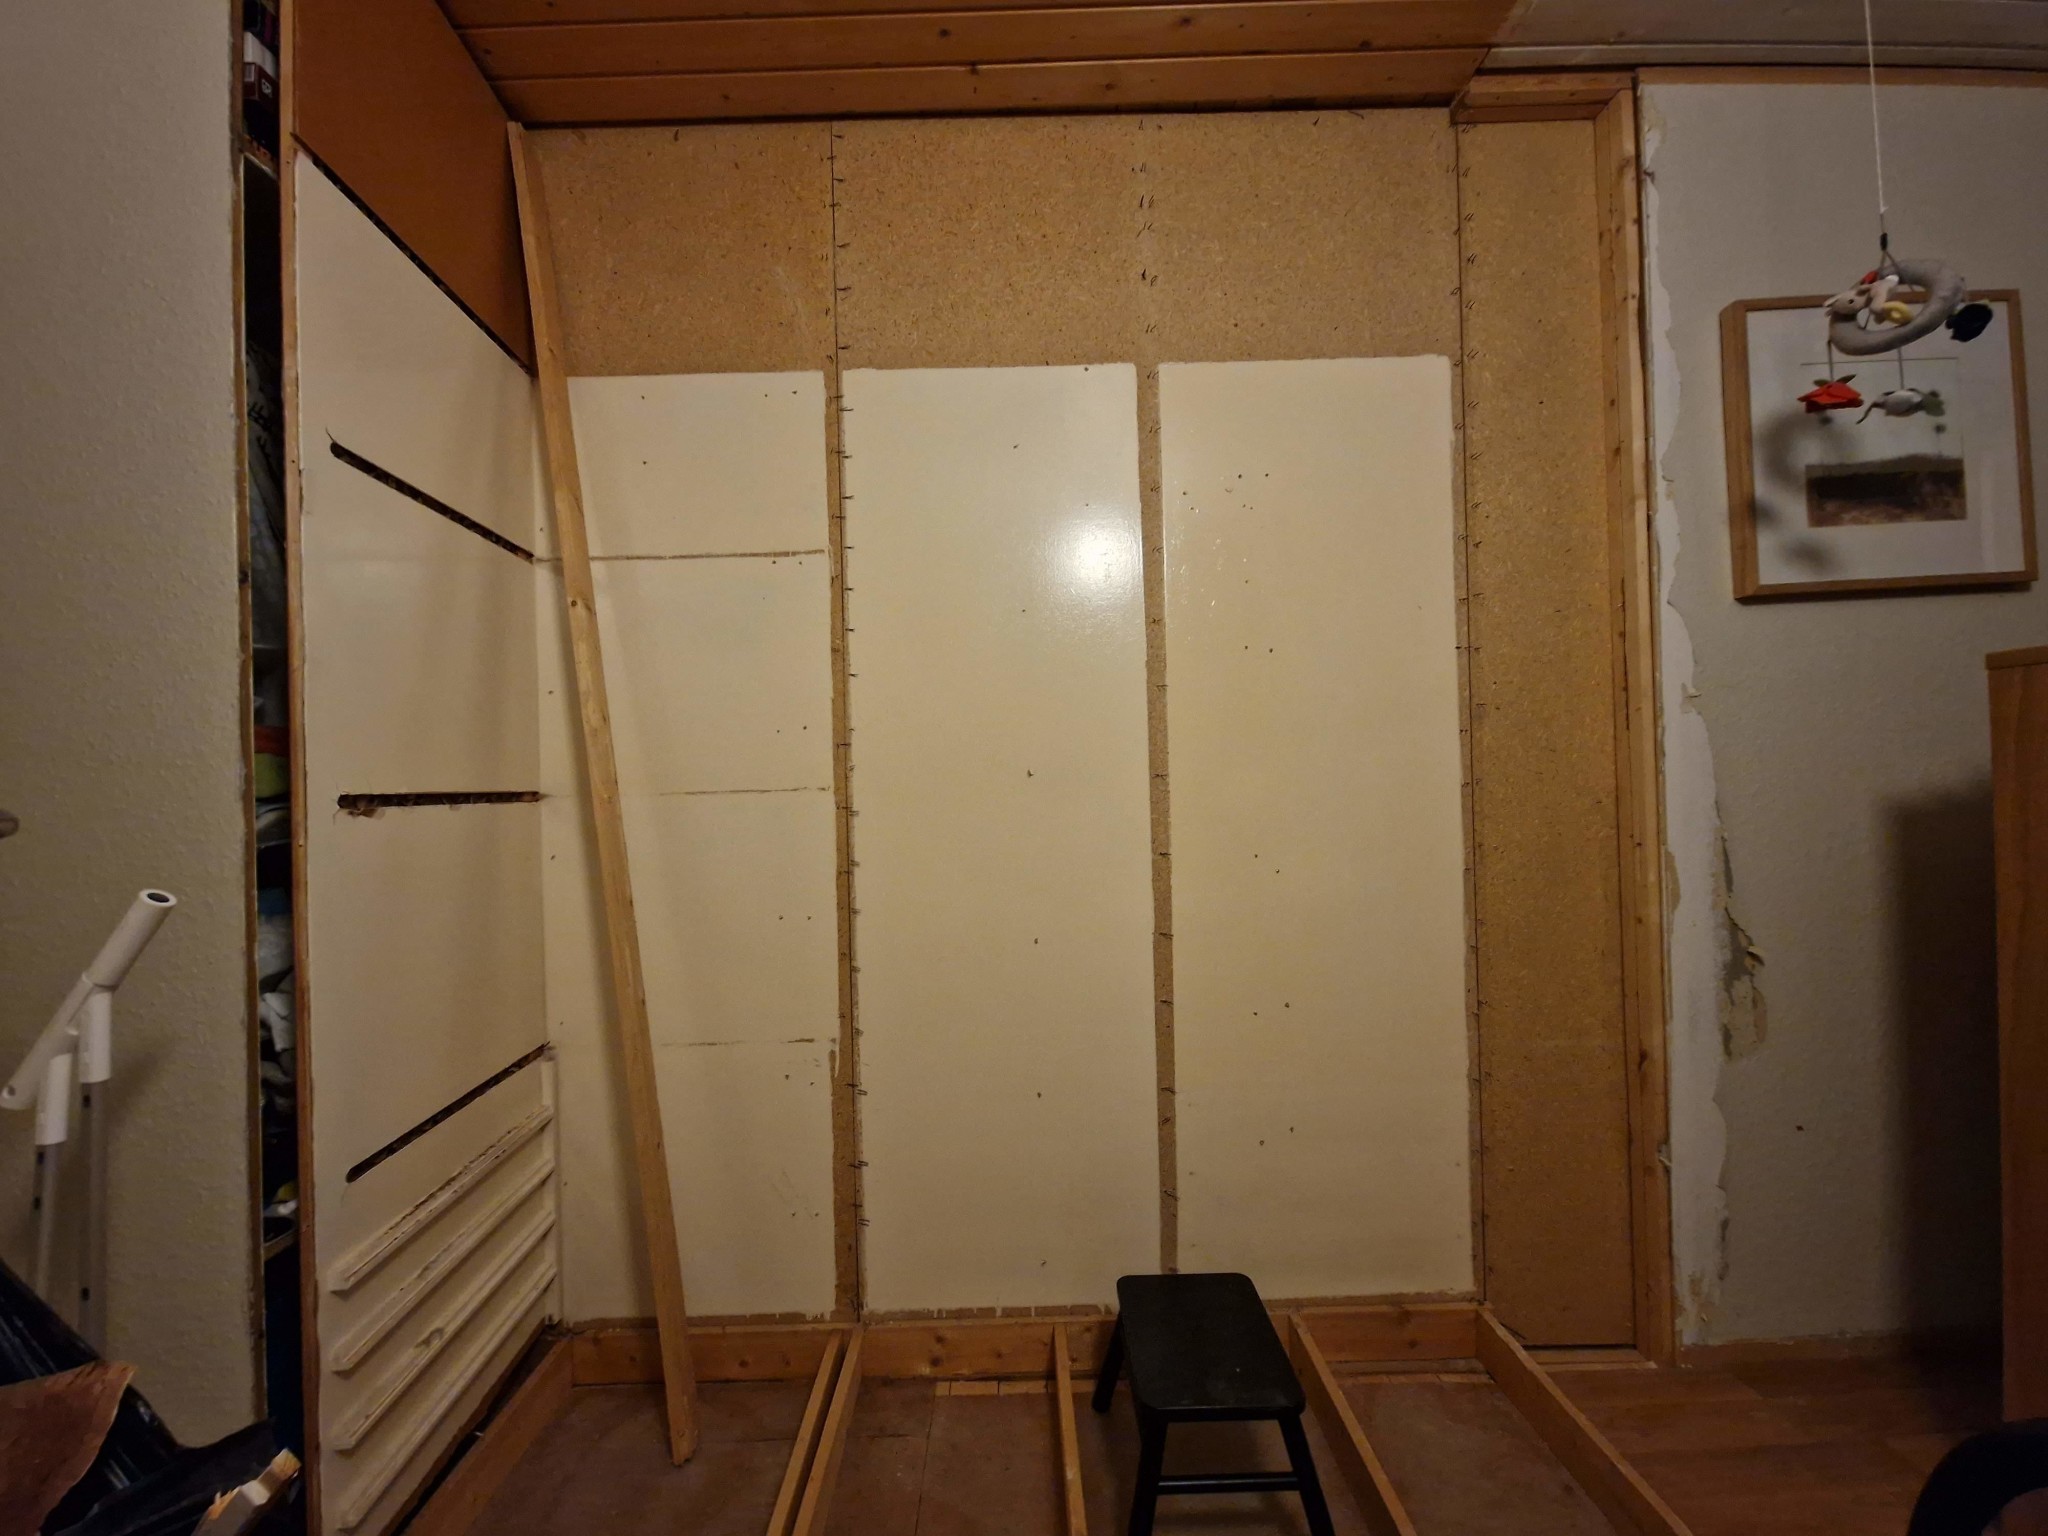
The idea is still that two 100x58 cm wardrobes will slide into the wall, while a 100x35 wardrobe will be placed outside the existing gypsum wall.
The depth is 59.5 cm while the wardrobes are supposed to be 58 cm. I'm thinking of placing two 15 mm OSB on the backside, to build out and stabilize both the wardrobes and to some extent the living room wall. Two vertical? Two horizontal? I'm thinking horizontal to clamp securely behind on the edges?
The left cabinet side was the back of the broom closet. I'm thinking of putting an OSB/plywood/glued board (which?) there to stabilize. Clamp behind OSB, and attach the side of one wardrobe to it.
Then the new cabinet will come out further than the previous cabinet plinths. So I have to figure out how to saw in the existing floor…
Then the new cabinet will protrude further than the previous cabinet bases. So I need to figure out how to saw into the existing floor..
Isn't it easier to put a hardboard, chipboard, etc. under the wardrobes to raise them to the same height as the parquet? Or is there an issue with the ceiling height?
How much clearance do you have to the ceiling? If there's floor height, you can place the new wardrobe on a board to avoid cutting the floor. (Second on the ball @BirgitS got there first
You can glue and screw with short screws (so they don't poke out the other side ) to make a more stable wall.
237.7 cm in ceiling height with parquet removed. The wardrobes require at least 237 mm in ceiling height for assembly, according to Ikea.
The parquet is 15 mm high.
So a bit tight indeed.

 If you are going to have 3x100, then it would look best if they align with each other. I.e., outside the existing wall. If you were to attempt to move a stud by 20 cm, you would also need to fix the drywall on the other side of the wall. This might mean that you have to re-drywall parts of or the entire wall on that side as well.