8,939 views ·
30 replies
9k views
30 replies
Tips to consider when laying 60x60 tiles
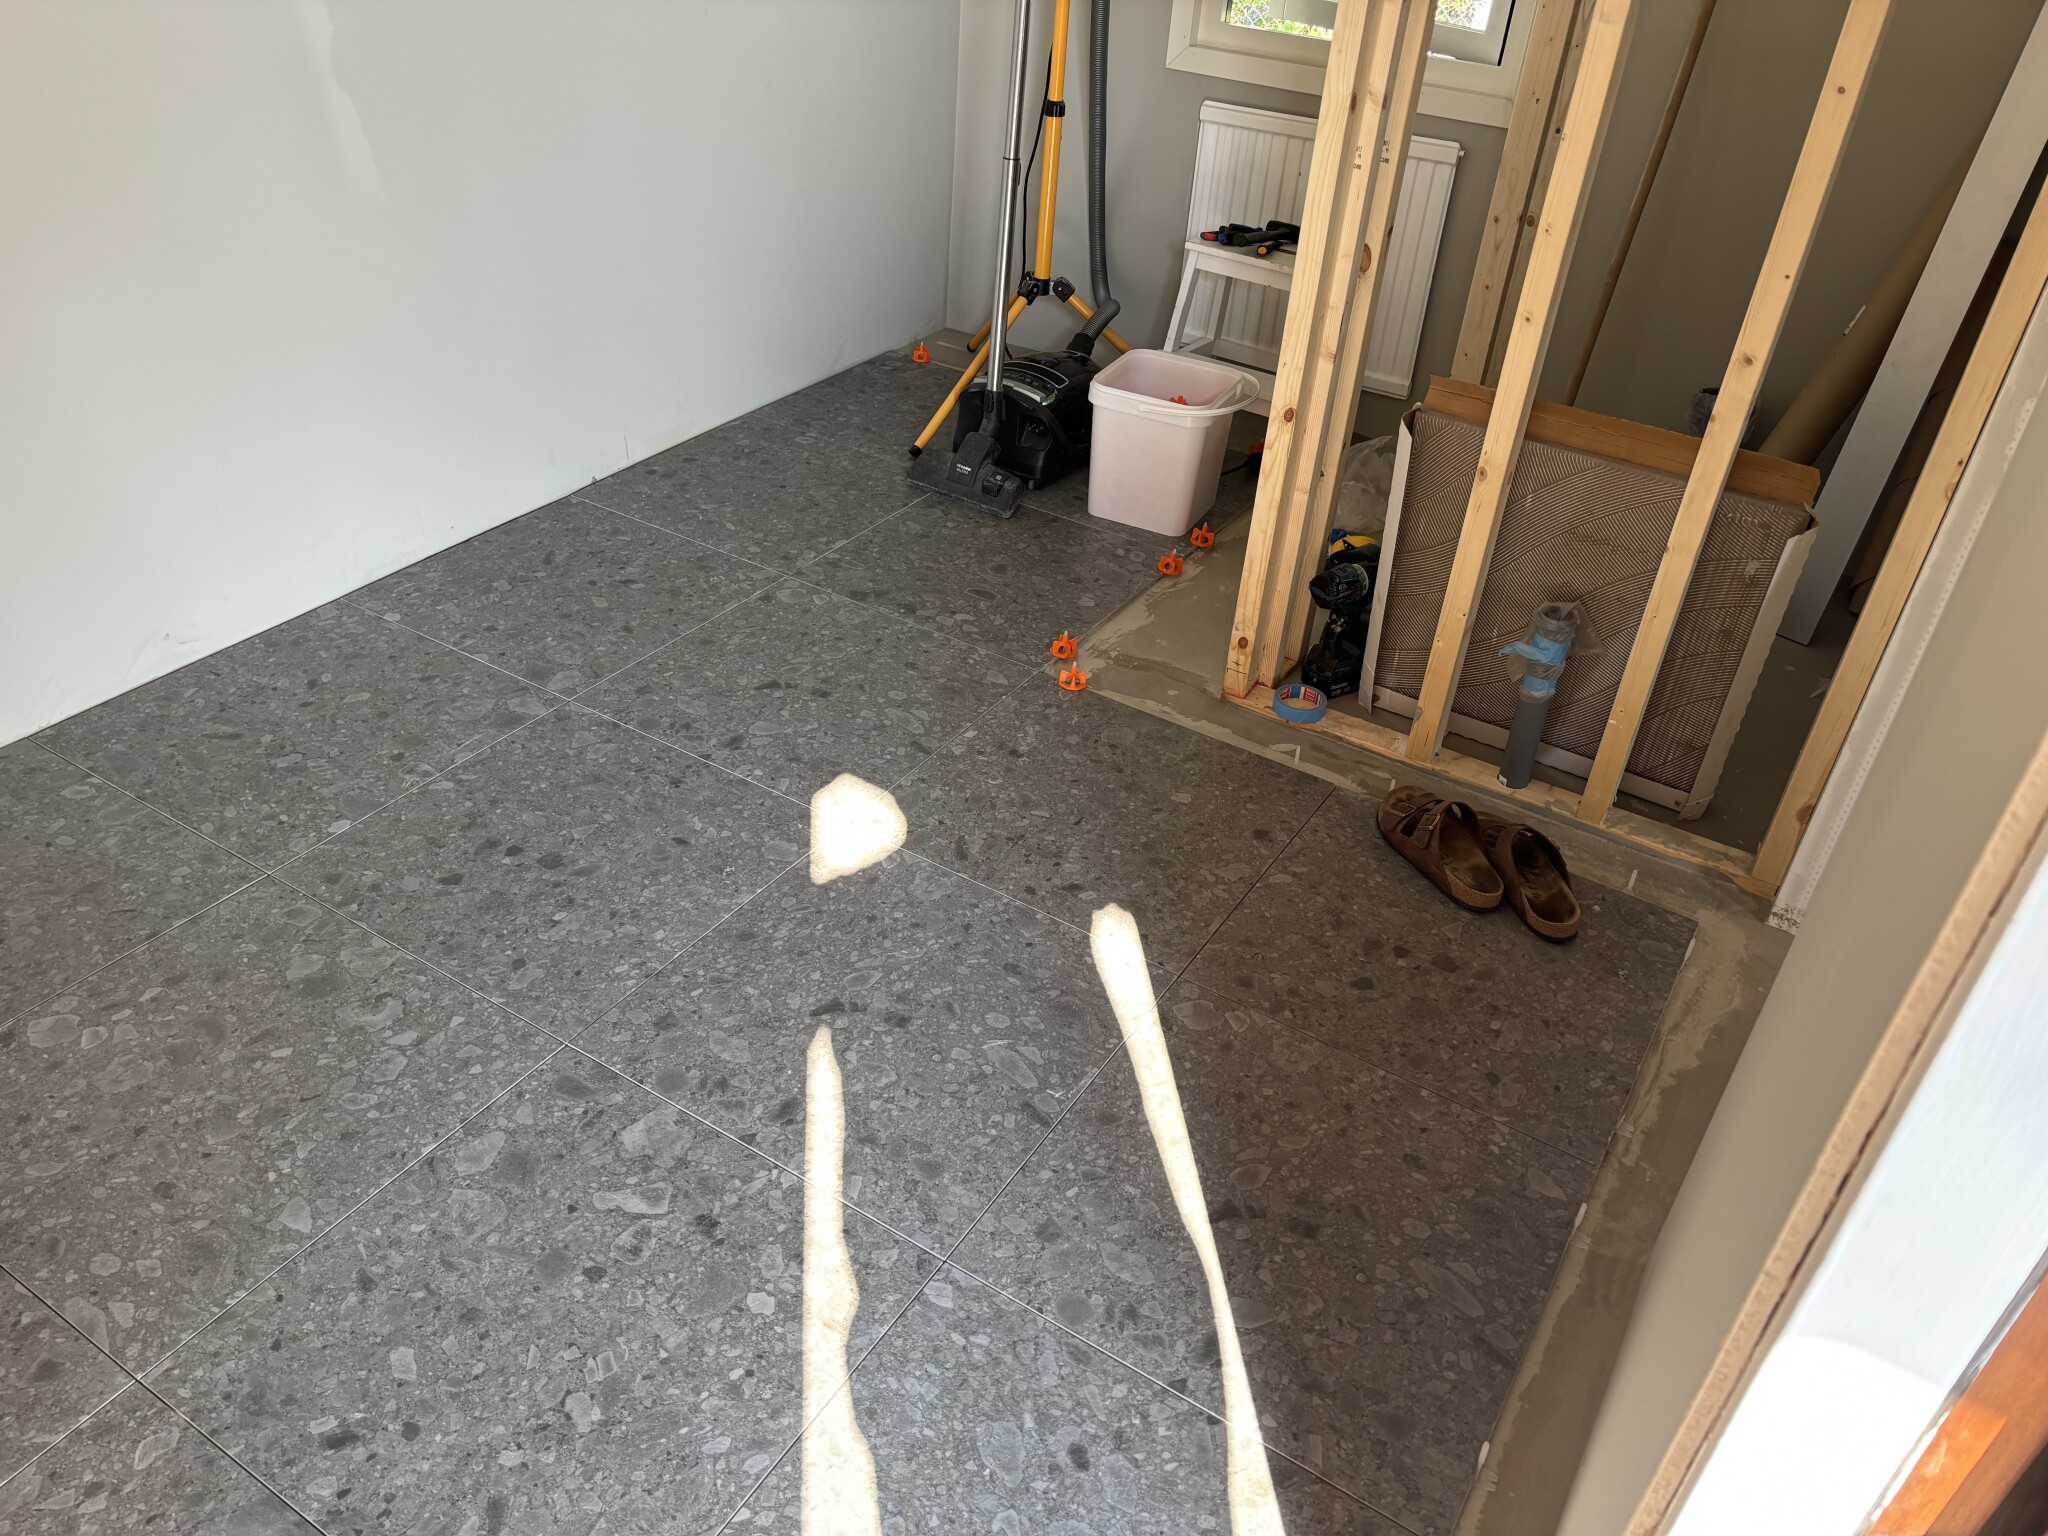
Exactly. You see in the last picture that what's missing for full length up and to the right are broken tiles and likewise towards the toilet. We have chosen full tiles that catch the eye towards the parquet when you enter through the door. To the right, up towards the window, it will be shorter, but wardrobes will be there, and then there's just the gap by the window between the wardrobe and the toilet. Likewise, it breaks right at the entrance, but there will also be an entrance mat, so it looks best that way.Byggtrixx said:
Have you laid out tiles for the entire length and width of the room? So you know if you, for example, need to cut the last row of tiles? If cutting is necessary, you might want to experiment with cutting equally on both sides or just on one side, depending on what is most visible or least distracting before you start.
No, it probably isn't a good idea to force more than a few mm. But they do seem undeniably good for maintaining a perfectly straight line.APR said:
I probably had the surface within 1-2mm because I value my time at 0kr. I then used Tebos white rubber mallet and suction cup. If you were a bit careless with the back-buttering on the tile, it was easy to either knock the tile down or lift it up and reapply. You probably shouldn't force the tile to level with the screws/wedges if there's too much difference after laying it and adjusting, since it's likely to risk breaking a corner.
Yes, there's time too, but I have half a house left to renovate and I've been working on various projects for 3 years and I'm starting to lose motivation in general. I just want to be done without compromising the quality of the end product. I'll just have to make sure to have enough adhesive so that there are no voids. Then it doesn't matter if the floor isn't 💯 percent level as long as the seams are aligned.
Great! I had a friend who forgot to check before and it unfortunately resulted in a really ugly finish right in the focal point too...Dr Benz said:
Exactly. You can see in the last picture that what is missing for full length up and to the right are broken tiles, as well as towards the toilet. We've chosen to place whole tiles that catch the eye towards the parquet when you enter the door. To the right up towards the window, it will be shorter, but closets will be placed there and then there's just the gap by the window between the closet and the toilet. Similarly, it’s broken right at the entrance, but there will also be an entrance mat, so it will look best that way.
Very good input, though. As always, it's relevant. The more prep work you do, the greater the chance it will turn out well.
Sometimes you can also tell if someone has put thought into it or not...


Thanks. Partly keeping straight lines (I'm very meticulous) even if you have spacers in the screws. Sometimes a little fix comes in between that makes it a bit wider, so you have to keep track all the time.Viktor.J said:
Similarly, you have to keep an eye on the pitch when combing. Different angles give different thicknesses, and it can be noticeable. You should try to maintain the same angle on all tiles.
Furthermore, it's generally quite messy to work with, especially when double combing.
But you learn from all this, so next time it will be even better.
But I would absolutely do it again. I don't like to compromise, and we love the size of the tiles.
The best is if you can lay everything at once; the day after, you can't move a tile or raise/lower it by a millimeter or two. The slope of the comb is not a big deal, especially if you double-coat. Comb out and take a small, maybe 2-3cm wide, and remove the fix along the edge before laying the tile, then you won't get fix between the tile and the level pin. Wash off a smear immediately to save time instead of dealing with it when it's dry.
Ok, that may be true. But you get different amounts of adhesive depending on whether you comb upright or almost flat. Where I know I've been careful with this, it's aligned very well height-wise between the tiles. Obviously, it makes a difference if you had done all full-size at the same time. That would have certainly made the result even better. The screws are very good because they help even out the tiles and also hold them in place so they have less chance to move.nino said:
It's best if you can lay everything at once, the day after you can't move a tile or raise/lower it by a mm or two. The slope of the comb isn't the end of the world, especially if you double-coat. Comb out and take a small, maybe 2-3cm wide, and remove the adhesive along the edge before you place the tile so you avoid getting adhesive between the tile and the leveling pin. Clean off a smear right away to save time instead of tackling it when it's dry.
I wiped the edges with the trowel, but there was still some smear. It's a craft like anything else, so practice makes perfect.
I'm actually quite satisfied anyway. Many people warned me against starting with 60x60 or even doing it at all 😊 But I like challenges.
I could actually stretch to say that I might have been willing to pay a craftsman for this.
Now it has dried enough and it's starting to be time for grouting.
What should you keep in mind to make it the best? I'm thinking of doing it all in one sweep since there aren't that many joints. I've bought Sika cream since it was Sika's adhesive that was used.
I have a float and a cleaning board.
Of course, the tiles should be cleaned thoroughly, and the joints should be inspected and scraped a little more if needed.
But what should you keep in mind during the procedure itself? Apply crosswise against you. But what's important when it comes to cleaning off later?


Diagonally across the joint, in both directions. Take a smaller amount of grout and work it out so the entire batch dries slower and you have more time. Use the right kind of grout for the tiles you have. If you're a bit careful to pick up all the grout with the float, you can just let the rest dry properly before you start cleaning with the float that has a sponge.
You'll notice that you can quickly wipe the large surfaces and then start to fine-tune the grout with the sponge. With the sponge, make sure to remove excess grout or, if any is missing, work in a little more grout. It is with the sponge, not the float, that the grout gets its final appearance.
After wiping with the sponge, let it dry again and then take a towel or similar and polish the tiles (without water) to remove the last of the grout.

