3,692 views ·
28 replies
4k views
28 replies
Replace "vävtaket" with gypsum
Hello!
Newly, somewhat lost homeowner") . Currently, we have some type of fabric ceiling that is stretched. Since it's not completely fresh, the idea is to take it down and instead install drywall. Now to my question, since drywall is heavy, how can I be sure it won't fall down? At ~3 meters, I only see two attachment points.
. Currently, we have some type of fabric ceiling that is stretched. Since it's not completely fresh, the idea is to take it down and instead install drywall. Now to my question, since drywall is heavy, how can I be sure it won't fall down? At ~3 meters, I only see two attachment points.
Do you think it will work if I frame it properly? Any tips on how tightly I should frame?
Very grateful for any answers and input!
Newly, somewhat lost homeowner
. Currently, we have some type of fabric ceiling that is stretched. Since it's not completely fresh, the idea is to take it down and instead install drywall. Now to my question, since drywall is heavy, how can I be sure it won't fall down? At ~3 meters, I only see two attachment points.Do you think it will work if I frame it properly? Any tips on how tightly I should frame?
Very grateful for any answers and input!
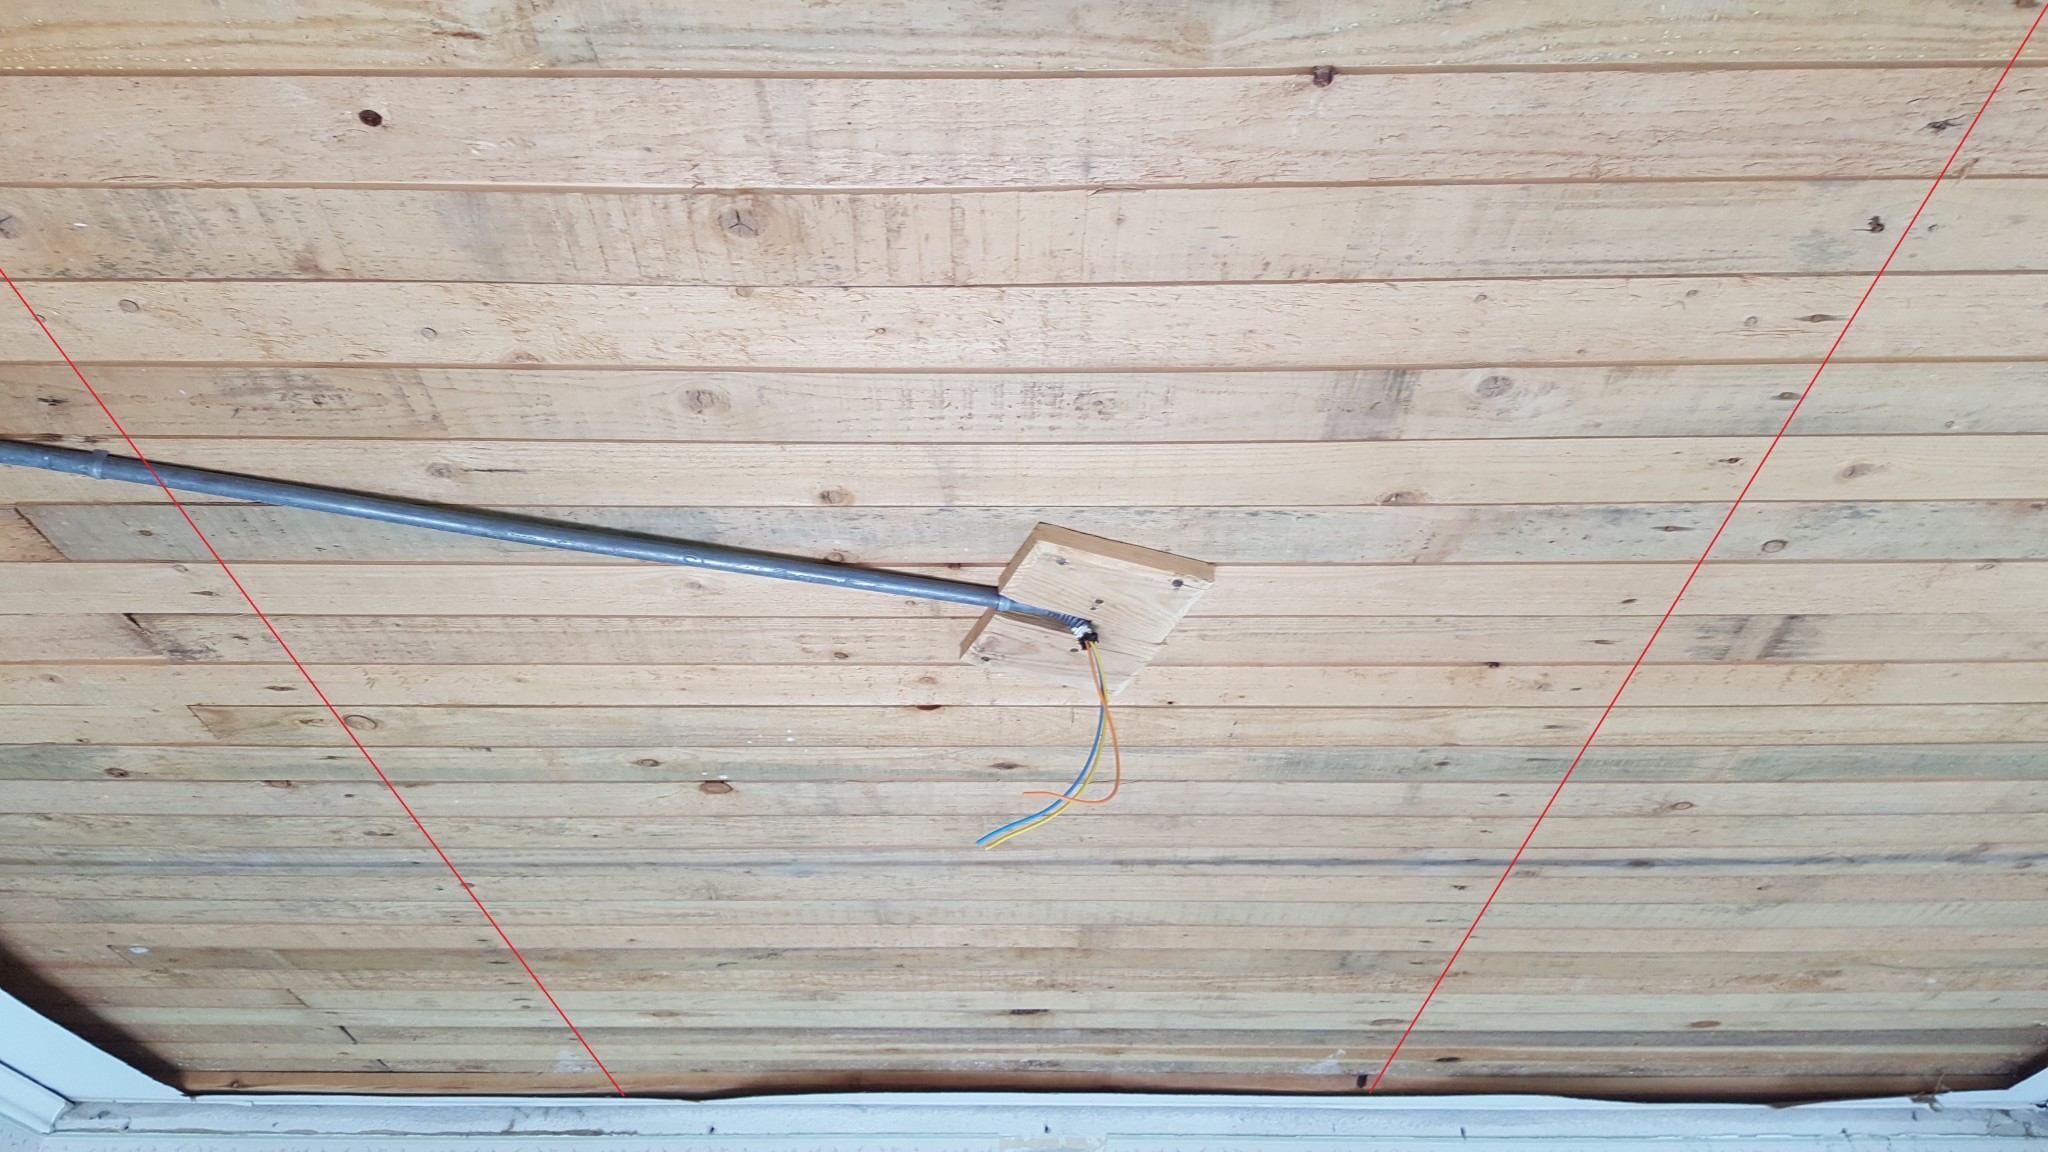
Due to the electrical conduit in the ceiling, you must frame or if it is wind, reroute it, not a successful lot of work, frame up with 28X70, (there is a board for electricity, you must go under it) it will hold. Think now if you want more electricity in the ceiling.
Thanks for the quick response! The råspont (is that what it's called) feels fairly even. It is a single-story house without an attic.
So it's enough if I put up transverse frameworks and cut out for the electrical conduit? For an uninitiated, 28x70?
Best regards
So it's enough if I put up transverse frameworks and cut out for the electrical conduit? For an uninitiated, 28x70?
Best regards
There are many ways to do it, your method works perfectly.W williamspäron said:
Ok, so 28x70 sparse panel with 30 cm spacing and up with drywall should do the trick?
Question, can you elaborate a bit on whether it's an attic or not? Currently, there's no attic above but it's still interesting.L Liteavvarje said:
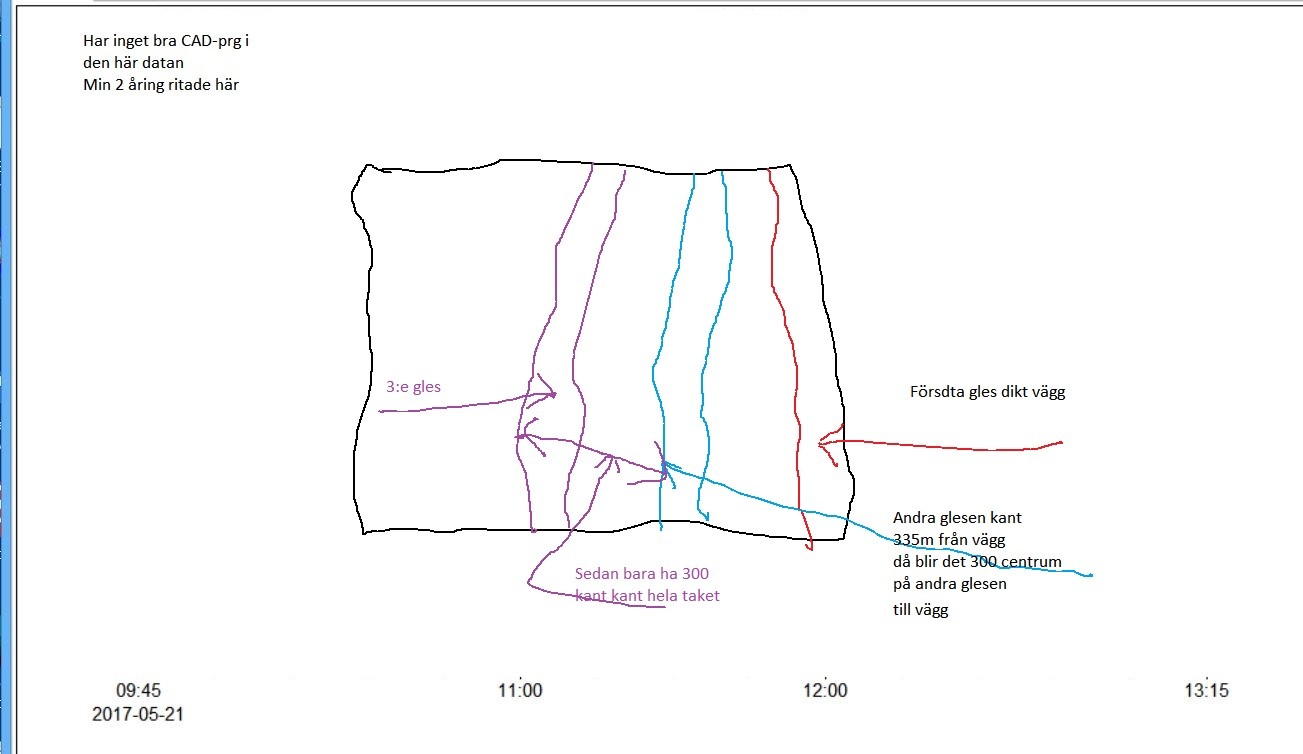
That's perfect, screw the råspont every 50 cm, it will sit like a rock. Consider which direction you'll place the boards so you don't have to cut small pieces, and avoid so-called general joints (the ends shouldn't be in the same place; stagger them a bit). When you start from a wall, measure from it 105 mm to the outer edge and then 300 to the next outer edge. You can snap a chalk line for everything, so you have the measurement without making mistakes. At the pipe, cut it and continue on the other side. In the part where the råspont ends and starts, end it about 100 mm from the wall, so you have one there to attach the boards at the end. (That way, you don't need to cut small pieces to place between the longitudinal ones.)W williamspäron said:
PS 1 Don't forget to bevel the boards that lie against each other on the short sides about halfway and in about 2 cm, so the filler has something to adhere to. Longitudinally, they are recessed, no bevel.
PS 2 Calculate and see the room's dimensions; boards come in various sizes, so there are as few joints and waste as possible. If you're doing it yourself, it's not easy—you'll need several people. It's heavy. You can rent a board lift, which isn't too expensive and avoids heavy lifting.
Thanks! I'm not entirely sure what you mean by 105 mm to the outer edge and then 300 to the next outer edge? Do you have an image you can refer to?L Liteavvarje said:It's perfect, screw the råspont every 50 cm, it will sit like a rock, think a little about the direction you want to place the boards so you don't have to cut small pieces, and also to avoid so-called general seams (the ends should not be in the same place but stagger them a little) when you start from a wall, measure 105 mm from it to the outer edge and then 300 to the next outer edge, you can snap a chalk line across it all, so you have the measurement without getting it wrong, at the pipe cut it and continue on the other side. In the part where the tongue ends and starts, you stop about 100 mm from the wall, because you should have one lying there to attach the boards at the end, (then you don't need to cut small pieces to place between the longitudinal ones. PS 1 don't forget to bevel the boards that lie against each other's short sides about half the board and in about 2 cm, this is for the filler to have something to adhere to, lengthwise they are recessed so no beveling needed. PS 2 calculate and see the room's dimensions, boards come in different sizes, aim for as few seams and waste as possible, if you're doing it by yourself, it's not going well you must be several, heavy, you can rent a board lifter, not a lot of money, no heavy lifting,
If I rent a lifter, should it be possible to do it myself?
Considering the construction, there's probably no plastic there, but some paper on the raw boards in the attic, likely with sawdust on it, the diffusion plastic is stapled to the battens before the boards. I don't know if you saw it, with the extra electricity, at the outlet you attach a piece of batten 50 cm 4 screws, next to the pipe so you have a bracket for the lamp hook.W williamspäron said:
was about to reply. deleted became wrong, new here: forget 105mm ::: my brother counted wrong, so did IL Liteavvarje said:Considering the construction, there's probably no plastic there but rather some cardboard on the raw planking in the attic, likely with shavings on it, the vapor barrier plastic is stapled on the battens before the boards, I don't know if you saw that, about extra electricity, at the power outlet, you attach a piece of batten 50 cm with 4 screws, next to the pipe you have a mount for the lamp hook
sketched a little hope you understand, you others don't laugh, check the measurements carefully so you don't end up with a piece of 5 cm at the end, it's better to cut the first one, but think, then the measurements change should align with 300 mm which is the division for the board in 4 (120/4 = 300)