6,541 views ·
20 replies
7k views
20 replies
Plasterboard 1 cm shorter
We have decided to have a ceiling without molding, and then the OSB + plasterboard will cover the visible staples that are closest to the walls.pbengtsson said:
Then it will probably be easiest to press an uncut plasterboard edge against a finished ceiling if you want to minimize the gap in the ceiling/wall angle.
OK, but then perhaps you can take more than 1 cm, the skirting board determines that.
I also vote for a circular saw, use a bad vacuum cleaner that you place outside (outdoors).
Personally, I've cut a lot of gypsum with a Festool plunge saw and their vacuum cleaner, no problems at all. The worst was cemberit because the blade was fine-toothed and the filters got clogged, but it was just a matter of shaking it out.
3-4 slices and a jigsaw should create slightly less dust than a circular saw.
Hello.
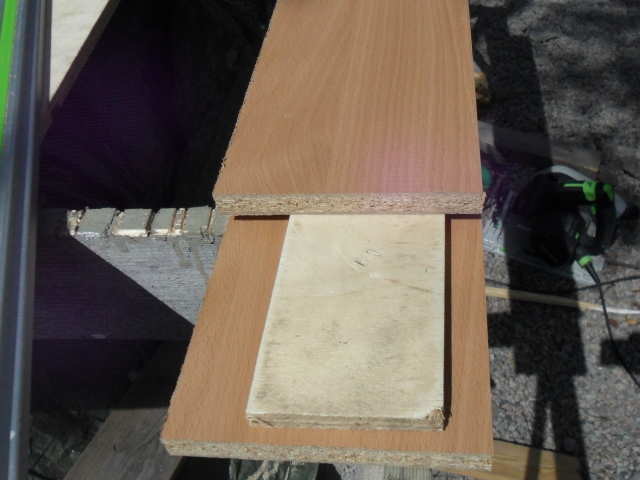
I have solved it, with a small homemade tool.
First, a 120cm strip of 13mm plywood, about 7-8 cm wide.
Then two 122 cm long strips of beech-veneered board from an old bookshelf (you use what you have, but I wanted a sharp edge!)
These pieces were a bit wider, around 14 cm.
Then I measured exactly 2cm in on the bookshelf panels (because I have now realized that I want these 40-60 drywall panels 2 cm shorter) and stapled sparingly with narrow-backed long staples, about 4 in total.
Then I also stapled the other bookshelf panel together, while the angle square ensured that it was straight and nice.
(edit: I like to clamp things together, so they don't move when you start screwing - no other reason for the staples, so you don't need to rush out and buy a stapler just because you're keen to make a similar tool") )
)
Finally, I screwed the package together from both sides with a number of chipboard screws, which I placed quite close to where the drywall panel is pushed in, to handle the bending force as well as possible.
I have solved it, with a small homemade tool.
First, a 120cm strip of 13mm plywood, about 7-8 cm wide.
Then two 122 cm long strips of beech-veneered board from an old bookshelf (you use what you have, but I wanted a sharp edge!)
These pieces were a bit wider, around 14 cm.
Then I measured exactly 2cm in on the bookshelf panels (because I have now realized that I want these 40-60 drywall panels 2 cm shorter) and stapled sparingly with narrow-backed long staples, about 4 in total.
Then I also stapled the other bookshelf panel together, while the angle square ensured that it was straight and nice.
(edit: I like to clamp things together, so they don't move when you start screwing - no other reason for the staples, so you don't need to rush out and buy a stapler just because you're keen to make a similar tool
)Finally, I screwed the package together from both sides with a number of chipboard screws, which I placed quite close to where the drywall panel is pushed in, to handle the bending force as well as possible.


Last edited:
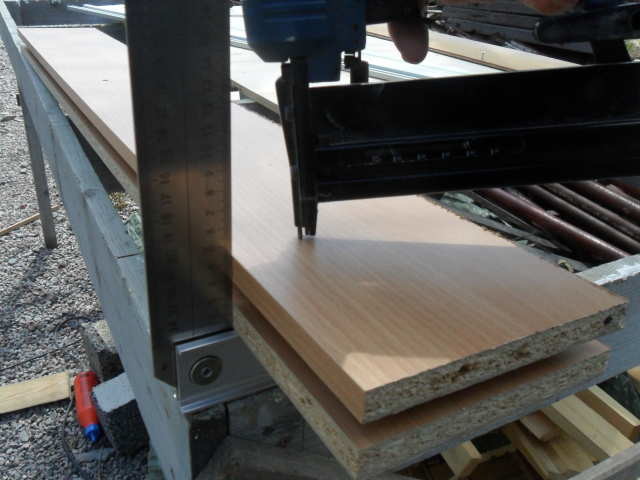
And then the test:
I inserted the disc into the bottom of the gap in the tool.
A pretty strong scratch pbs (on both sides).
Break -> perfect result.
Then the 2cm plaster strip was actually quite stuck in the gap, and only broke into small pieces when I tried to take it out. :S
But then I discovered a feature, which hadn't been considered during the tool construction.
Since the shelves are wider, I can squeeze it a bit there, so the slot where the plaster is stuck opens a bit. Perfect, as if I had thought it all out directly.

Click here to reply
Similar threads
-
Drywall on Homosote with 120 cm between studs?
Building Materials and Construction Technology -
How can I install a heavy chandelier (10-12kg) in a 1.5cm plaster ceiling?
Building Materials and Construction Technology -
Boxing in HEA12 became 20x24 cm. Can it be made smaller?
Building Materials and Construction Technology