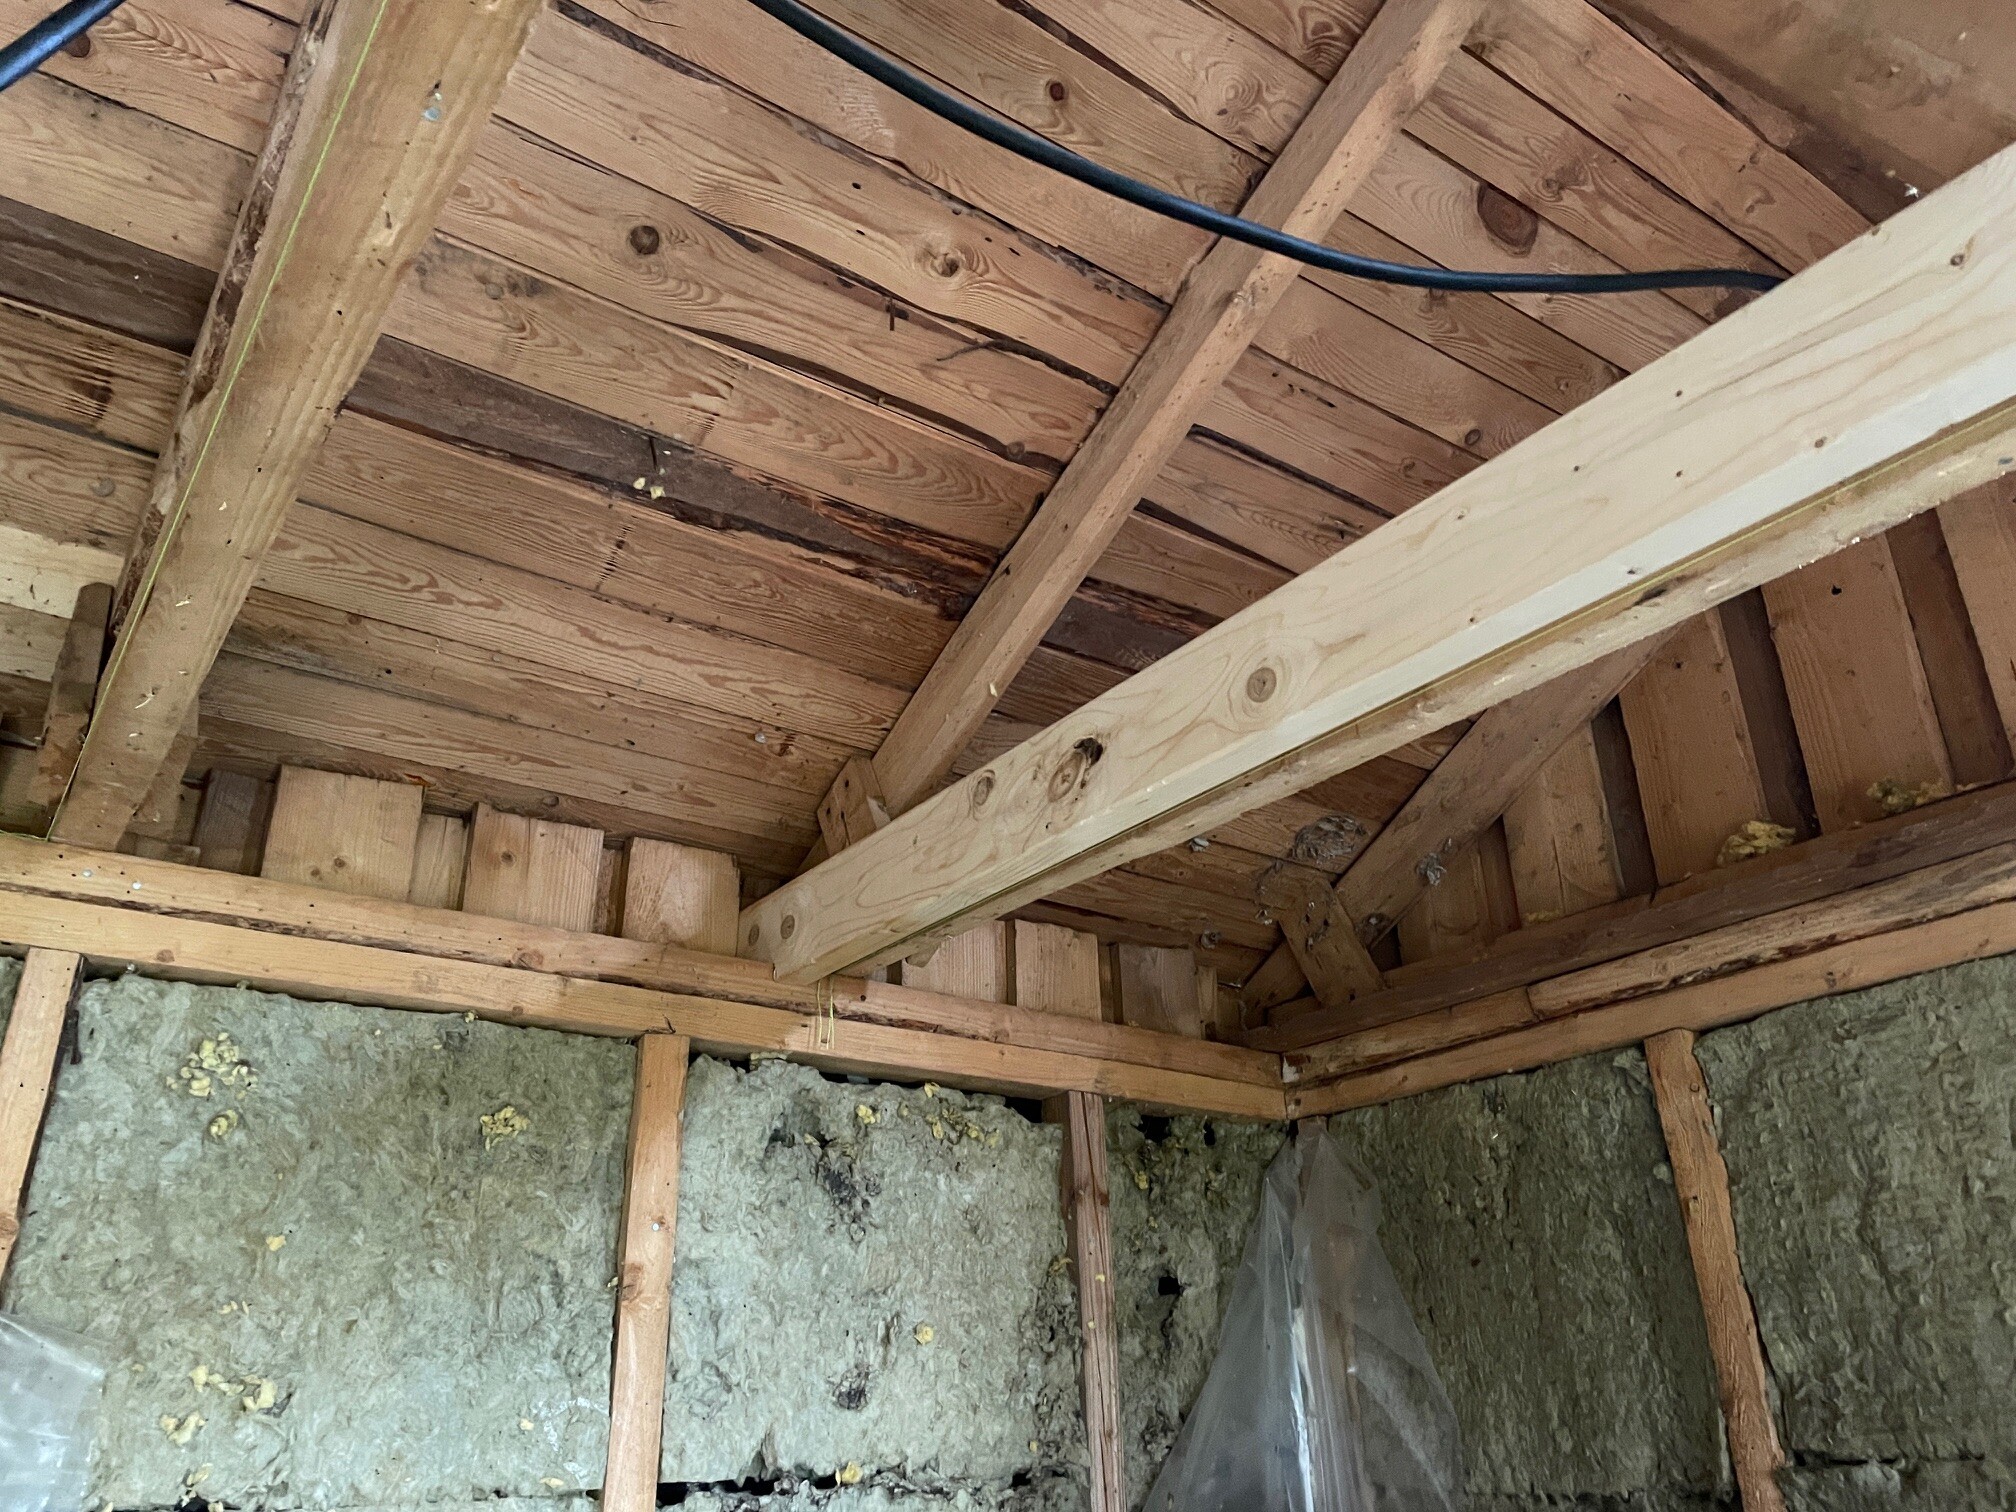
Renovating a summer cabin (as mentioned in previous threads) and preparing for a new plaster ceiling. Previously, there was a tongue and groove ceiling directly on the roof trusses, so I plan to install a sparse panel. I quickly encountered that the trusses flex and are uneven in height in two directions, which means compensating with shims/spacers/washers in two dimensions becomes a bit of a frustrating project 😅
I then had two ideas; either plane the existing truss beams evenly or buy new ones for the ceiling. The former felt unwise as it might compromise the structural safety, so I'm considering the latter.
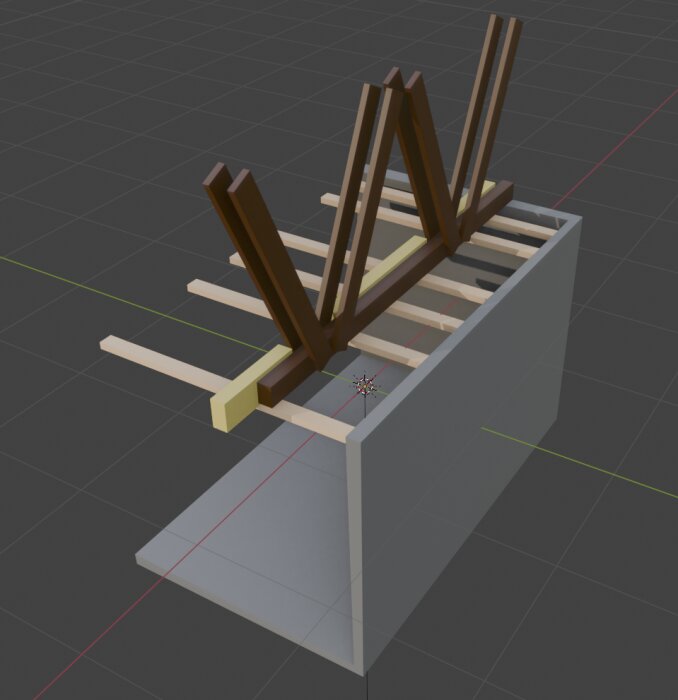
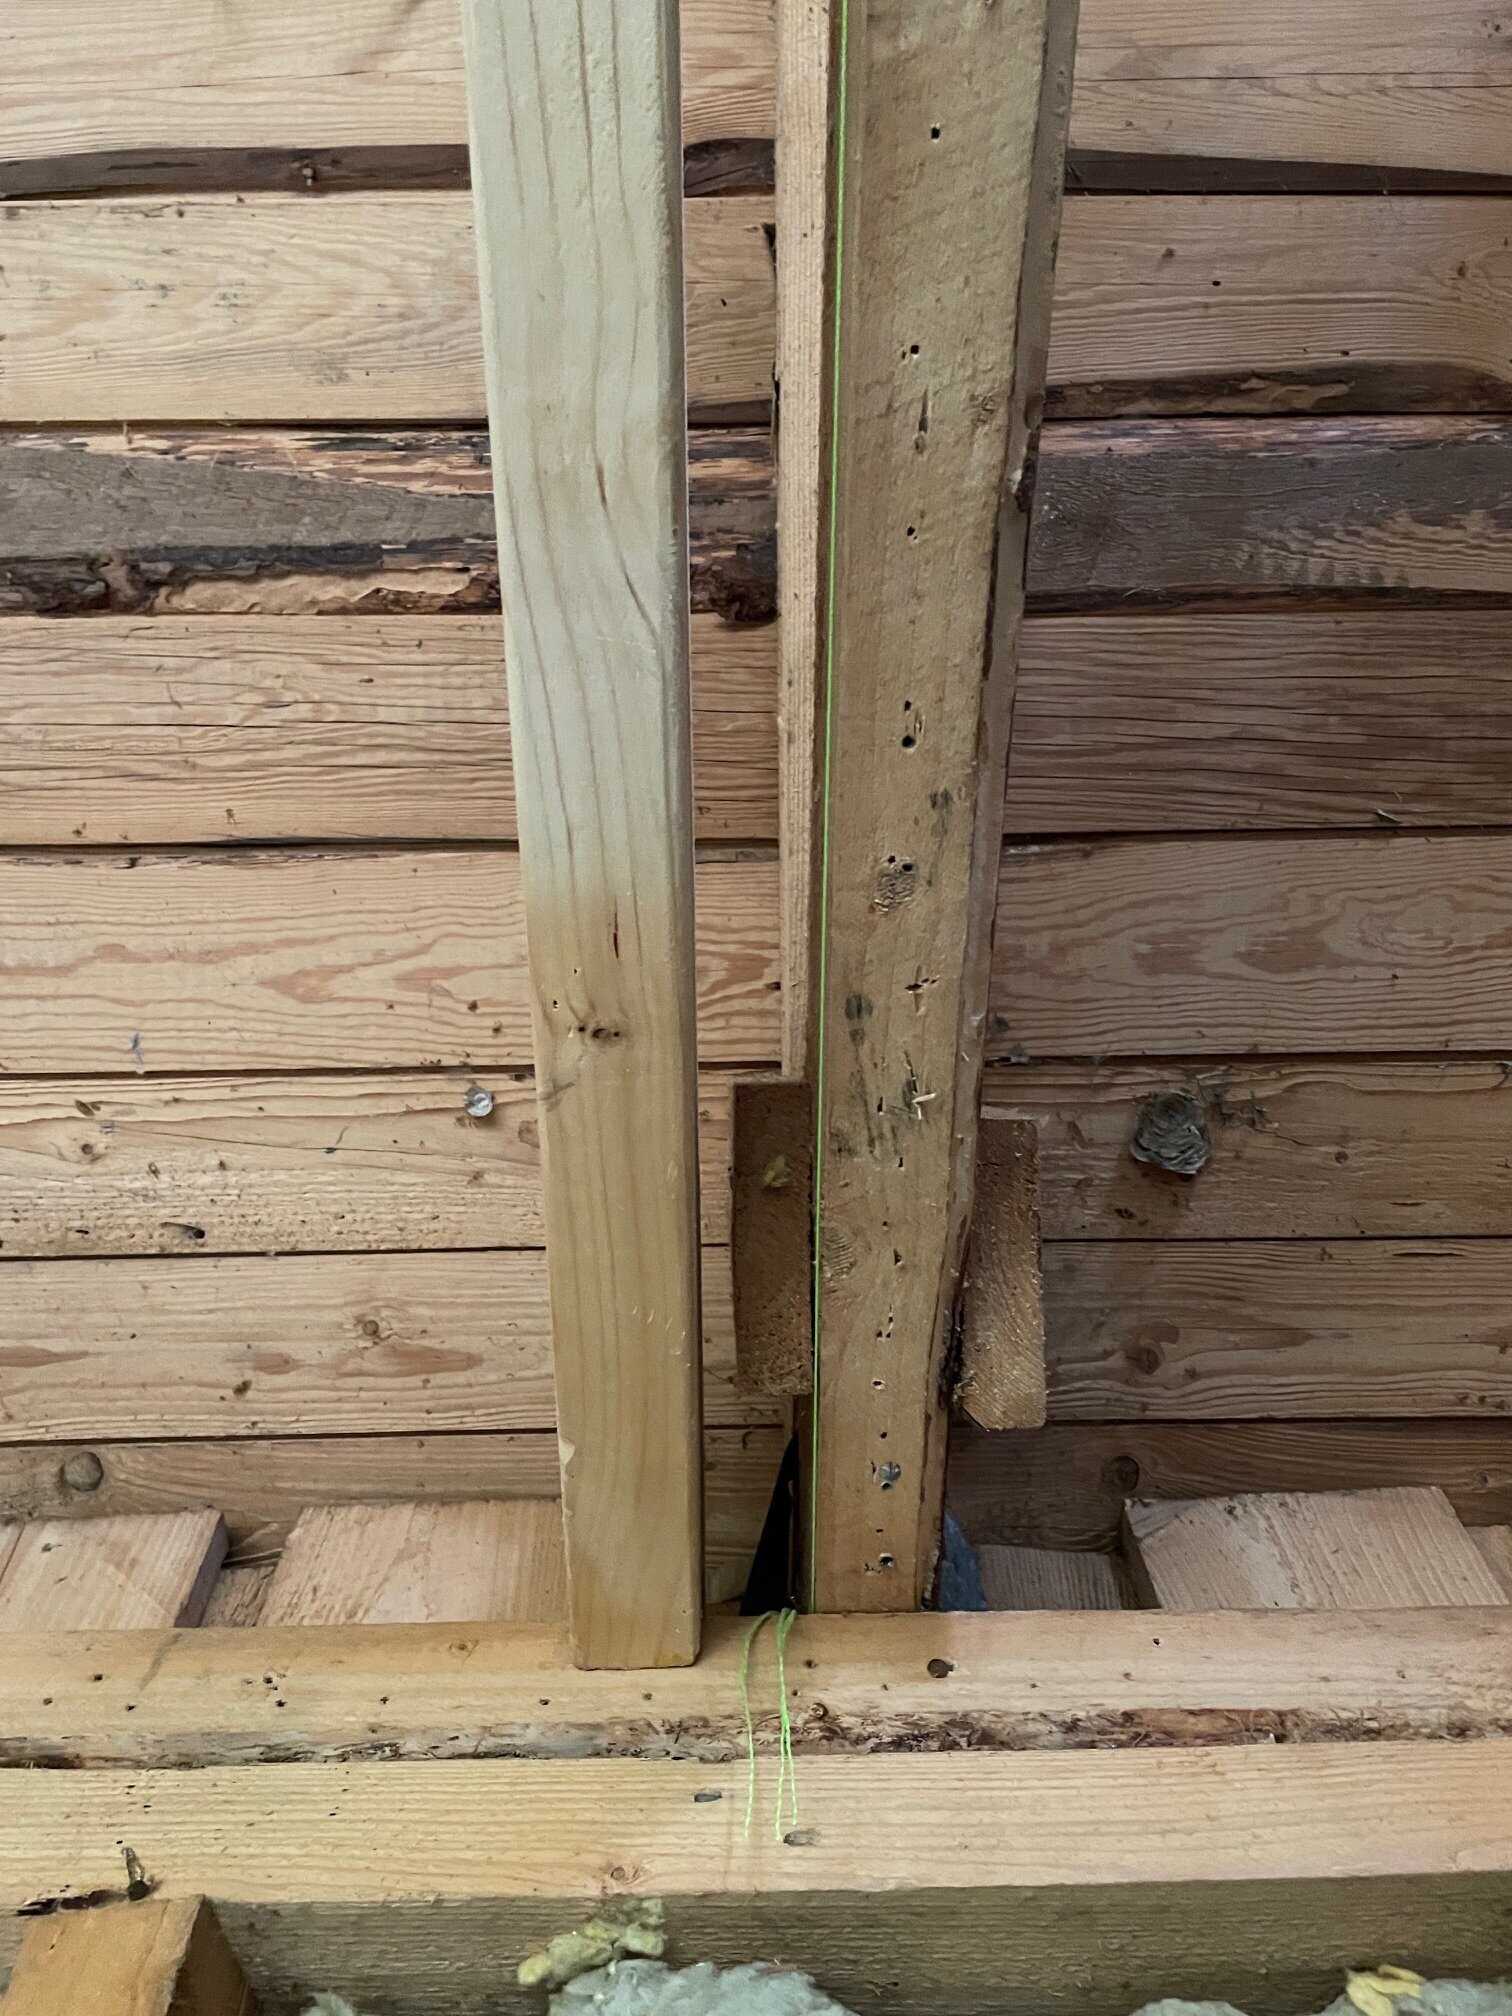
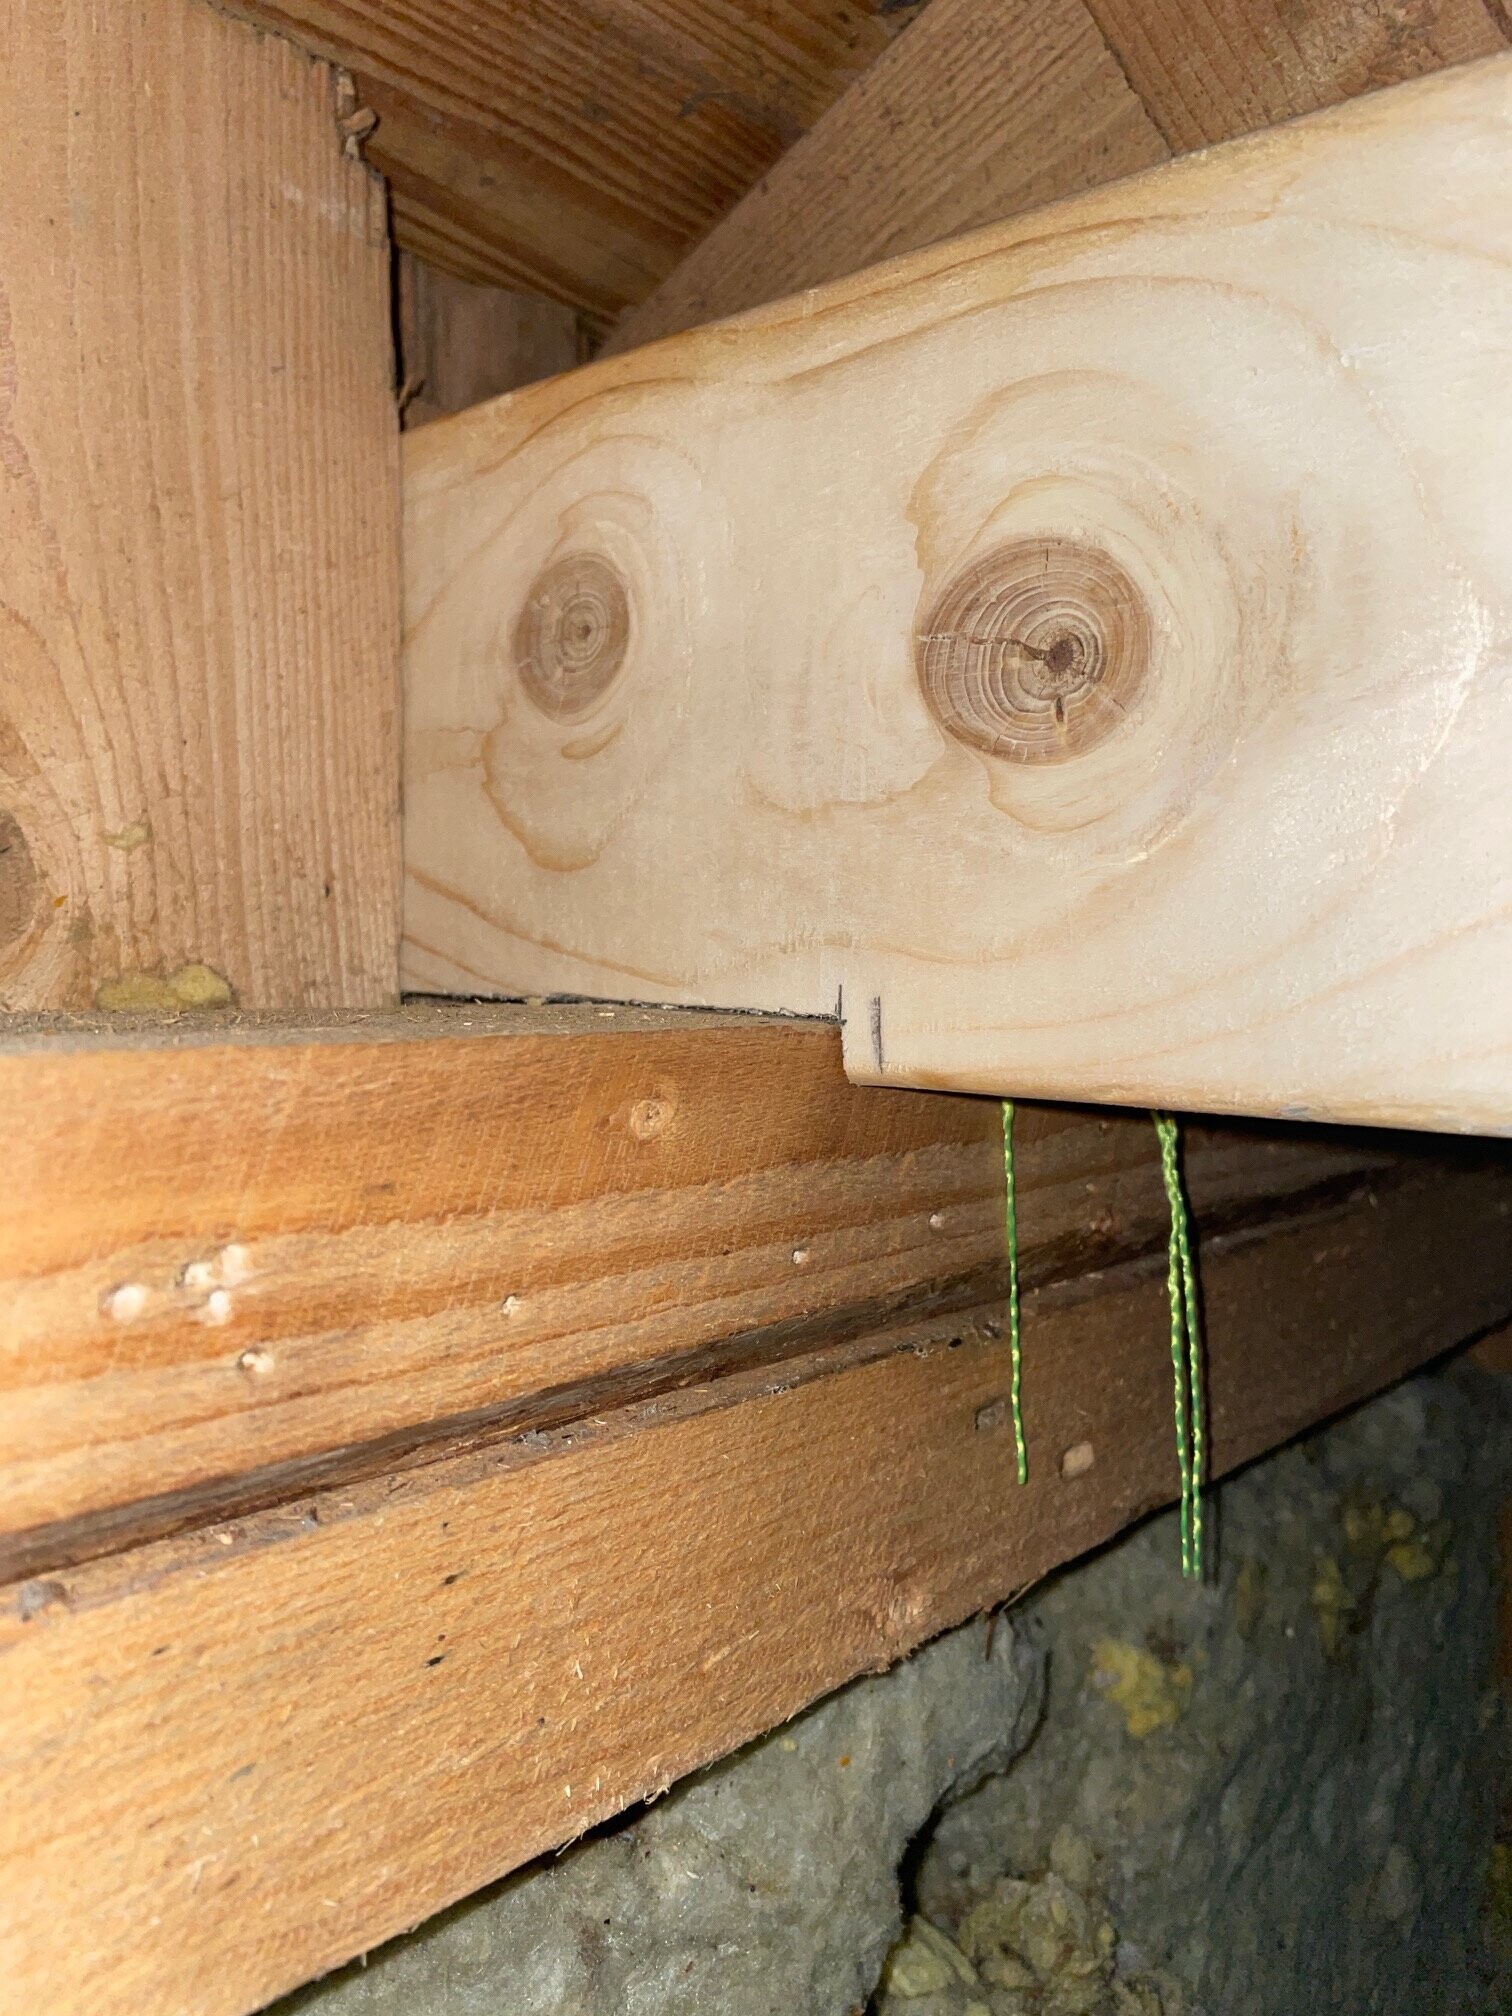
I'm thinking that if I carve out a piece from the beams and then place them in the "frame" (bearing beam? not sure what it's called) they would then reach down below the existing truss beams, allowing me to achieve a smoother finish. See images below.
My thoughts are:
* Is it a good or bad idea?
* Will it support sparse panel, plaster, and insulation? Rule 45x120 C14
* How should I mount it? With angle brackets (orange in the illustration), or screws directly from above or angled screws? Should I also anchor it laterally to the existing truss beam? (thinking it would be less prone to flex?)
Or should I take the timber I bought, cut it into pieces, and attach it to the existing beams to lower the level evenly? (non-scale illustrations).
Gratefully accepting all possible tips and help! A learning project this is.
I would have followed your first suggestion. Then I would have taken at least one size larger beam than the one already there since it has proven to be too weak. Attach the new one with angle brackets and into the existing ones.
I would go with your first suggestion.
Then I would take at least one size larger beam than what's already there since it obviously was too weak. Attach the new one with angle iron and to the existing ones.
Ok thanks! It should hold considering the extra anchoring in the current beam should also prevent flexing.
Do you need an angle iron on each side? Or maybe it's enough on one side (attached on the opposite side at the other end).
Ossian K Olsson said:
[link]
Could this tip help perhaps?
That looked interesting! It would probably be the easiest, but I wonder if it holds enough 🤔 The beams today have a center-to-center spacing of 80-90, so it's narrower than today's standard, which should somewhat increase the strength.
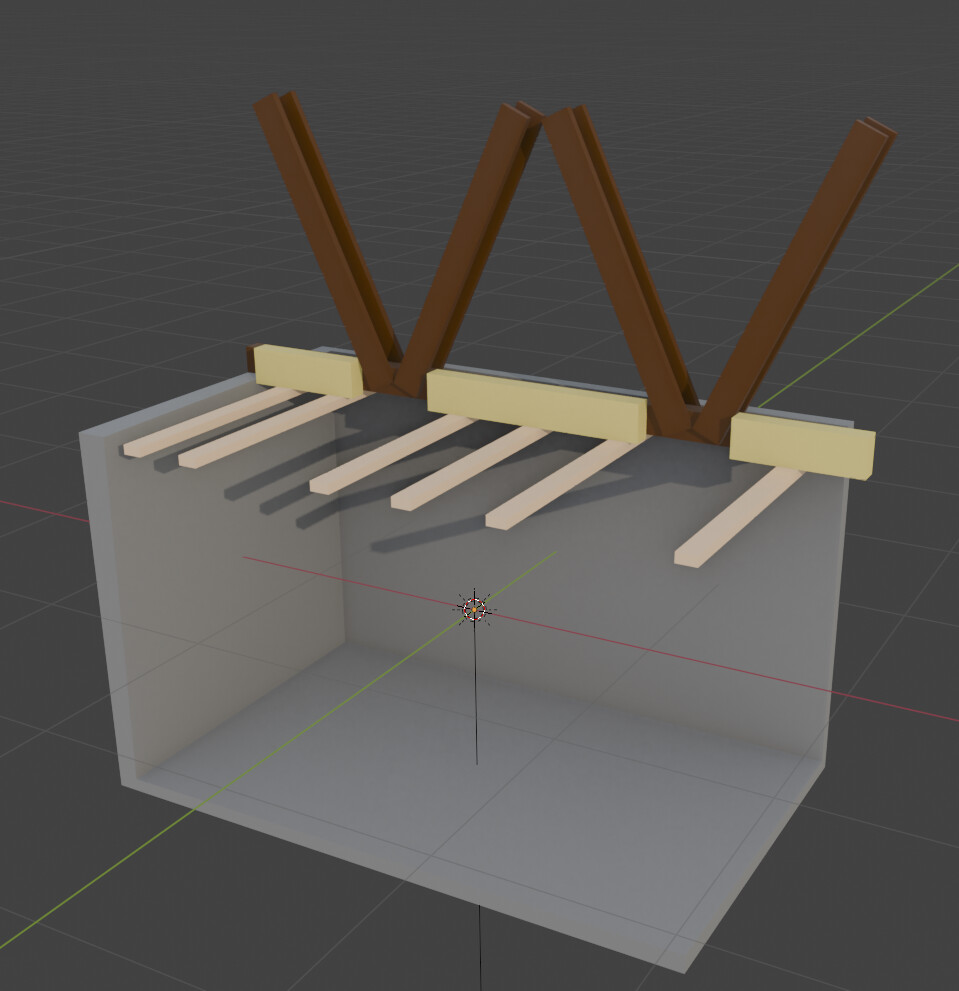
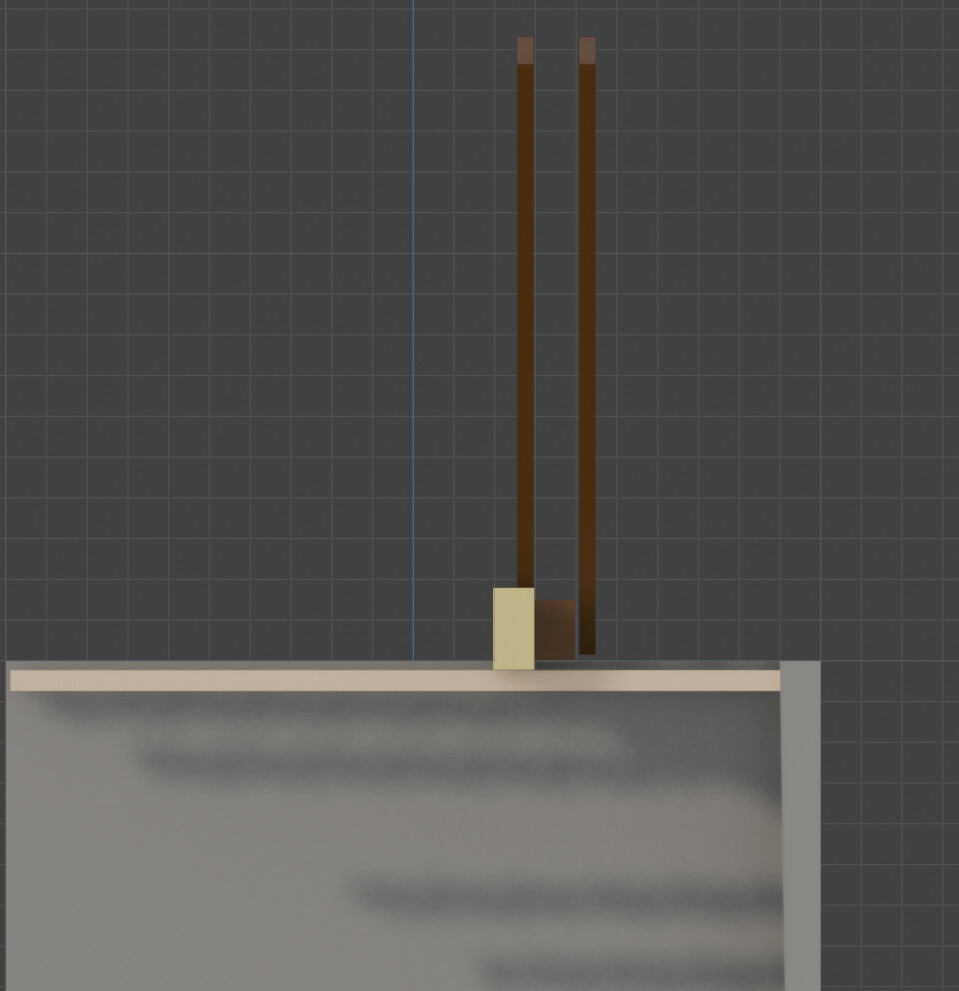
Renovating a summer cottage (as mentioned in previous threads) and preparing for a new gypsum ceiling. Previously, there was a tongue-and-groove ceiling right on the rafters, so I thought of installing sparse paneling. I quickly encountered that the rafters are flexible and also uneven in height in two directions, which means compensating with shims/spacers/washers in two dimensions becomes somewhat of a frustrating project 😅
I then had two ideas; Either plane the existing rafter beams smooth or buy new ones for the ceiling. The former seemed silly for potentially compromising on load safety, so I’m thinking of the latter.
I think that if I carve out a piece from the beams and then place them in the "frame" (support beam? not sure what it's called exactly) that they then reach below the existing rafter beams and therefore I can achieve a more even surface. See images below.
[image][image][image]
My considerations are:
* Is it a good or bad idea?
* Will it hold sparse paneling, gypsum, and insulation? Rule 45x120 C14
* How do I mount it best? With angle brackets (orange in the illustration), or screws straight from above or toe-screwed? Should I also anchor it sideways in the existing rafter beam? (thinking it would be less prone to flex?)
[image]
Or should I take the wood I bought, cut it into pieces, and attach it to the existing beams to lower the level evenly? (non-scale illustrations).
[image][image][image]
Gratefully accepting all possible tips and help! A learning project this one.


Ossian K Olsson said:
Lovensson said:
Hello there!