13,082 views ·
27 replies
13k views
27 replies
Laying chipboard flooring, can the instructions really be correct?
How on earth am I going to get this together?
"Jointing between sections is allowed, minimum length is 900 mm and each board must be fastened to at least two joists."
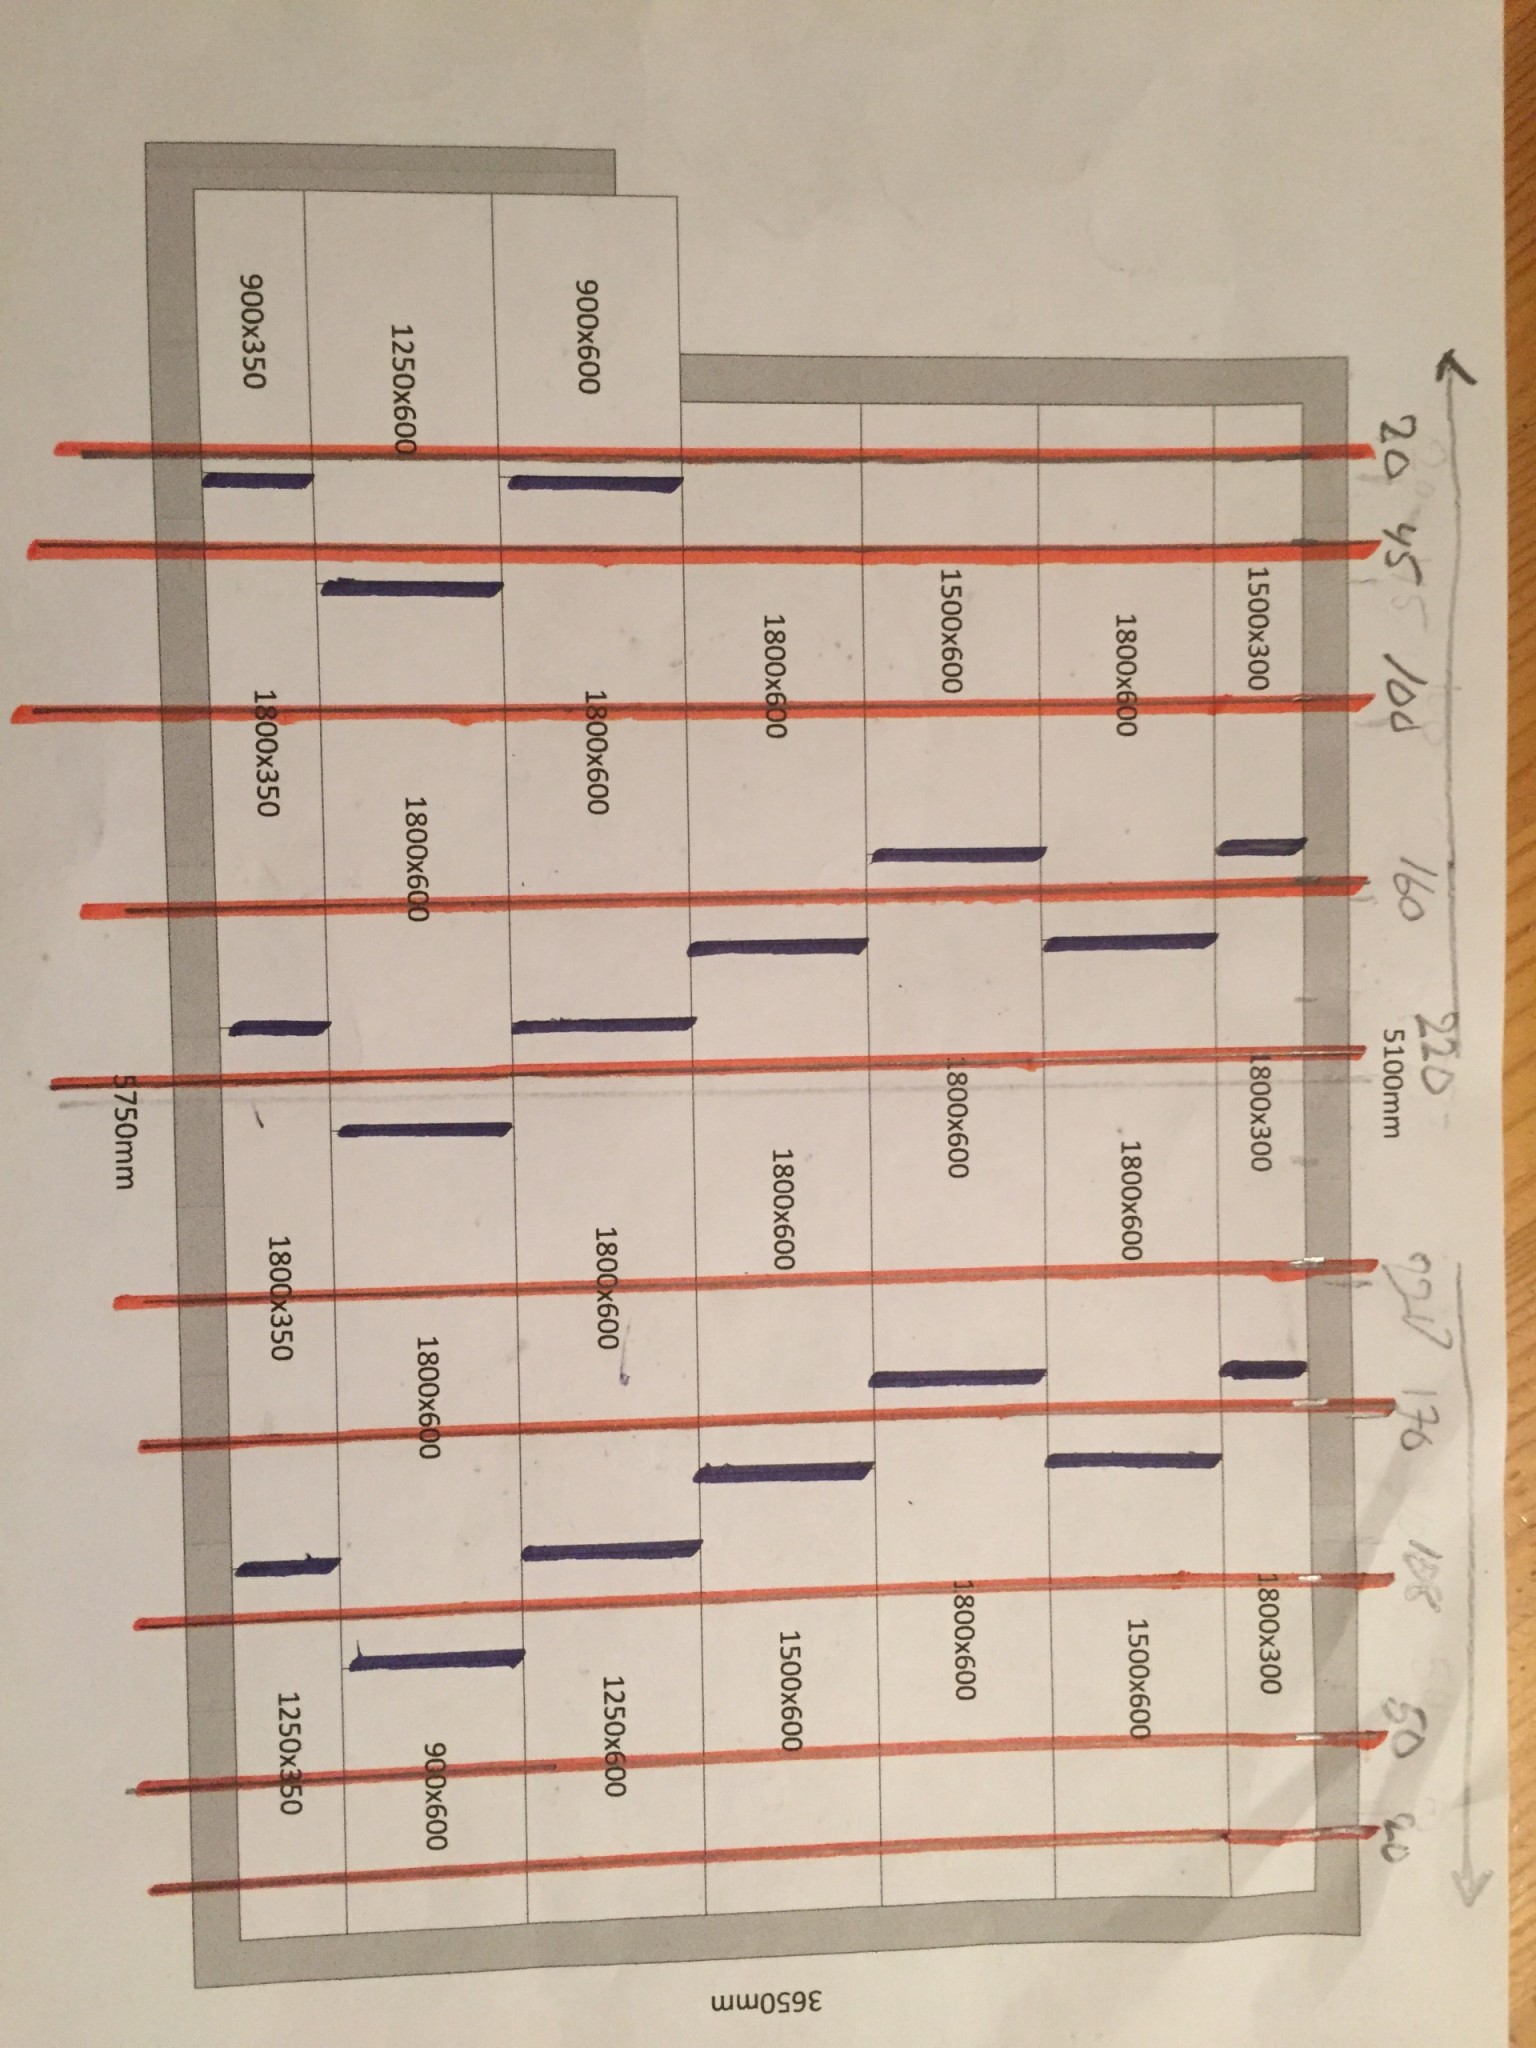
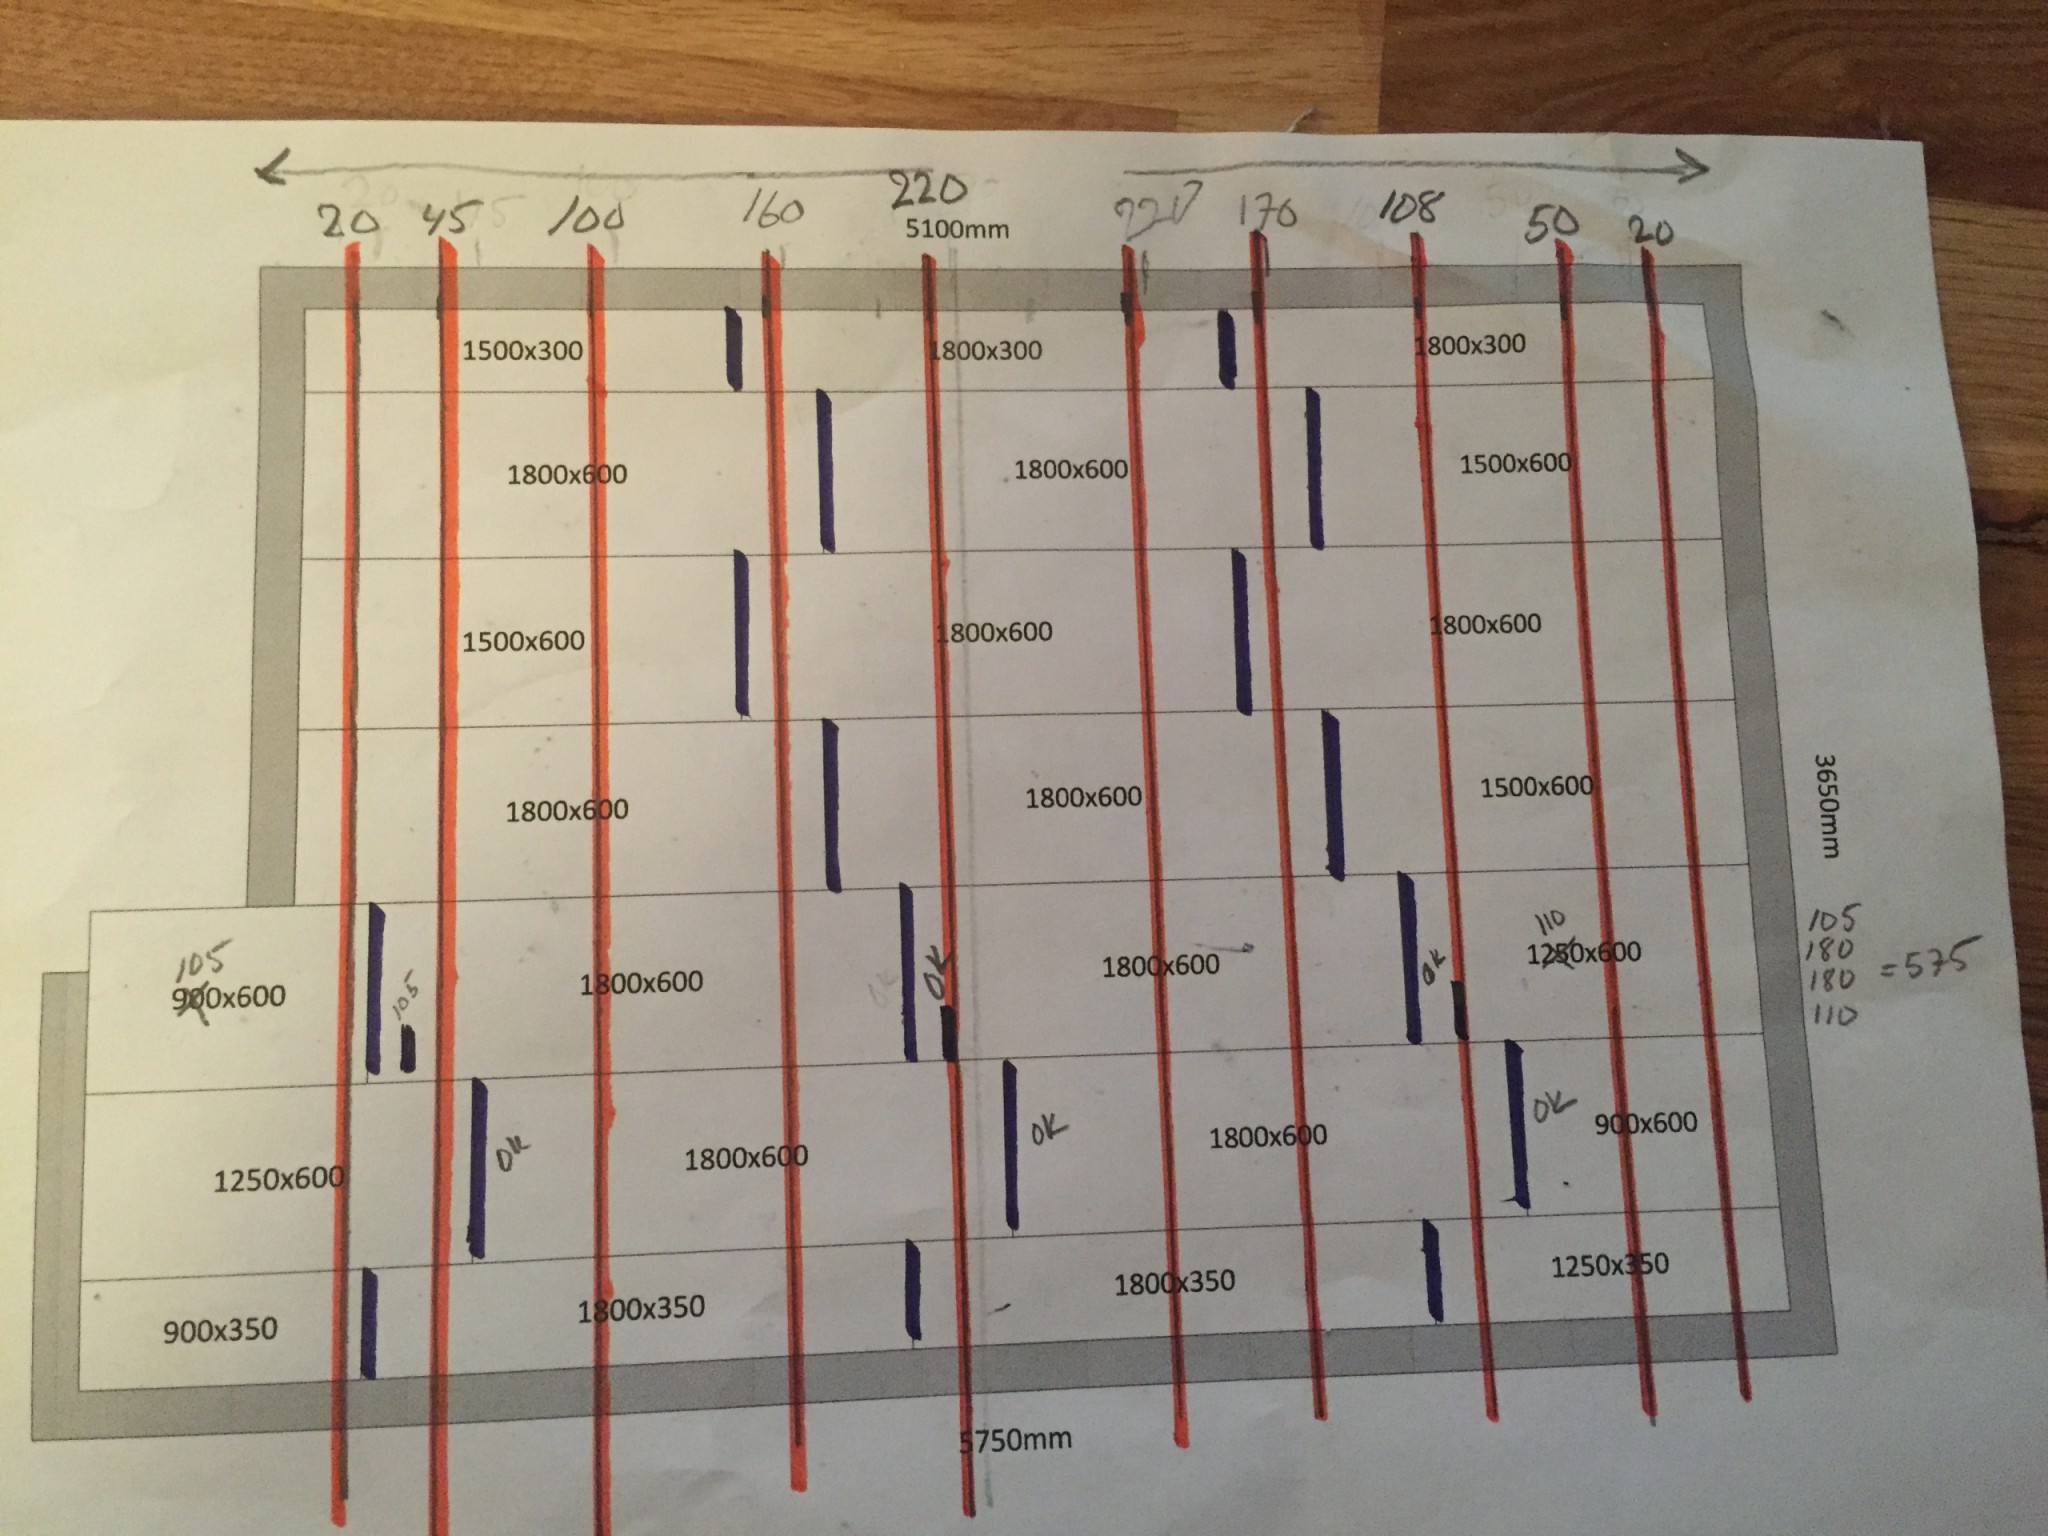
The floor is 510cm long and if I start with a whole board, it'll be 180+180+180=540. Then I can't start the next row with that piece if the minimum length is 90cm. If I cut a board in half, it's 90+180+180=450cm, meaning the last piece will be 60cm, which is too short according to the instructions. Did they make a mistake, or what? According to Elitgolv's instructions, the minimum piece is 200mm, if I understand it correctly. The floor is from Hornbach, Kronospan. Same as Byggmax, I think.
"Jointing between sections is allowed, minimum length is 900 mm and each board must be fastened to at least two joists."
The floor is 510cm long and if I start with a whole board, it'll be 180+180+180=540. Then I can't start the next row with that piece if the minimum length is 90cm. If I cut a board in half, it's 90+180+180=450cm, meaning the last piece will be 60cm, which is too short according to the instructions. Did they make a mistake, or what? According to Elitgolv's instructions, the minimum piece is 200mm, if I understand it correctly. The floor is from Hornbach, Kronospan. Same as Byggmax, I think.
You get 30cm waste per row.
30/510 gives 5.8% waste.
180 + 180 + 150 = 510
150 + 180 + 180 = 510
If it says so in the instructions, then that's what applies.
But if you are building for yourself, you can always make exceptions.
But have you calculated how many boards you would save on that floor by doing it "wrong"?
Are there 240 boards from the same supplier?
It's going to be a maximum of 2 pieces so I can take that, they weren't that expensive. Yes, they were available in 240 lengths too but now they are purchased and brought inside the house, so it will probably be fine.
This is how it will be with that division. It will only be 6cm on the last row so maybe you should start by length-splitting the first row? I don't know what the minimum width is.
Here are the instructions
")
As I see it, that's not the whole idea, but it is approved and fully possible. In a modern house, you usually run at cc600 and then, of course, you place all the joints over the joists. In an older house, it's rarely exactly cc600 over all the joists, and then it becomes best effort. But as I said, it is fully possible to place joints between the joists if needed, but I don't think it is either desirable or "the whole idea." It's just possible to make it somewhat practical, economical, and quick to lay the flooring in most conceivable spaces.Peter_K said: