12,076 views ·
12 replies
12k views
12 replies
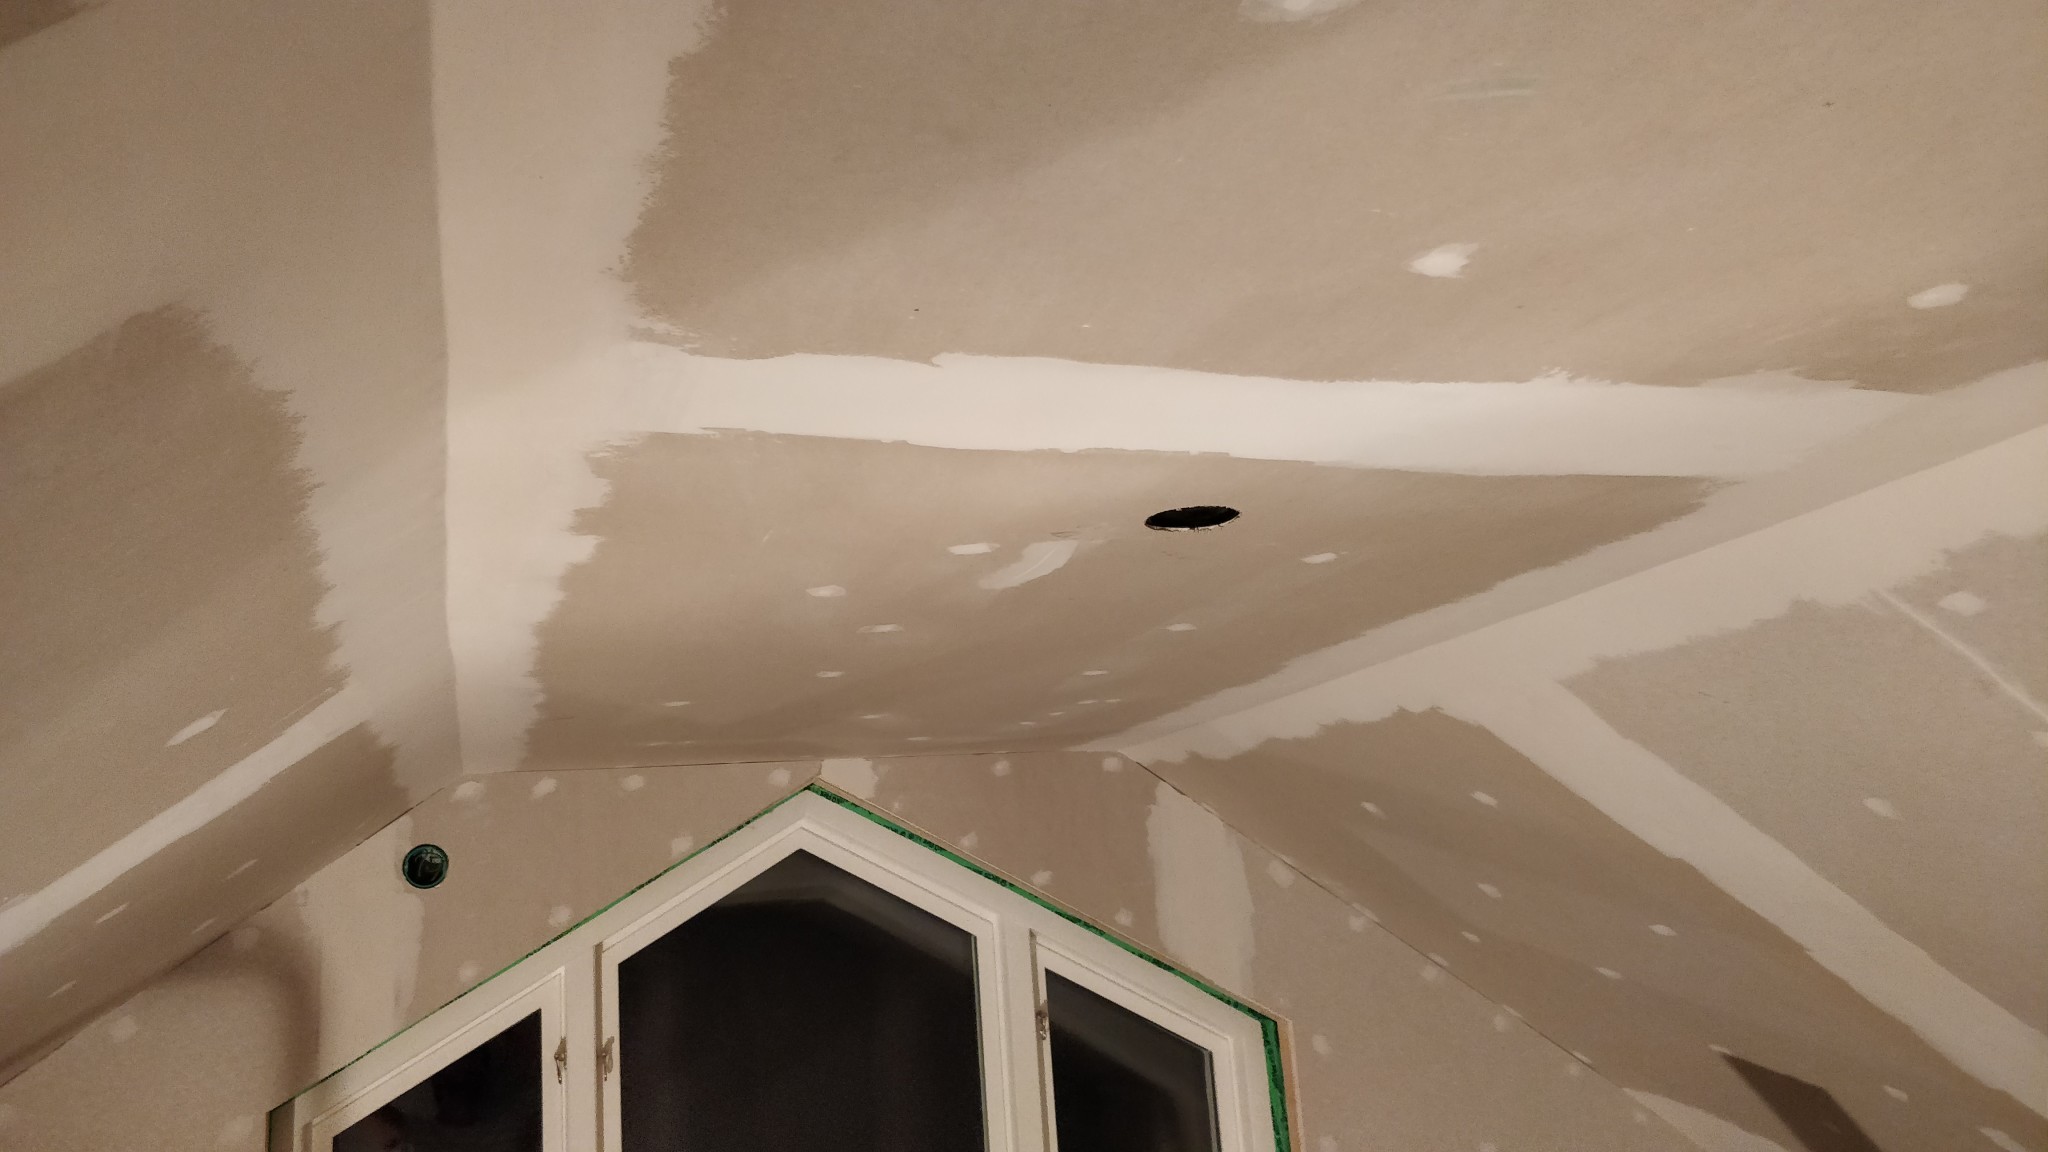
How to plaster a nice angle ceiling-sloping ceiling
Working on my second bedroom on the upper floor with a sloped ceiling (38-degree pitch). In the first bedroom, the angle turned out so-so; if you look along it, you can see it snaking. Now the second bedroom is becoming the same, see picture.
I've used fiberglass tape and then plaster with a putty knife perpendicular to the joint from both directions.
Any tips on how to make it look nice?
I've used fiberglass tape and then plaster with a putty knife perpendicular to the joint from both directions.
Any tips on how to make it look nice?
Best answer
I usually place the plaster in the same direction, now it’s too late.
If you have a laser or string, set it in the seam, then use a stop as a guide for plastering, a straightedge or a longer level to align after the string/laser.
Otherwise, it works perfectly with wide filler directly, work from the middle of the alignment mark in one direction, start in the middle again and pull in the other direction, this will give you a sharper break that is straighter, in other words, work in the opposite direction, not along the seam/break.
Regards, P-A
That it wobbles is probably due to an unevenly thick layer or a slightly poor fit on the boards, usually resolves eventually. It's just unfortunate when it happens.
Best to sleep on it, not so effective at night anyway even if that's the only time you have...
Best to sleep on it, not so effective at night anyway even if that's the only time you have...
I was apparently bad at following up on the advice I received (and even following it  ).
).
I mostly struggled with a wide putty knife (starting in the corner and spreading outwards). It turned out better than the first room but far from perfect. However, it's mostly visible in raking light so I don't think much about it, plus it has cracked in some places too
).I mostly struggled with a wide putty knife (starting in the corner and spreading outwards). It turned out better than the first room but far from perfect. However, it's mostly visible in raking light so I don't think much about it, plus it has cracked in some places too
Thanks for the feedbackD Dsl said:I was indeed bad at following up on the advice I received (and even following it
I mostly struggled with a wide putty knife (starting in the corner and pulling outward). It turned out better than the first room but far from perfect. However, it is mostly visible in glancing light so I don't think about it much, plus it has cracked in some places too
I have myself acquired a laser which I placed along the straightest part of the seam, and after a moment of studying, I realized which of the drywall panels were set higher/lower. My plan is to cut along and create a new straighter line. We'll see if it succeeds,
Angle profile NORGIPS perforated LP50 3000mm https://www.hornbach.se/p/vinkelprofil-norgips-perforerad-lp50-3000mm/5509170/R Rompompom said:
Available in all hardware stores.
It is a flat sheet that has holes where it bends/folds, so the spackle will not adhere to the smooth sheet. You need to fill in with something like gypsum mortar so that the angle becomes correct and then glue on a paper strip or something like microlit fabric in the angle, which is then spackled with regular spackle.
Click here to reply
Similar threads
-
Hur snyggt ska spacklat golv bli?
Golv -
Spackla takvinkel, går det?
Färg, Måla & Tapetsera -
Snygg övergång staket med liggande brädor vid vinkel?
Trädgård allmänt -
Snyggast lösning på nockplåt i vinkel
Tak & Vind -
Hide nail plate angle or are there nicer angles
Building Materials and Construction Technology