I had no tools. Just placed the mold on the gravel. Poured in cement... then took a wooden stick and stirred around a bit and tapped on the mold. Then when I lifted it up, it was broken in three places.
What should one calculate for drying time before you can walk on it, if you start pouring outside now. About 10 degrees during the day
I would wait until next weekend. I don't know where you live, but here in the Gothenburg area we've had freezing temperatures at night recently. It's unnecessary to risk it freezing before the concrete has set properly. But it should be walkable after 3-4 hours from when you pour. If it's sunny and a bit windy, then faster than that. Add a few more hours and you can use the path without problems, without having to be careful.
Start today to dig up my old stones. I will take the opportunity to widen a bit.. There is grass there now. Do I need to rent a compactor and flatten it or is it enough to roll over the soil a few times with that heavy roller you pull in front of you? Can't remember the name now. Older model.
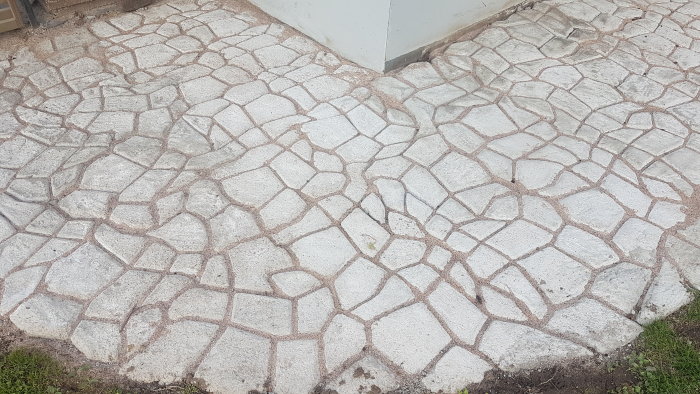
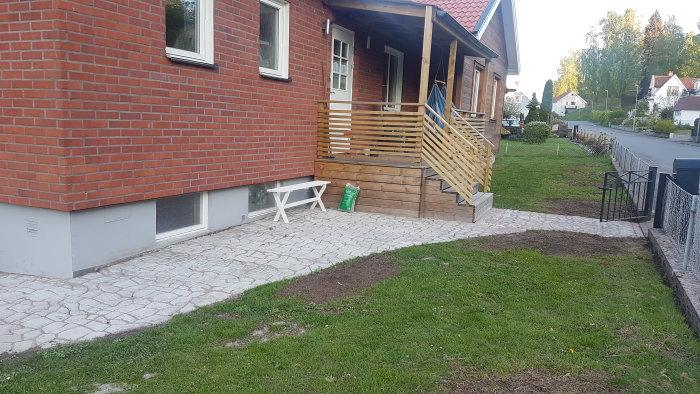
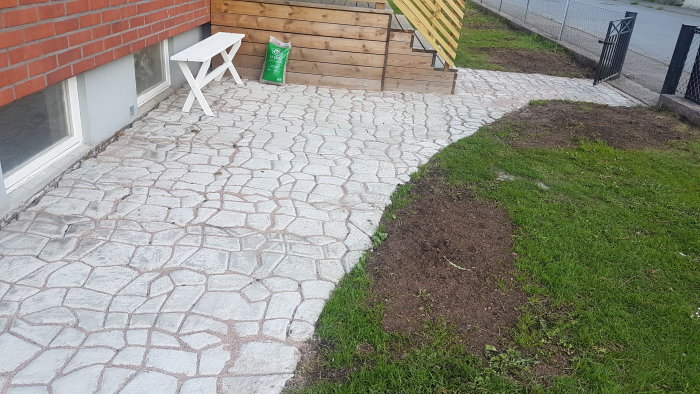
Hi, I just wanted to provide some feedback. Overall, I'm very satisfied. I used a bit more cement than I expected. But apart from this, I'm really happy. Where there were awkward angles, I poured out cement without the mold. Then when it started to set, I took a stick and shaped stones from it myself. The joint sand was really the finishing touch.
The molds were purchased at Jam o Fix. I used two molds the whole time. Unfortunately, the quality was super poor; the first one cracked immediately, but I fixed it with duct tape. The other frame was cracked in three places when I opened the box, but even here, tape could be used.
It turned out so well!! I will try it myself; how much cement did you use in the end? What did you put between the stones? Is it stable?
Jjonaslatt said:
Hi, I'd like to give a little update.
Overall, I'm very satisfied. I ended up using a bit more cement than I thought. But aside from that, I'm very happy.
Where there were awkward angles, I poured cement without the mold. Then when it started to set, I took a stick and shaped stones out of it myself.
The joint sand really was the icing on the cake.
The molds were purchased at Jam o fix. I used two molds the whole time. Unfortunately, the first one had super poor quality and cracked immediately, but I fixed it with duct tape. The second frame was cracked in three places when I opened the box. But even here, duct tape worked.
[image] [image] [image]
Hi, thought I'd follow up a bit.
Overall, I'm very satisfied. I used a bit more cement than I thought. But other than that, I'm very satisfied.
In areas with awkward angles, I poured out cement without a form. Then, when it started to set, I used a stick to shape stones myself.
The joint sand was really the icing on the cake.
The molds were bought at Jam o fix. I used two molds the entire time. Unfortunately, the quality was super poor; the first one cracked immediately, but I fixed it with duct tape. The second frame was cracked in three places when I opened the box. But even here, I managed to use tape
[image] [image] [image]
I'd also like to know the cement usage.
I'll be attempting this myself soon
Unfortunately, I can't answer how many bags were used.
This summer, weeds unfortunately started coming up between the tiles. (as always) unfortunately.
I bought sand to put between the tiles. It may have been called fog sand at byggmax. Next year I will try to wash everything off, so it'll probably be one or two bags of new fog sand again then.
But the tiles hold up very well.
I had to lift a few tiles to move the robot loop a bit, but it went well to put the tiles back again.
Then you can consider that the robot found it a bit harder to go over the uneven tiles. Sometimes it stops because it thinks someone lifted it because of the slightly uneven surface. Between the stone and fog.
Dusting with a little cement at the bottom before pouring makes it like dry cement and hard, more cement and weeds have difficulty rooting by going down between as it is like concrete down the seam. Of course, this means that what is cast bonds to the bottom and it can be difficult to remove a single piece. Just choose for yourself.
Vi vill skicka notiser för ämnen du bevakar och händelser som berör dig.


")
