I cast a footing on rock and then built with leca to create a crawl space for an extension. It was a hellish job, I can tell you, but it turned out well. The rock was quite uneven with a height difference of about 80 cm between the highest and lowest point. There might be easier ways, but here is how I did it in broad strokes:
1. Measure the foundation with strings between posts placed a bit outside the planned extension. Drop plumb lines down to the rock and mark where the footing should be.
2. Bolt 2x5-inch beams to the rock with anchors on the inside and outside of the footing. Remember to add the width for form plywood, or the cheaper variant OSB. The beams should be in shorter lengths, adapted to the way the rock rises and falls. They don't need to follow the rock perfectly and can be a decimeter away in places. The beams should at least touch the rock every 1 to 1.5 meters to attach anchors.
At this stage, drill holes in the rock for dowels. I drove in regular rebar pieces, but nowadays you probably should use stainless dowels.
3. If you have height differences like mine, cast the footing in different levels (steps) to avoid casting too much. Adjust the length and height of the steps to match the length and height of the lecablocks. Nail vertical beams and a crossbeam at the finished level of the footing. In some spots, the footing is low (1 decimeter) and doesn't need bracing. Where it's 30-50 cm, it must be braced. I just nailed a board across the top of the form, making it steady enough for me. For longer stretches with a large height, you'll probably need to brace conventionally with braces on the outside.
4. Place a piece of form plywood on the rock against the beams. Follow the rock's form with, e.g., a wooden block and mark on the plywood with a pencil. Cut out the contour with a jigsaw and test against the rock. Mark the top of the form and cut off. Screw the plywood to the beams and voilà, you've made at least a couple of meters of the form.
I used OSB instead of form plywood, and it worked where the form was low. Where it was high and I placed vertical beams too far apart, you could see that the OSB had softened from moisture and bulged after casting. It didn’t matter as it wasn’t in a visible place.
5. I mixed concrete in a regular concrete mixer, which worked well, but it was hard work to shovel gravel, wheelbarrow full of concrete, and then tamp the concrete by hand. I used a bar or broom handle to tamp the concrete instead of a vibrator. It worked well, except in one place where I had cast against the old house foundation, and it was 10 cm narrow and 80 cm deep. You could see air pockets in some places where the concrete hadn’t flowed out to the form.
6. Remember that you may need to build a support wall if the free span of the wall is long. Then you'll also need to make a footing for that section.
Good luck
/Dymlingen
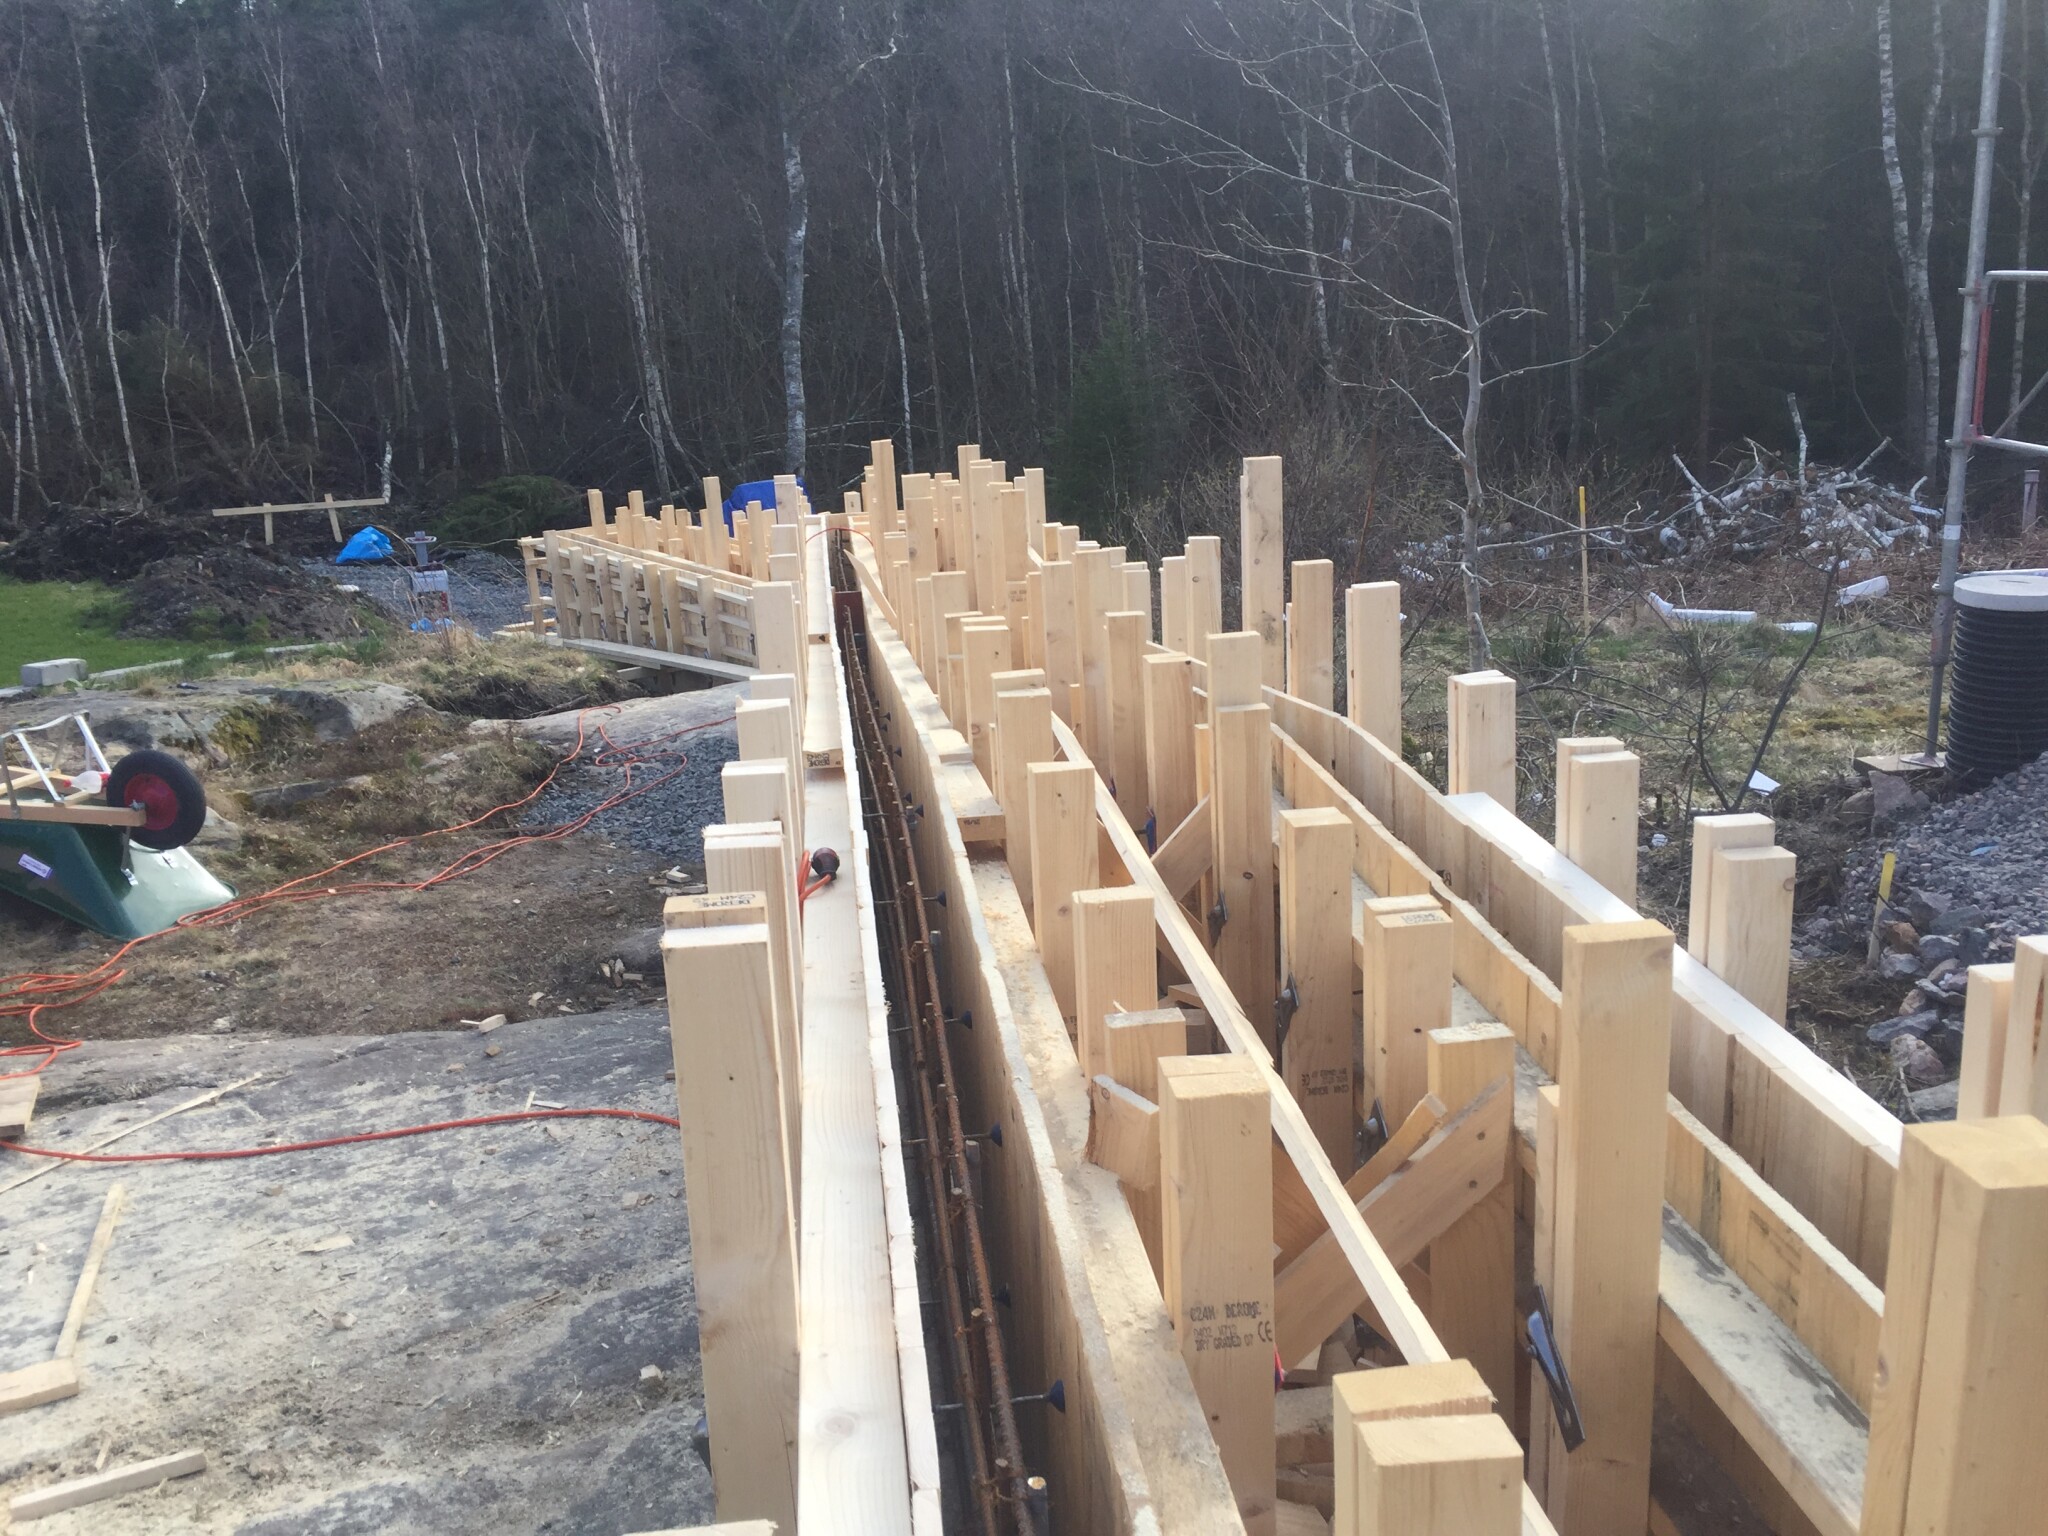
Here is a picture of our mold directly on the rock. We used Formplyfa where the rock was smooth, and standing timber where there was a significant difference in height. Sure, a little concrete leaks out here and there, but you can seal all the cavities with thicker concrete before you finally fill the mold.

A picture is worth a thousand words.
The shape is very similar to the one I built, except I made more steps to avoid casting so much. If you're ordering concrete, it doesn't matter, and I would probably cast it a bit higher. Concrete feels more stable than lecablock.
Having lecablock below ground level also feels worse than concrete. I had leca below ground level, and in that case, it's important to plaster the outside, apply a platonmatta, and ensure proper drainage and gravel outside. Otherwise, there's a risk of the foundation being damaged by frost heave.
/Dymlingen
When I read Dymlingen's post, it almost felt like he/she had been involved in building my form ")
A small note might be: It takes much, much longer to set up the form than it does to cast. A professional might set up a form quickly, but as an amateur, I had to think quite a bit.
A small note might be: It takes much, much longer to set up the form than it does to cast. A professional might set up a form quickly, but as an amateur, I had to think quite a bit.
Spend a lot of time on the form. If it fails during casting, you're not very confident. There are construction guidebooks from Liber on how to build a casting mold. I haven't followed the textbook completely. You need to be careful with the outer corners so they don't pull apart. When casting some heights, there will be considerable pressure on the form at the bottom - I've learned. When we made a gate post, the form cracked at the outer corners. We just had to hang down into the form and scoop out the concrete. Luckily, we had three wheelbarrows available.
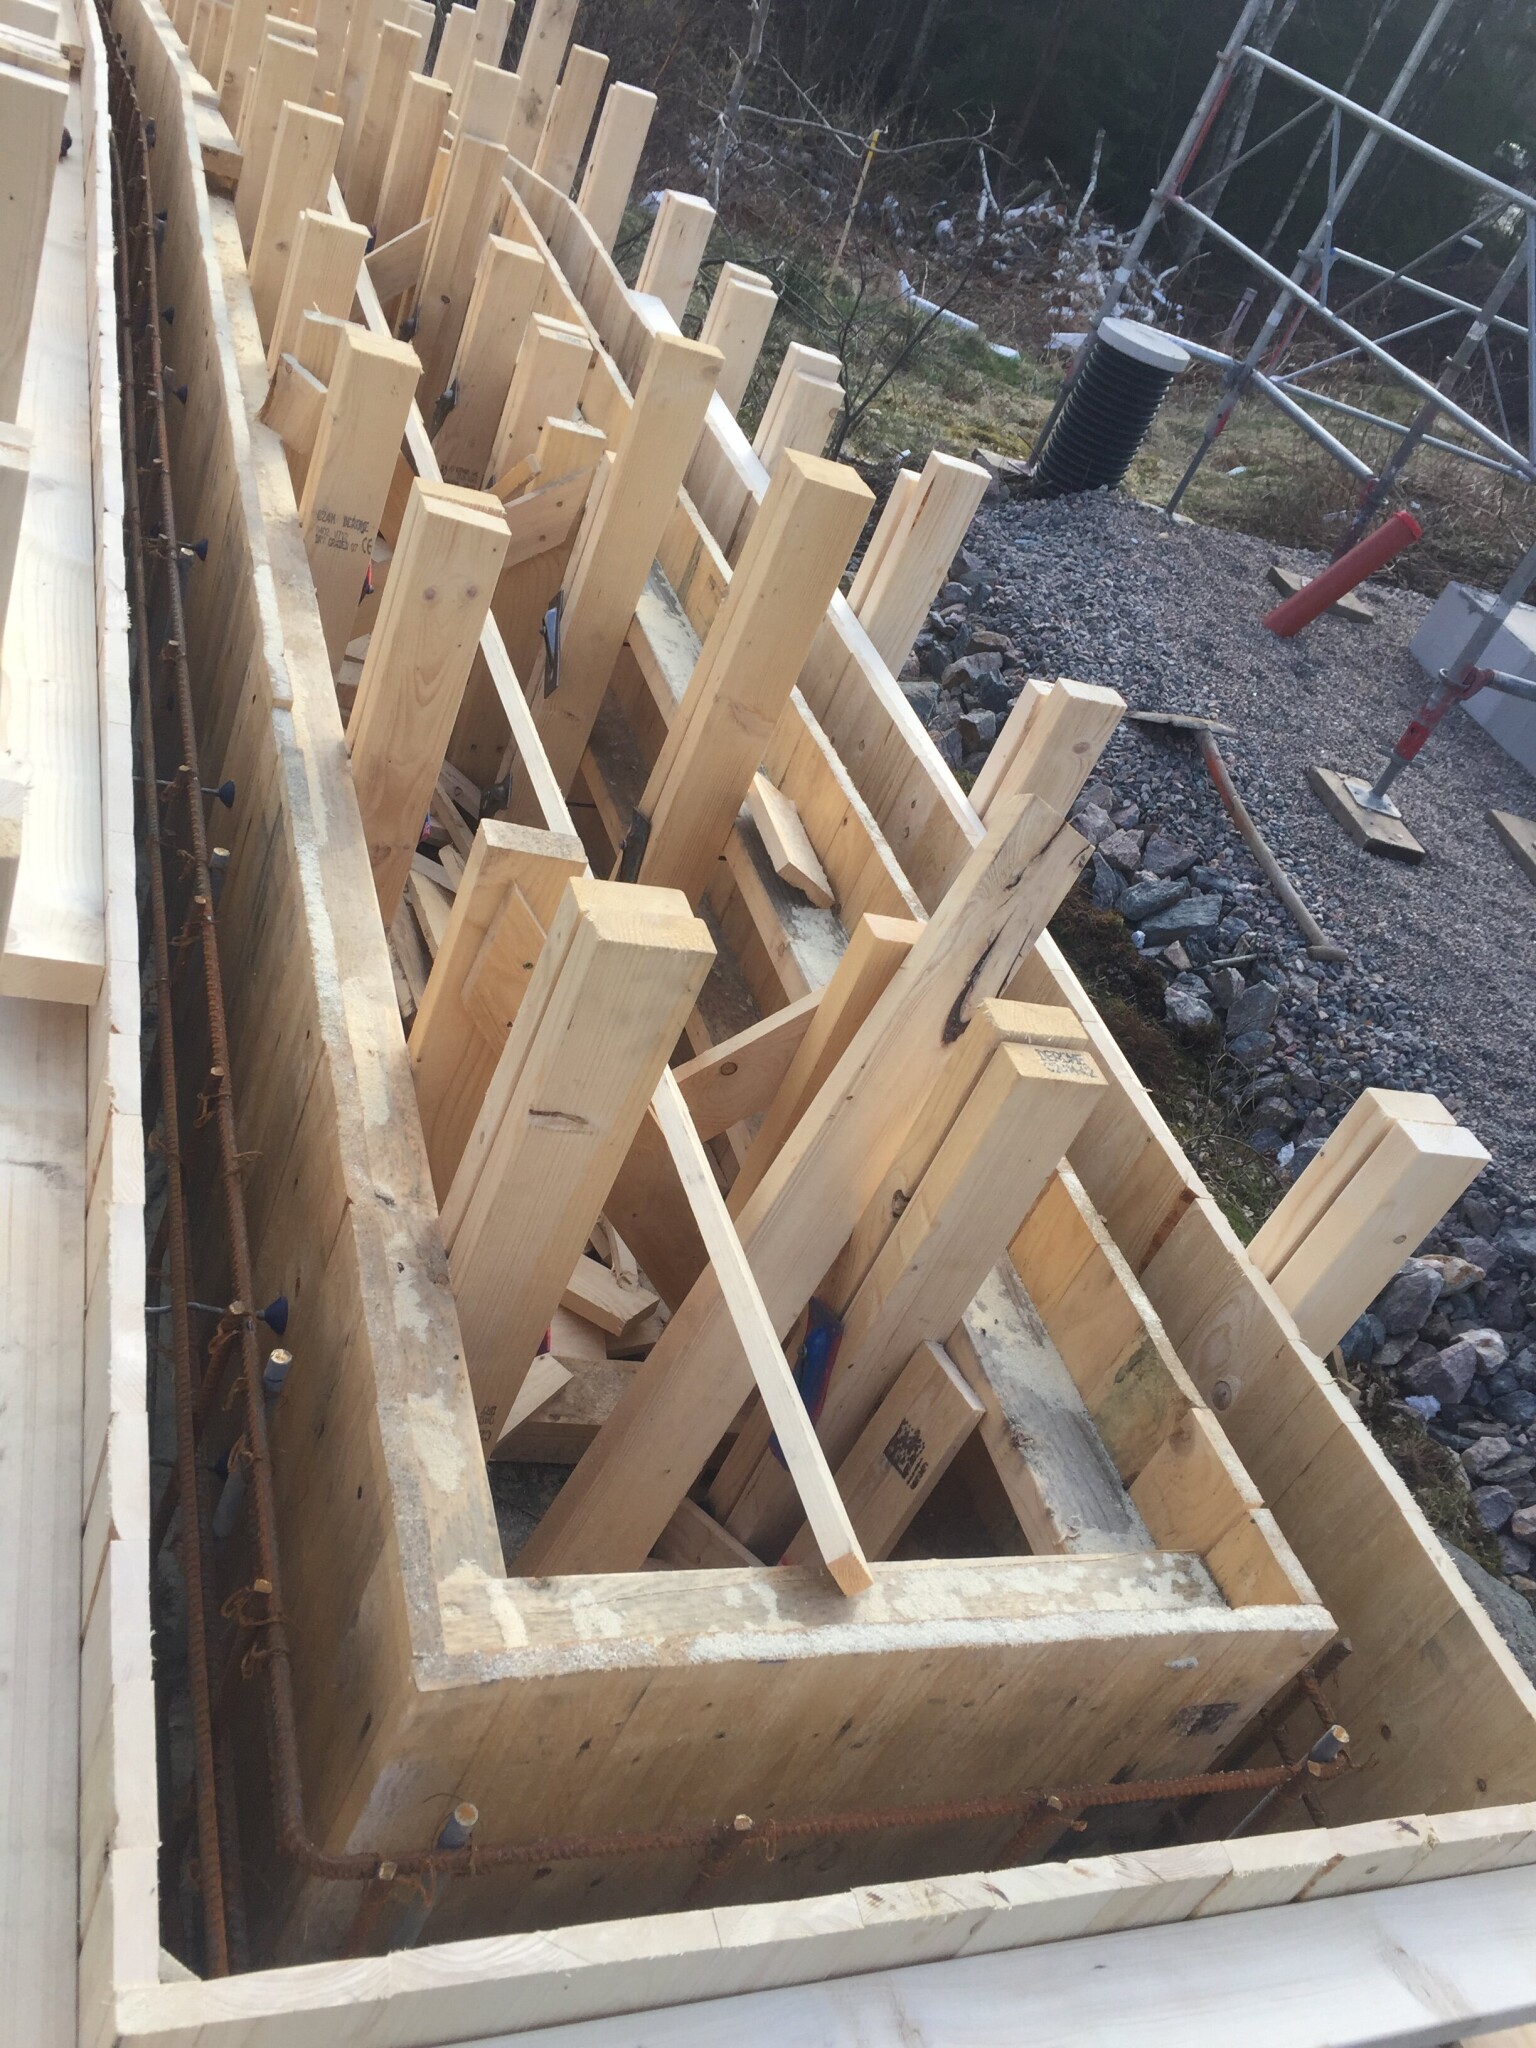
This is NOT how a casting mold should look:

Weak wood, among other things, but you usually learn from your own mistakes.
This is NOT how a casting mold should look:
Weak wood, among other things, but you usually learn from your own mistakes.
A triangular strip in the corners (inside) would have done the trick, and perhaps the gate post would have had softer corners.Fasting65 said:Spend a lot of time on the form. If it collapses during the casting, it's not so great. There are construction guidebooks from Liber on how to build molds. I haven't done it exactly according to the textbook. You should be careful with the outer corners so they don't pull apart. If you pour a little height, there will be considerable pressure on the form at the bottom - I've learned. When we made a gate post, the form cracked at the outer corners. We just had to get inside the mold and scoop out the concrete. Luckily, we had three wheelbarrows available.
So this is NOT how a mold should look:
[bild]
Weak wood among other things, but you often learn a lot from your own mistakes.
Dymlingen's post is good and instructive. But it is a far too cumbersome way to do it.
Measure where you want the wall and widen out 10-15 cm on either side of it. This gives you a bit of margin to work with.
Clear down to the rock and rinse the surface. (Concrete must not adhere to an unclean rock surface.)
Drill dowels (which are not really dowels, a dowel is placed in the expansion joint and a dowel set in rock) according to Dymlingen's description if the slope is steep. (It's fine to dip regular rebar (fi 16-25 mm) in cold tar and set them down.)
Then pull a string along the wall level with the top edge and use this as a starting point for the rest (or use a laser on a tripod). If you measure down to the highest point, you can form straight to that height at the bottom edge. Below that, it will be fitting.
If you are using panels, set the top edge to be level (It doesn't matter if the panels stick up higher than the top of the wall. You can do a nail leveling inside the form to pour against to avoid unnecessarily damaging the panels.) and trace the contour of the rock at the bottom edge in the same way as when laying the last board in a parquet floor against a wall and sawing with a jigsaw. On the outside, you should have vertical studs 2"x4" cc 400. Outside them, double horizontal studs 2"x4" one-third the height above the bottom p.b.s. Between the horizontal studs, tension form ties of 6 mm round bar with form locks (a plate with a wedge-shaped slot, or a plate with a round hole and a wedge in an affixed U-bracket) if the form is high. (You have to drill through the panels.) Otherwise, the form will bow. If it is low, you can simply nail a board across between the vertical studs. At the bottom, fill with soil against the panels. It doesn't take many decimeters to seal and withstand the pressure. (So no bolted 2"x5" plank that you then have trouble removing. Just tear down the form and pull up the panels.)
If you are using form boards, they should be horizontal, and the studs outside them vertical 2"x4" with double 2"x4" outside them on both sides (as above). It is still easiest to form the upper part first and fit the lower (with an axe). Again, ties between the horizontal studs if the form is high, otherwise ties between the vertical ones in ök.
The pressure in a standing form is greatest one-third above the bottom. It can increase if a vibrator is involved in the casting. It is even possible to explode a form, regardless of how it is built, through clumsy handling. Therefore, the third-height is crucial for forming. Ties through the form at that height are then a safer bet than bolting studs at the bottom and tying the form together with ties at the top. As a rule of thumb, a form up to half a meter in height can manage with backfill at the bottom and ties at the top. If it's over 50 cm in height, one must use double horizontal studs one-third above the bottom and ties through between them to prevent it from bowing.
_______________
Byggaren
Hello,
An old but very relevant thread for our project.
Could someone help explain post #12 (which I believe is the best answer to the question)?
I don't quite understand how the form is held in place on the outside.
Furthermore, I also don't see how the lying 2x4” are placed (are both placed at 1/3 height).
What dimension should the lumber be on the sides of the mold (if it's not formplyfa)?
Maybe someone has a picture or sketch lying around?
Thanks!
The usual way when free-forming traditionally is with board or plywood..P pjop said:Hi,
An old but very relevant thread for our project.
Could someone help explain post #12 (which I believe is the best answer to the question)?
I don't quite understand how the form is held in place on the outside.
Furthermore, I also don't see how the horizontal 2x4” are placed (are both placed at 1/3 height).
What should be the dimension of the timber on the sides of the casting mold (if it's not form plywood)?
Perhaps someone has a picture or sketch lying around?
Thanks!
45x95 in two layers then cladding 21x95 board or alternatively form plywood..
Then you brace one side and the other side is held together with tie rods..
Some pictures of a form on Berg with 21x95 boards..