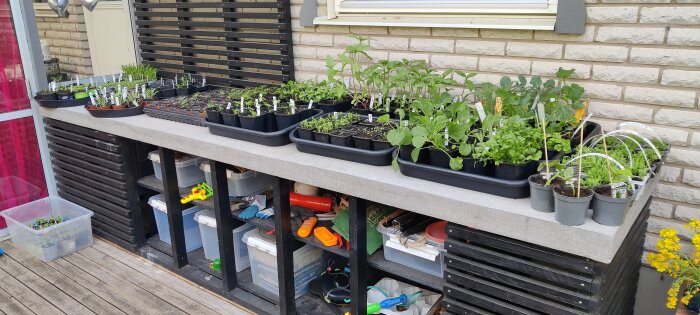
About four years ago, I built an outdoor kitchen on the patio at home and cast a concrete countertop, approximately 400 by 70 cm and about 5 cm thick with an overhang at the front so that it looks about 10 cm thick.
The thing is, my set of tools and skills didn't quite match the difficulty of the task, which became apparent when the casting was finished...
As you can see in the pictures below, there are a number of really ugly spots on the slab that I'm wondering if anyone here has tips on how I could fix them?
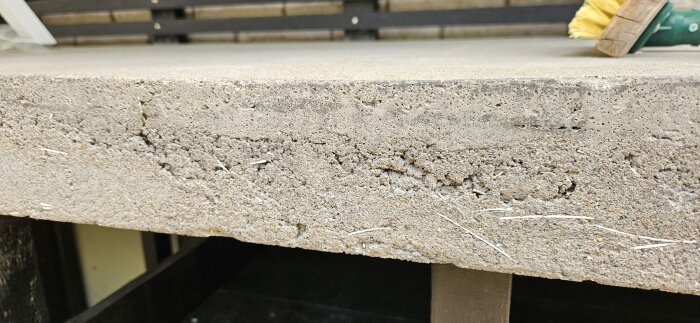
This is the edge of the slab, and it's full of pits and holes that don't look very nice. It's better in some spots, but almost the entire edge of the slab looks like this.
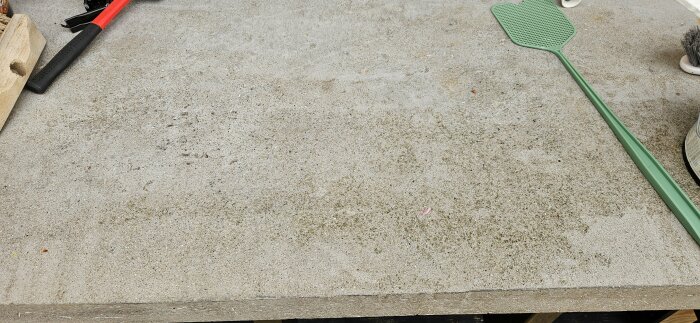
The slab has two substantial "dips" where the mold I built must have had a slight sag and wasn't completely level, which now results in a large depression on the slab right here where water collects in a puddle.
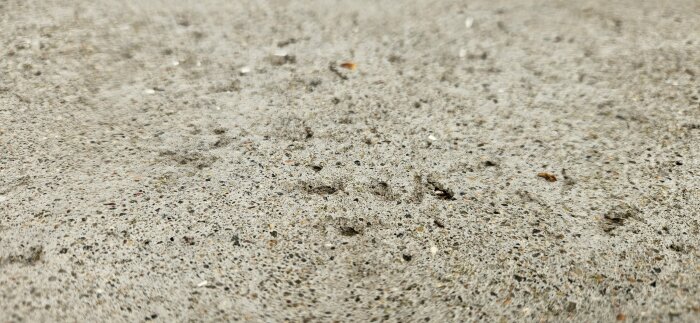
There are pits on the surface of the slab. These are relatively deep pits, maybe 5-6 mm scattered over a fairly large area with mainly smaller pits but also a number of somewhat larger ones.
I've been watching a lot on YouTube, and it seems there are a bunch of Americans fixing this type of damage, especially on stairs and such, but I haven't seen anyone repair an outdoor kitchen yet. My challenge is that they always use products that don't seem to be available in Sweden, which makes that knowledge a bit useless.
What I'm thinking is that I would like to spread some form of concrete product over the entire slab, which would then cover all the holes, and I could shape the front edge to get the entire slab at the same level. And some similar product that could fill the holes on the side of the slab.
I first thought of buying a bag of fine concrete and trying to sift out the coarsest particles and then mix it into a paste to fill the holes on the side with and more liquid to fill up the pits on top of the slab. However, I'm very unsure how this would look, and especially how it would hold over time. I have no problem with color differences in the concrete, but I would like to avoid the repair just being a layer that doesn't bond with the base and therefore comes off or looks terrible.
Is there self-leveling compound that can be used outdoors, without any other protective layer? The outdoor kitchen is outside and even though it's somewhat sheltered from the weather, it will still get rain and snow on it.
What kind of surface do you get with self-leveling compound, and how hard does it become? Also, how thick does it need to be applied to be satisfactory?
I did exactly as you suggested in your post, used sieved fine concrete and a spray bottle to moisten the concrete. Filled the holes and it holds up well eight years later.
If you're going to cast a concrete slab, expanderbetong is probably preferable.
Okay, I'm going to try sieving some concrete, it's a very simple way to do it! It seems maybe like the only reasonable thing to fill the holes on the side of the slab with.
For the slab itself, I'll probably continue looking for some kind of self-levelling compound, it seems like the best solution.
As casting, it looks pretty good after all. Hard to get regular cement to look nice right up to the form if you want to make it an aesthetic issue. The dip is probably due to the weight of everything. The form has to support quite a few kilos, which many people don't consider. If such a large bench is to be level, it requires a form that is extremely stable........
The form is probably not actually wrong here, as you can see in the picture it is fairly built up since I was unsure how sturdy it needed to be. The subframe for the slab is built with a horizontal 70 beam at each post, which is also a 70 beam, and they are approximately spaced at 45 cm or something like that. On top of the beams are fiber cement boards as the "bottom" of the form.
It took about 11 bags of concrete for the slab, so it weighs a little over 250 kg.
The dips are specifically only at the front edge in a couple of places and since I sawed the form with a circular saw without a rail, I guess it turned out a bit crooked...
Click here to reply
Vi vill skicka notiser för ämnen du bevakar och händelser som berör dig.