7,302 views ·
36 replies
7k views
36 replies
Paneling together with skirting board and door lining
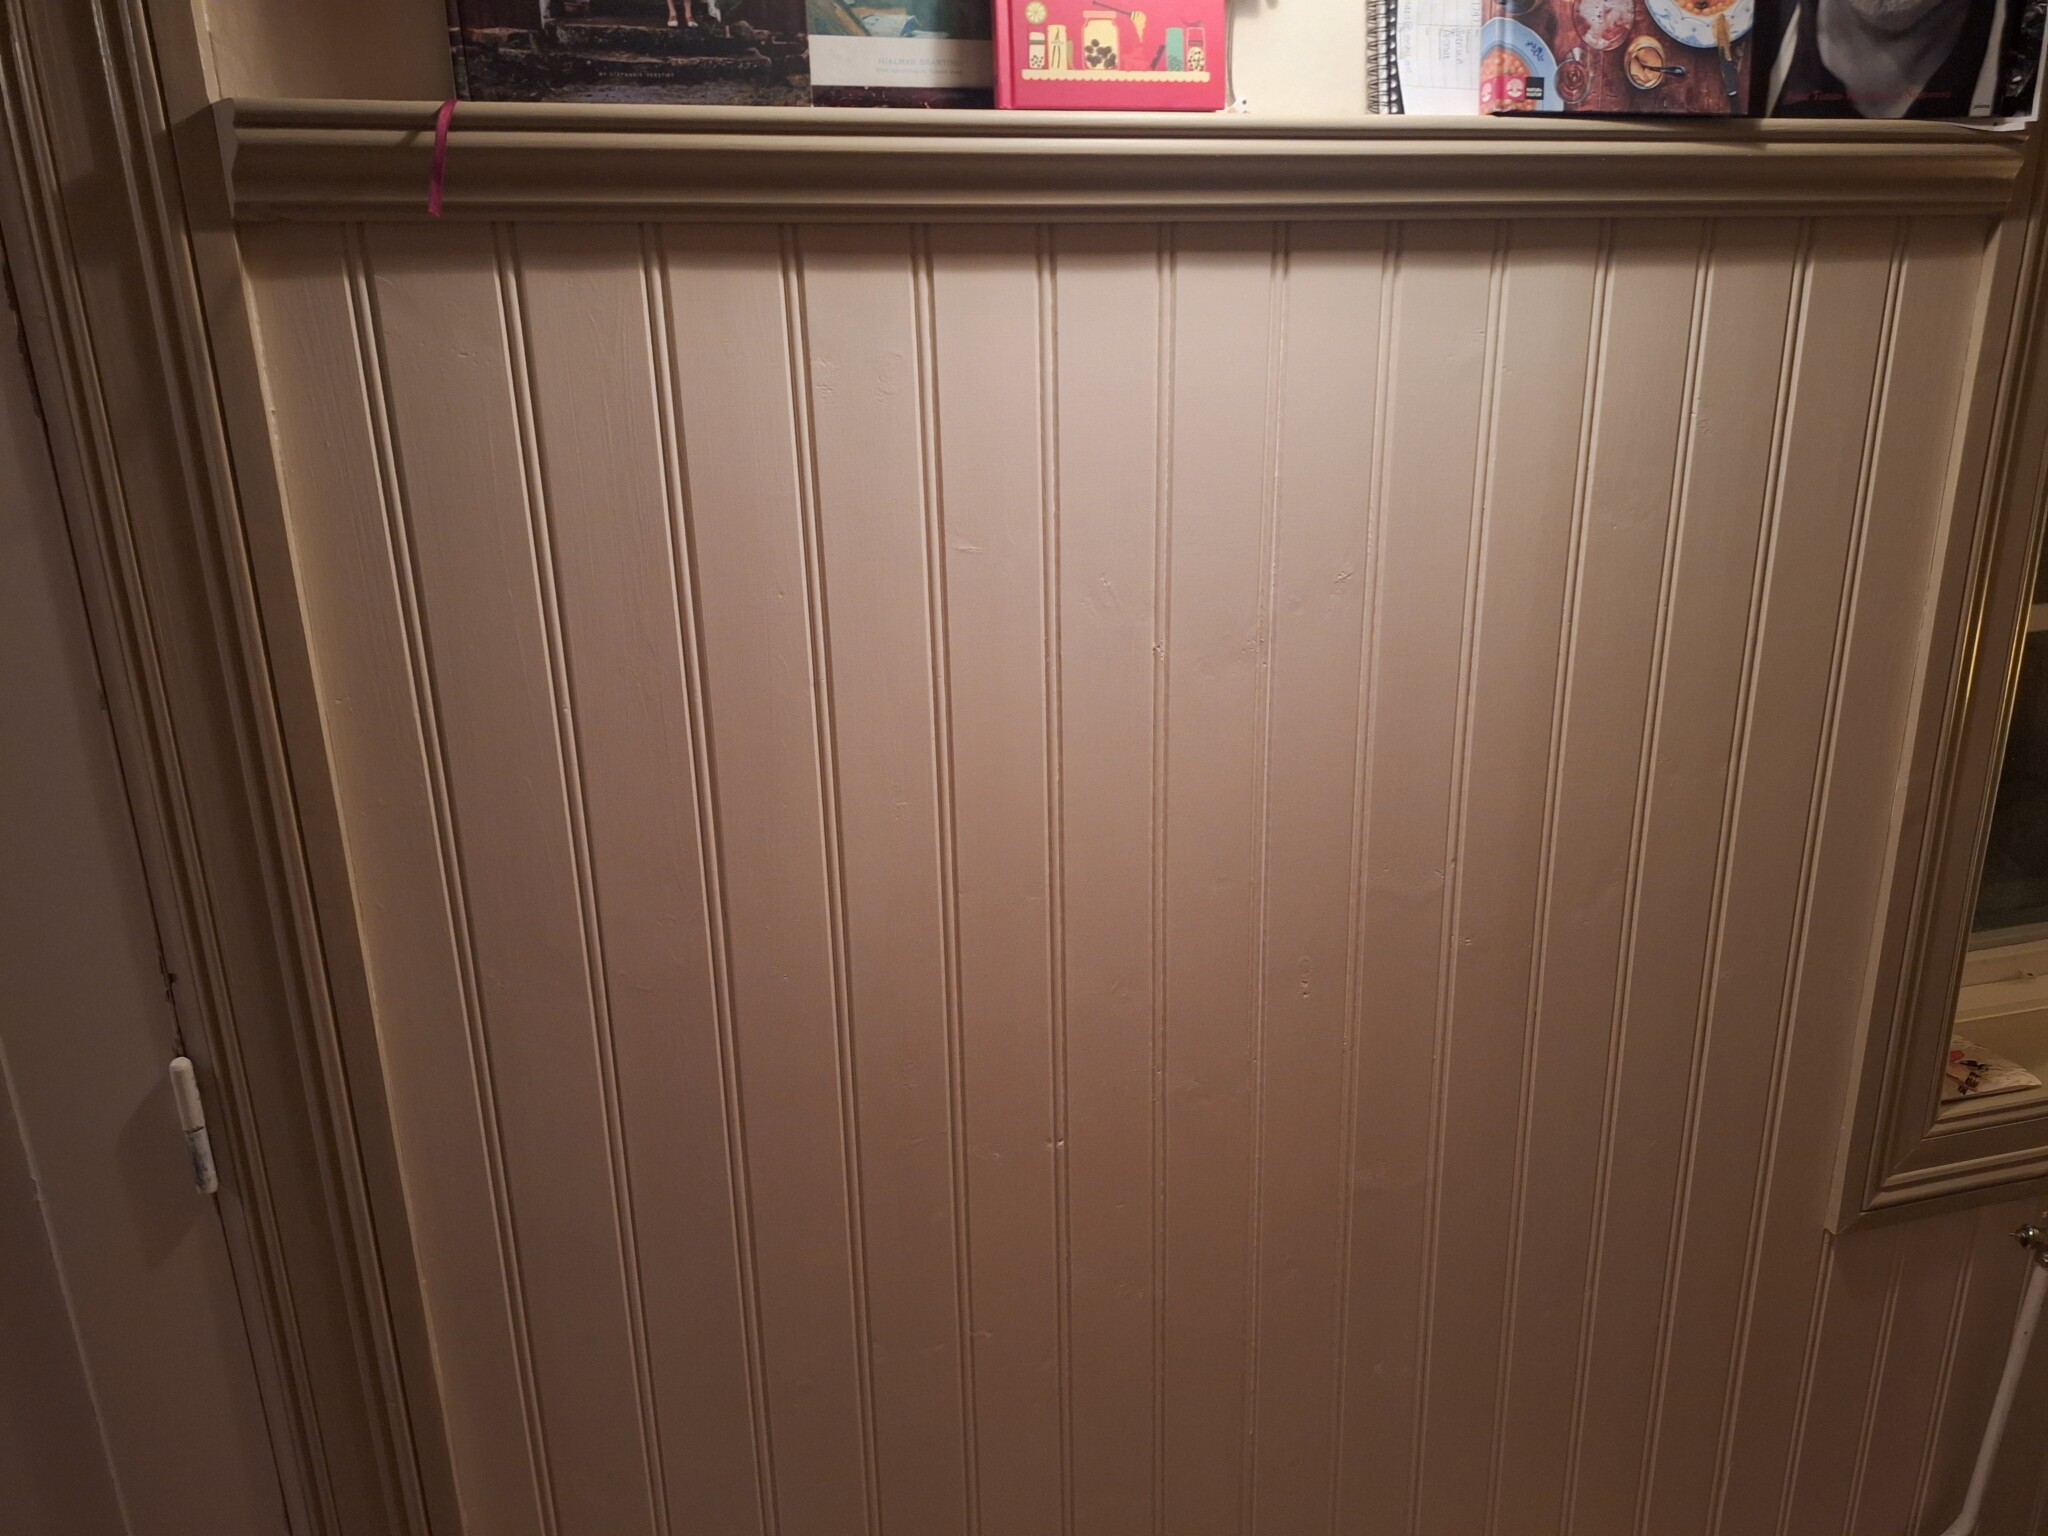
We are planning to install beadboard on the interior wall of our house, and along with that, we will also replace the existing door trim and baseboards with those in the picture. We will also have corner blocks (which is convenient, as it means we don't have to miter the trim).
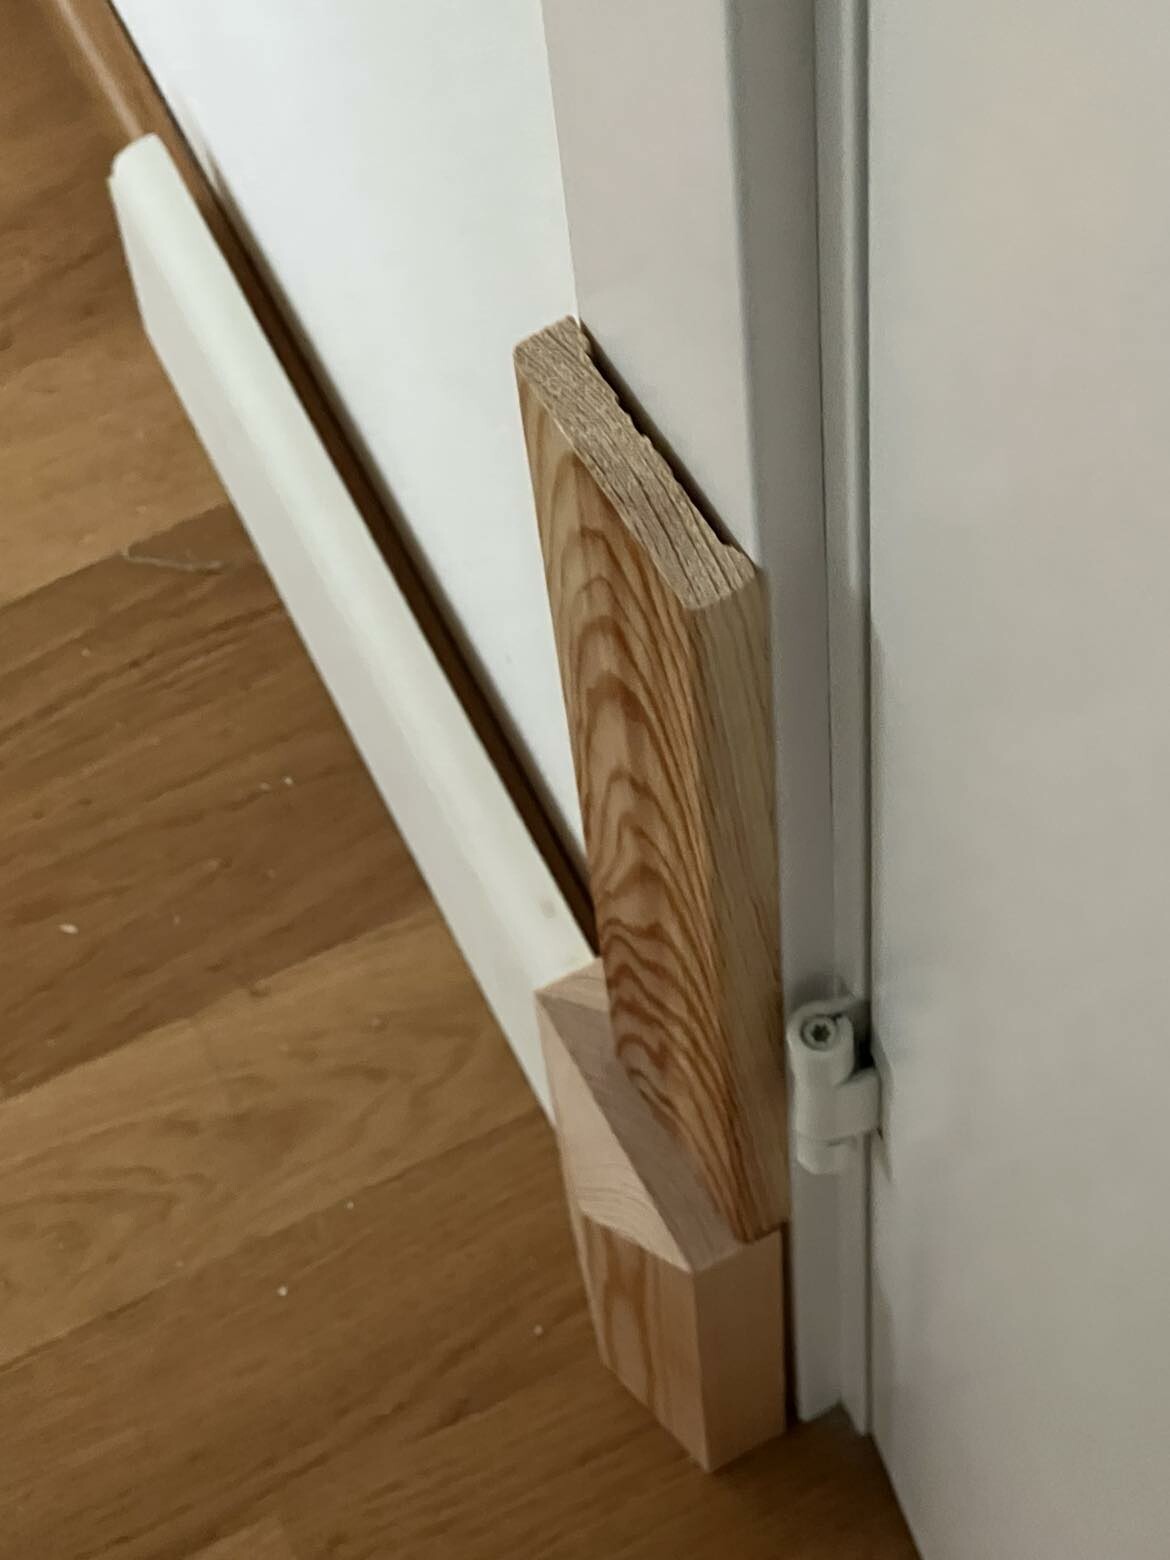
Now for my question: How do you recommend mounting this in the best and most stylish way? Should the beadboard go under the trim or alongside it? If the trim goes on top, we end up with a gap in the door frame that we don't know how to cover. If we instead place the trim alongside the panel, we encounter a problem with the block for the baseboard—should it also be alongside in that case? It will involve a lot of cutting to make it look nice.
We think the baseboard must go on top of the panel, as we believe that otherwise it would look odd.
Any help and tips on how you have/would do it are appreciated!

Hobby carpenter
· Västra Götaland
· 1 474 posts
Everything should be on the outside of the panel. On the inside lining (the door side), a smyglist is placed to cover the notch on the beadboard.
If you only want a plain trim that isn't too wide, you can look at klackfoder, which has an angled section that covers the panel. I know they are available in 43 and 56 mm widths, but there might be wider options too.
C caril said:
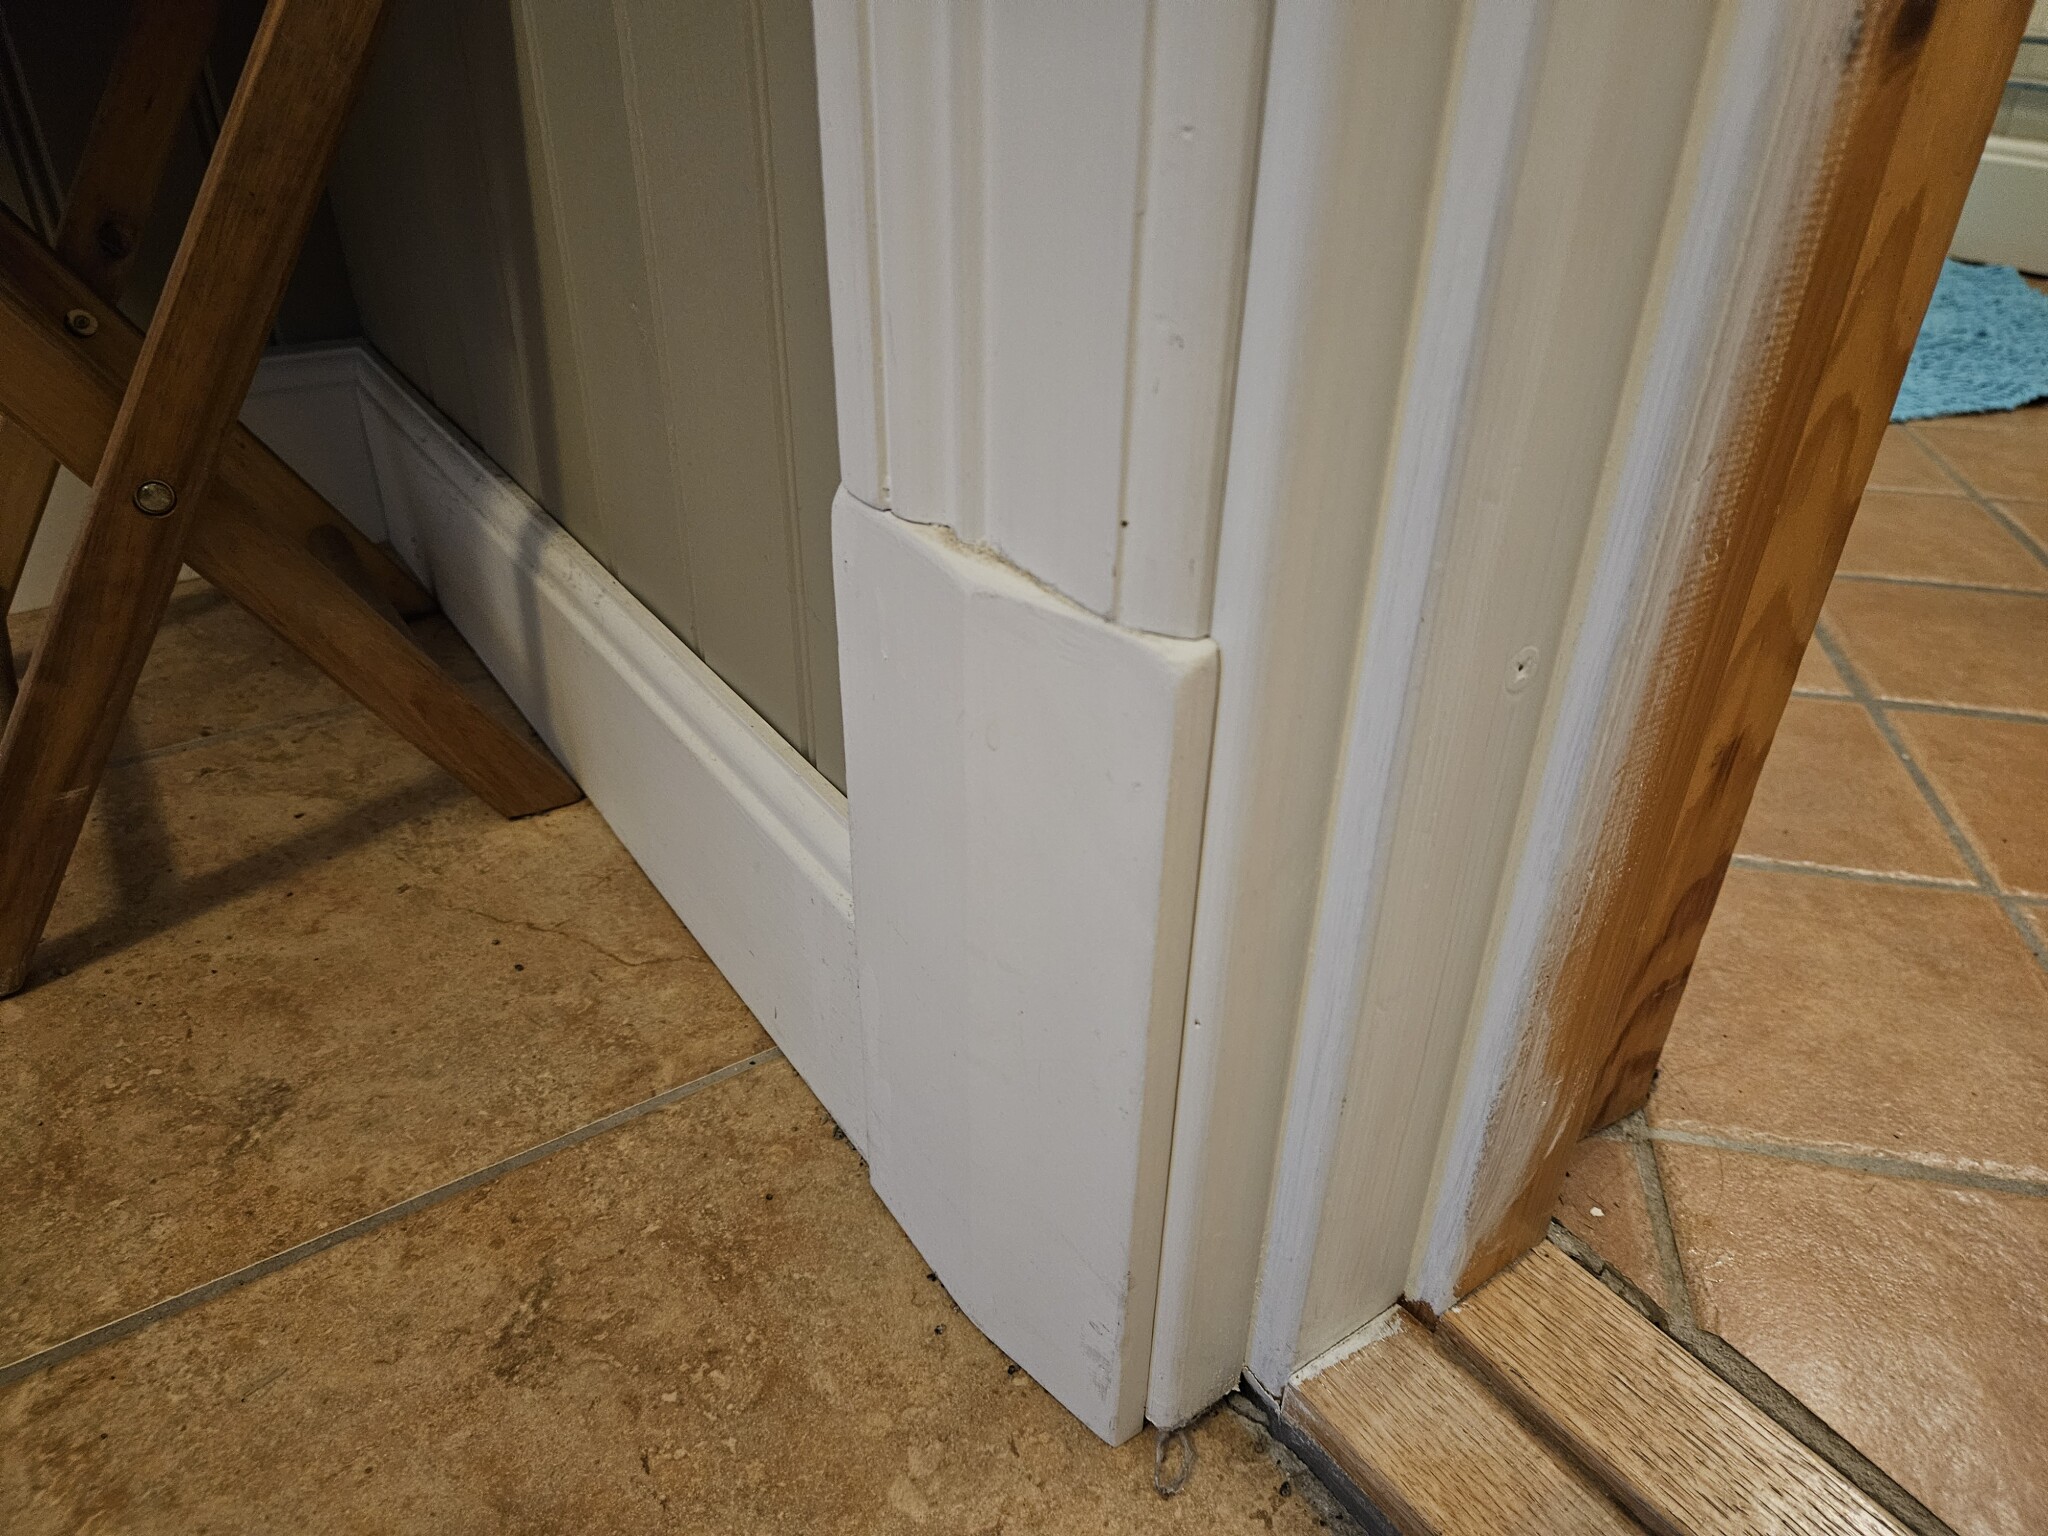
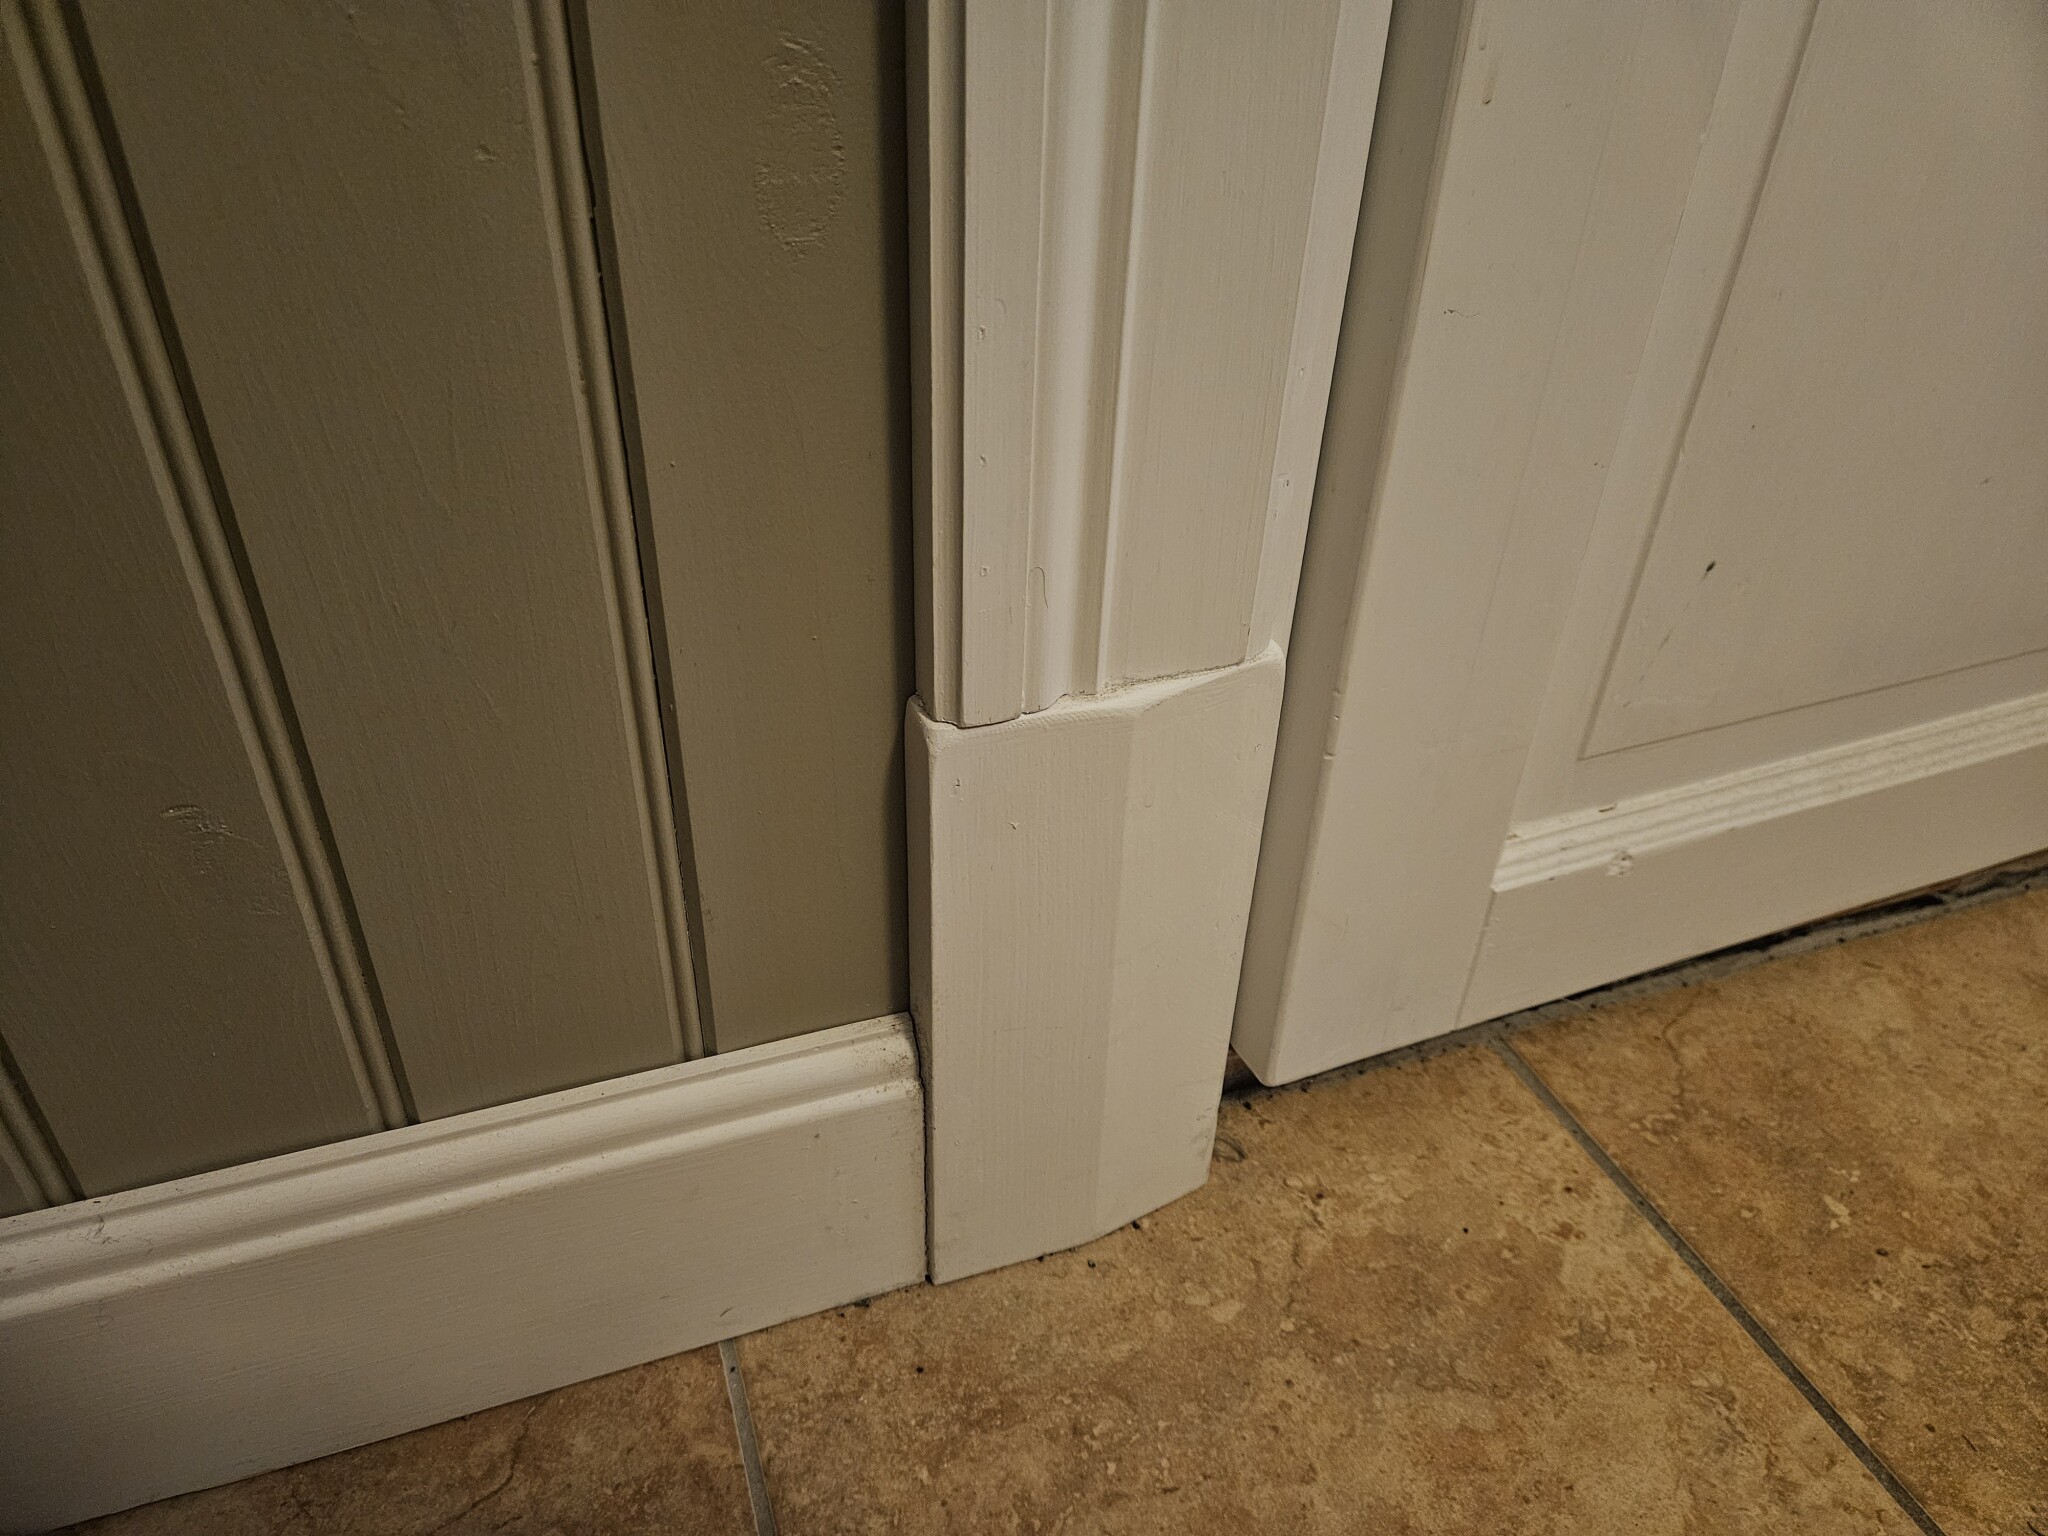
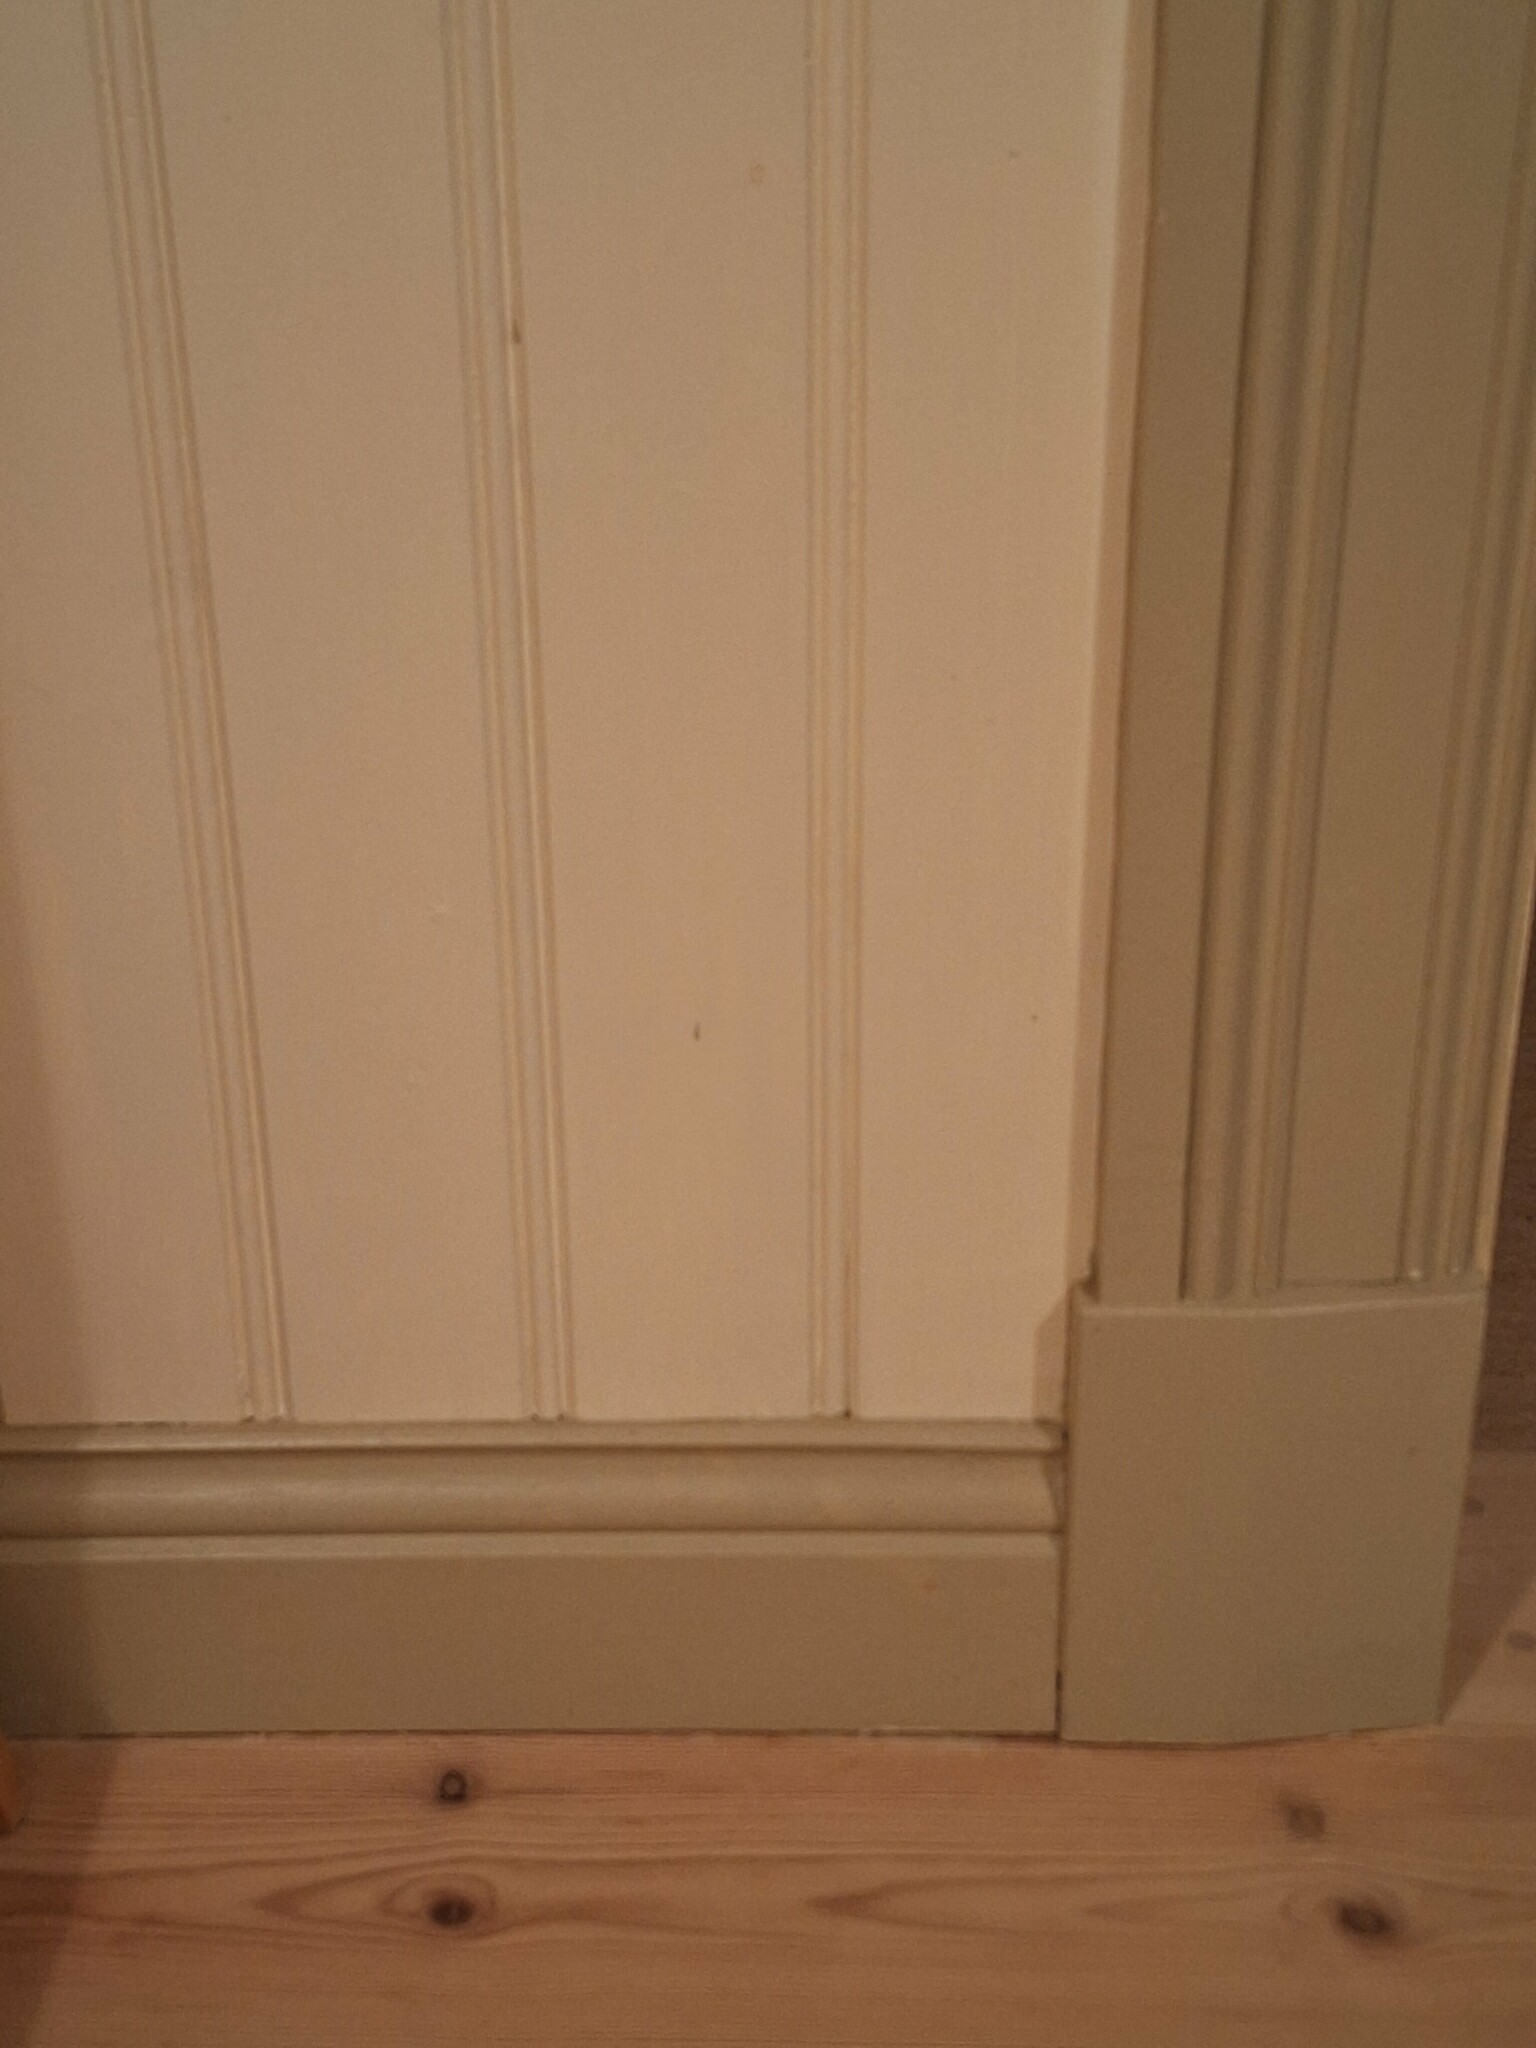
Here you can see the molding between the trim and the frame.
Aha you have a wooden panel that you cover I see. The problem for us is that we are using a simpler version of beadboard which is only 6mm thick: https://www.byggmax.se/väggpanel-pärlspont
So it is difficult to find a trim strip that is narrow enough to cover the small gap.
So it is difficult to find a trim strip that is narrow enough to cover the small gap.
Yes, I am absolutely prepared to do that in this case. But splitting a 205 m long strip that is a few millimeters too thick is not a job I see as an alternative. There must be someone who has encountered something similar before and found a smarter solutionA A.Barman said:
")

That's exactly what one does. Buy a planed board in a suitable dimension, e.g., 22x120, and then cut out the strips you need from it. I usually do this on the table saw; it's easiest. After that, I usually first glue the trimming strip onto the jamb and secure it with a nail gun (t-brad), and then I also glue-nail the trim into the strip. Then it stays forever.C caril said:
The "smart" solution is to use real beadboard paneling and then saw/plane the last board so no trim strip is neededC caril said:
Otherwise, it's relatively simple to saw a 6 mm strip from a larger board with a table saw. If you use a molding, you also need to cut the molding to the right dimension, but then you saw from a larger piece, which can be easier if you're not used to the saw table. It can also be solved with a plane if you don't have a table saw.
Diversearbetare
· Göteborg
· 10 713 posts
Why not use the beadboard panel material as trim? It has the right thickness. Just need to clean up the cut. Diluted wood glue (PVA) a few times with intermediate sanding, and it will look nice. It might even be possible to extend the beadboard panel all the way to where the trim would go and lay the moldings on top?
Tip to OP: If you're considering filling the gaps that appear between the baseboard and the beadboard's bead, avoid it. It looks completely wrong and wasn't done during the time when beadboard was commonly used.
Tip to OP: If you're considering filling the gaps that appear between the baseboard and the beadboard's bead, avoid it. It looks completely wrong and wasn't done during the time when beadboard was commonly used.
You can do it both ways. It's just a matter of what conditions you have and what will be easier and more attractive. For example, if you have a very thick baseboard and casing, it might look better to place them on and beside. This way, you avoid having to install the reveals in the door and window frames, which can take a long time if you have an old and crooked house, especially if you don't have access to a table saw or plunge saw.C caril said:We are going to install beadboard on the interior wall of our house, and along with it, we will also replace the existing door casings and baseboards with those in the picture. We will also have corner blocks (convenient, as we won't have to miter the moldings).
Now to my question: How do you recommend installing this in the best and most aesthetically pleasing way? Should the beadboard go under the casing or next to it? If the casing goes on top, we'll have a gap in the door frame that we don't know how to cover. If we instead place the casing next to the panel, there will be issues with the corner block for the baseboard—should it also be next to it then? It will involve a lot of sawing to make it look good.
We think the baseboard needs to go on top of the panel, as otherwise, it might look odd.
Any help and tips on how you have/would have done this are appreciated!
So, I would say it's a decision you need to make based on the conditions, knowledge, and tools you have available. So sit down and look and measure. Then see what you think looks best in the transition between the different materials and what is feasibly doable. You want to have a natural flow so that it looks like it was thought out from the beginning.
For example, I think some people with an overly thick upper baseboard get a very unnatural break and an unattractive transition between the wall and baseboard. It just collects a lot of unnecessary dust on such horizontal surfaces.
But as I said, that's my opinion.
Also note that if you place the beadboard behind the baseboard, you will have small holes down behind the baseboard around each bead. This can be less practical and especially not as nice if you have a wider beadboard with a larger bead.C caril said:We are going to install beadboard on the interior wall of our house, and along with that, we will also replace the existing door trim and baseboards with those in the picture. We will also have corner blocks (convenient, as we avoid miter cutting the moldings).
Now to my question: How do you recommend installing this in the best and most aesthetically pleasing way? Should the beadboard go under the trim or next to it? If the trim goes on top, we'll have a gap in the door frame that we don't know how to cover. If we place the trim next to the panel, there will be problems with the block for the baseboard – should it also be next to it? It will involve quite a bit of cutting to make it look nice.
We think the baseboard must go on top of the panel, as we believe it would otherwise look strange.
All help and any tips on how you have/did it are appreciated!
Everything I wrote has probably already been commented on in the thread, so if I repeat myself, you can disregard this since I haven't read all the comments.
R Robin_CG said:Also worth considering, if you place the beadboard behind the baseboard, you'll get small gaps behind the baseboard around each bead. This can be less practical and especially not as aesthetically pleasing if you have a wider beadboard with larger beads.
Everything I wrote has probably already been mentioned in the thread, so if I'm repeating myself you can disregard this since I haven't read all the comments.
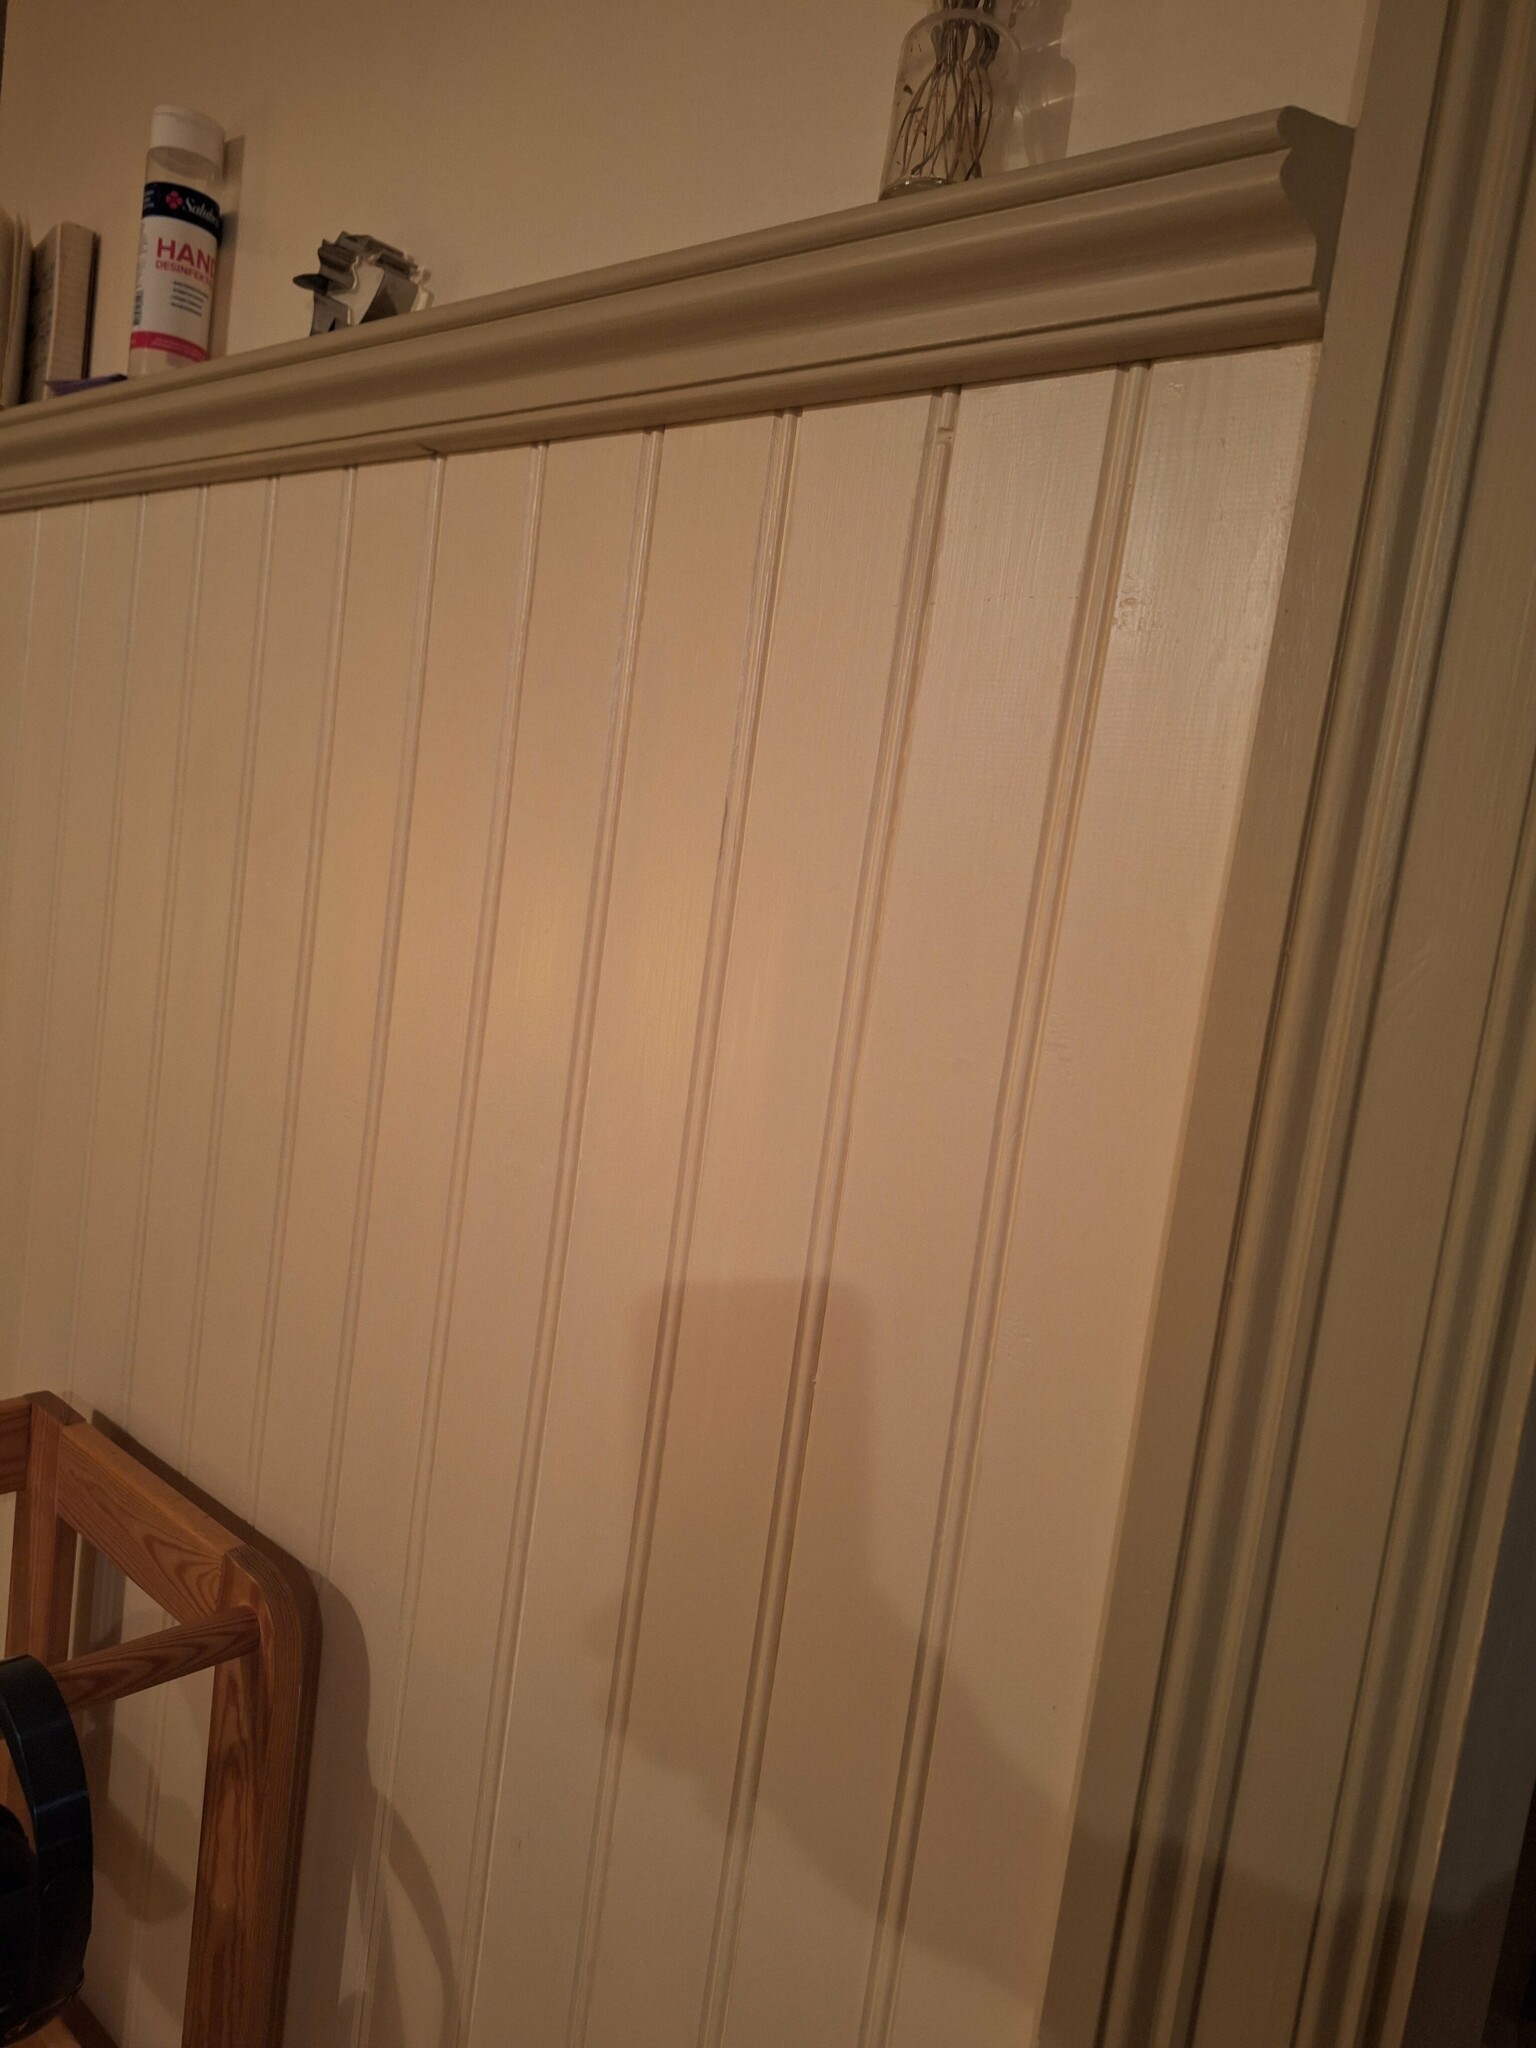
Here, the moldings, floor, and crown molding were installed first and then the beadboard was fitted, as the transition on the backside of all the moldings around doors and windows towards the beadboard would have looked awkward. It would have protruded 30mm+ over the beadboard.
And if you then have a crown molding when you come to a door molding and lay the lower part of a 15mm beadboard, then you'll have a backside on the molding above the crown molding that is between 40-50mm thick. In that case, I would install the moldings and lists first any day rather than having a molding that sticks out into the room that you end up bumping your head on. 🤷🏼♂️