4,452 views ·
34 replies
4k views
34 replies
How to saw moldings.
Hello.
I once again have a small problem with crown moldings and angles, but this time I'm wondering if it can be sorted out. Hopefully, it's just me being silly again, so I am seeking advice on the matter.
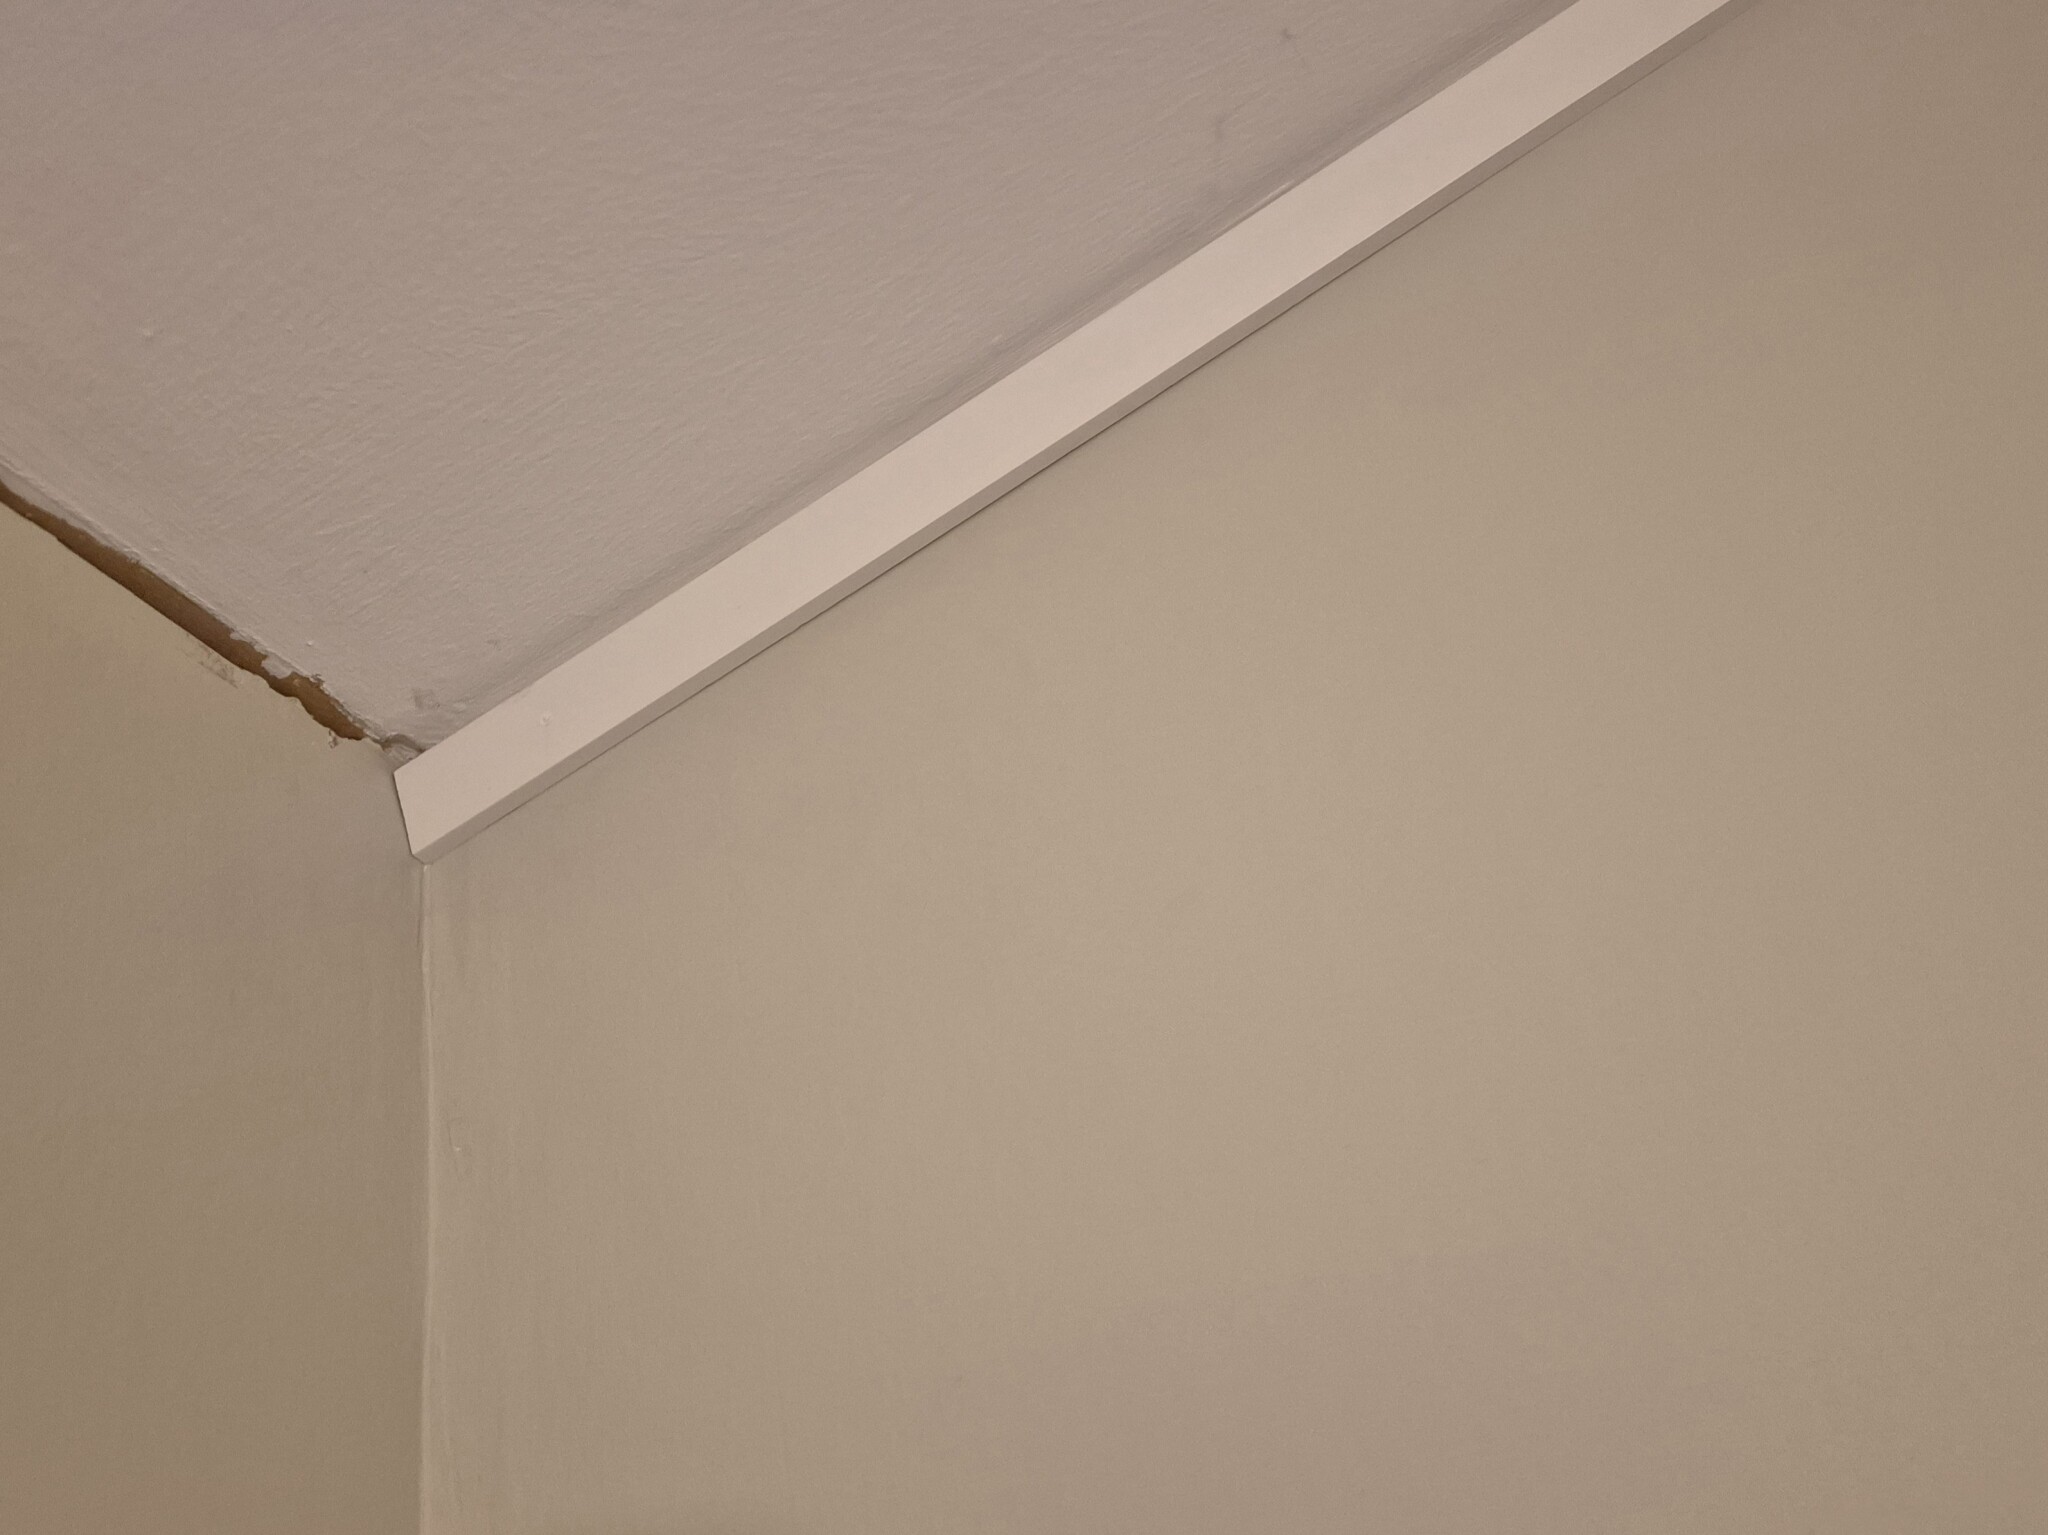
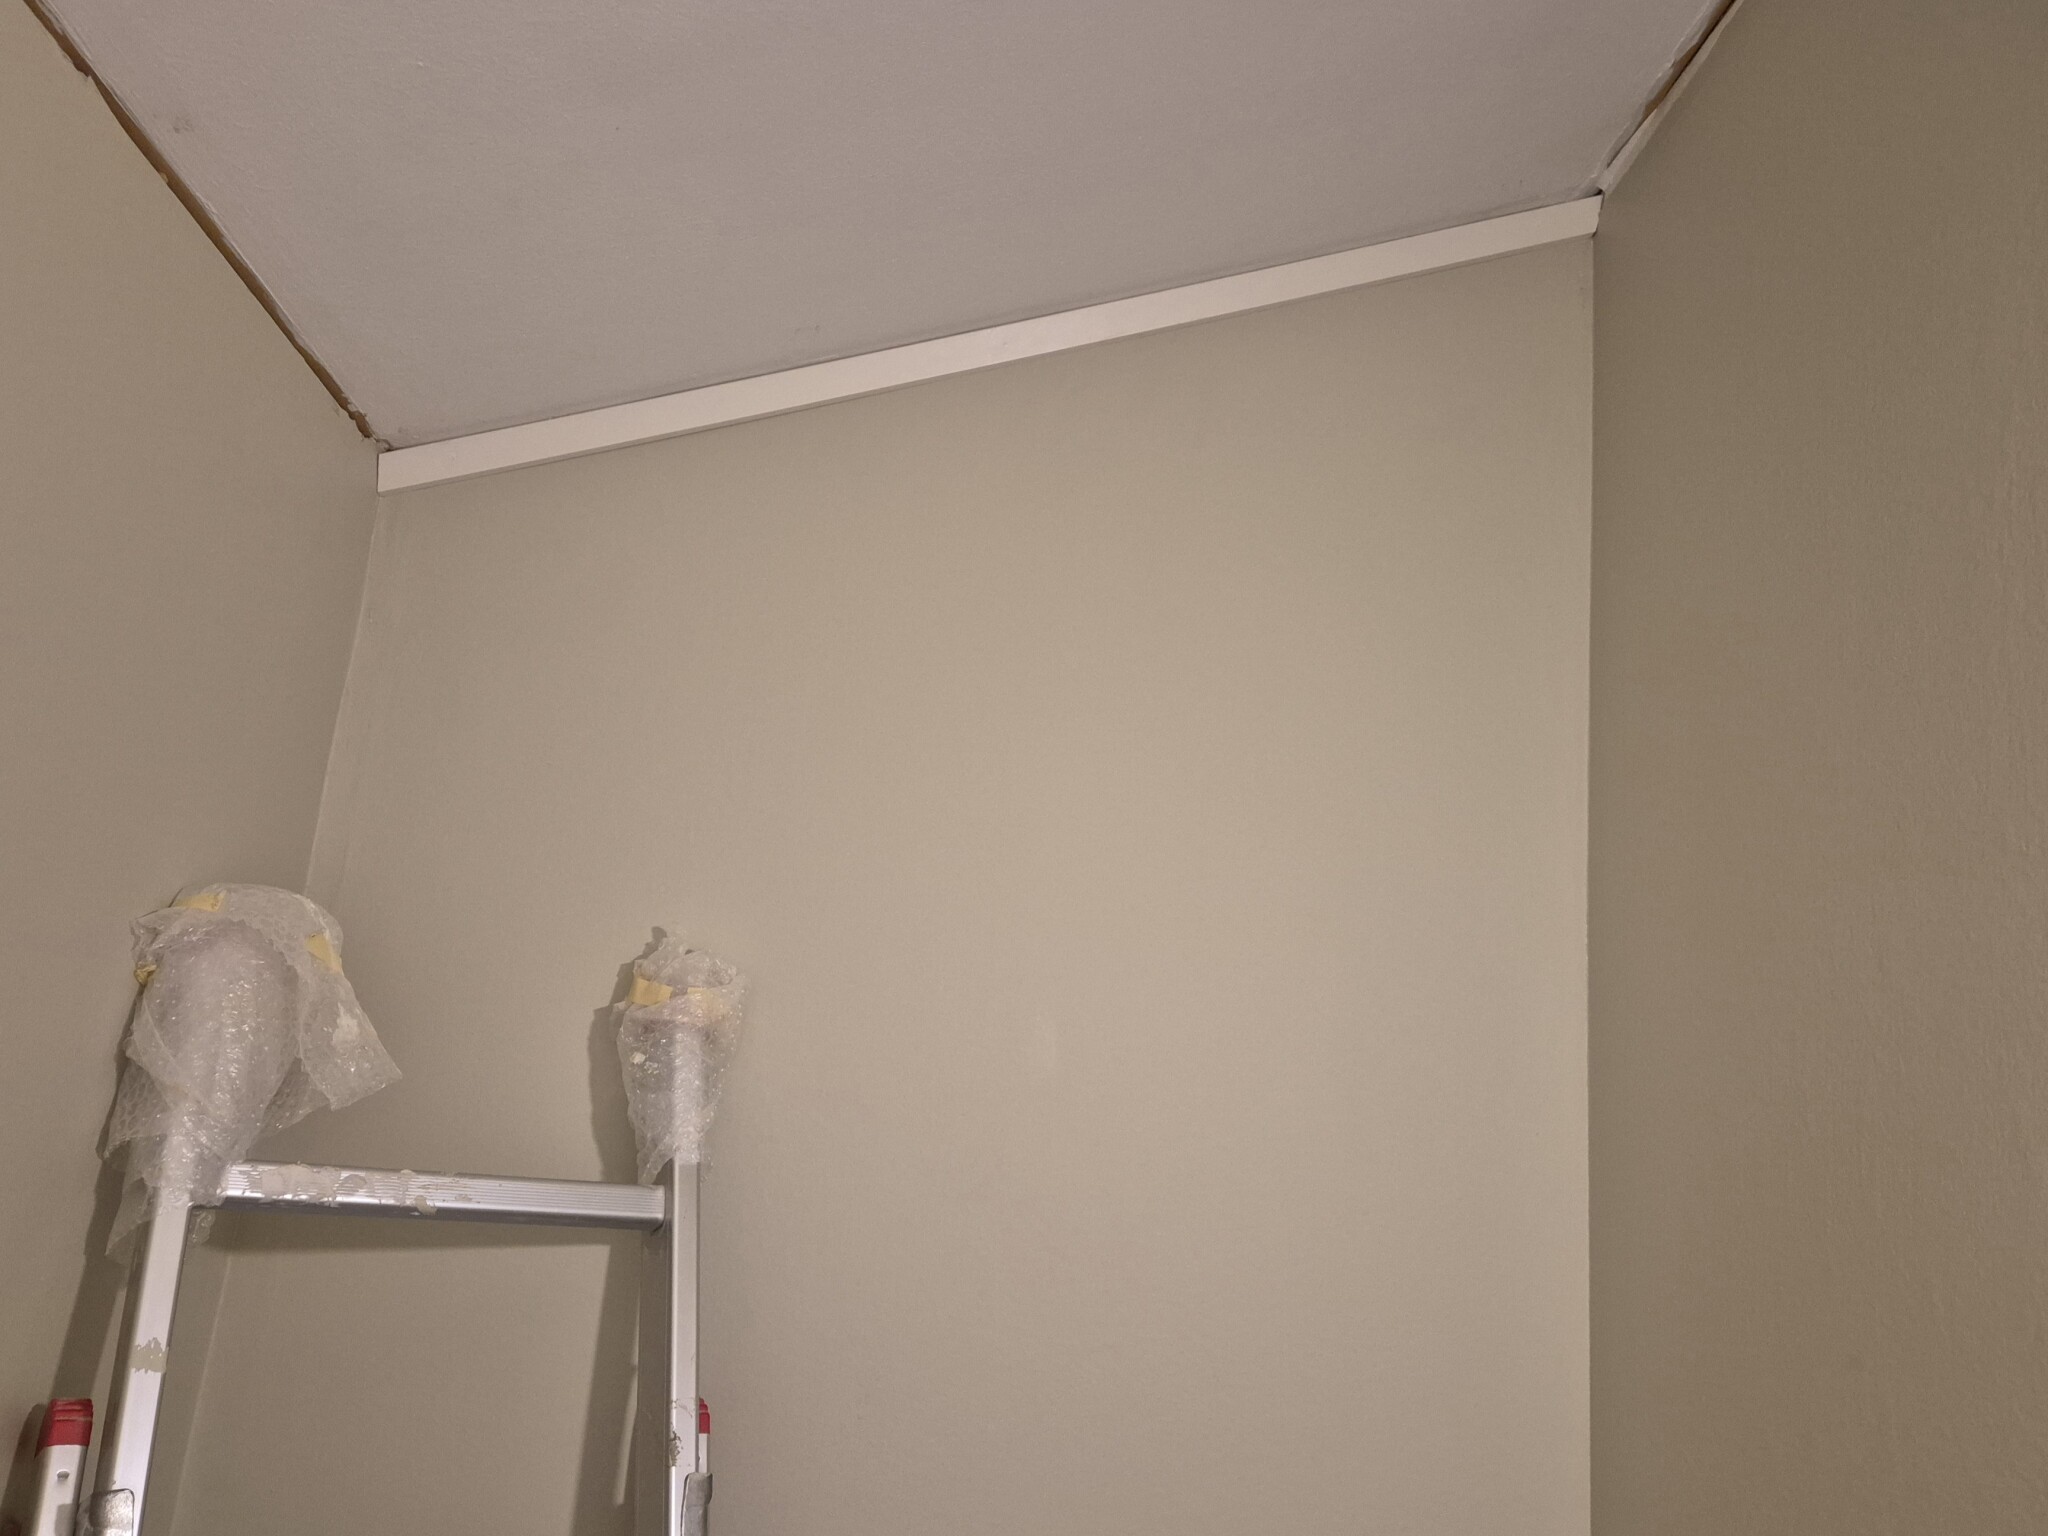
I am renovating a staircase/stairwell in our townhouse. The ceiling slopes at about 110 degrees (I trimmed the molding that went up at 108.5 degrees).
I now need to put up moldings along the wall/ceiling that does not slope, but I really don't know how to cut to get an angle that matches/makes them flow together. Everything I've tried so far has the wrong angle or one of the moldings looks too big/too small.
The moldings in question are of the type shown in the pictures. Not perpendicular, so to speak.
It's difficult to really convey what I'm thinking/the problem is, so please ask if I can clarify in any way. How do I solve my problem?
I once again have a small problem with crown moldings and angles, but this time I'm wondering if it can be sorted out. Hopefully, it's just me being silly again, so I am seeking advice on the matter.
I am renovating a staircase/stairwell in our townhouse. The ceiling slopes at about 110 degrees (I trimmed the molding that went up at 108.5 degrees).
I now need to put up moldings along the wall/ceiling that does not slope, but I really don't know how to cut to get an angle that matches/makes them flow together. Everything I've tried so far has the wrong angle or one of the moldings looks too big/too small.
The moldings in question are of the type shown in the pictures. Not perpendicular, so to speak.
It's difficult to really convey what I'm thinking/the problem is, so please ask if I can clarify in any way. How do I solve my problem?
You need to angle the cut 45 degrees in one direction and 55 degrees in another direction since you have 90-degree corners horizontally and 110 degrees vertically.
Take a couple of short pieces that you hold up to the corner and mark on, and "practice" the cut to find the exact angles before you take the whole molding and make your cuts. You must cut corresponding angles on both moldings if you want to join the meeting.
It looks in the picture like you've put up a molding cut at 90 degrees, and that won't work, and it also looks like it's on the wall and not the ceiling. In that case, the meeting molding must also be placed on the wall, in the same manner.
That certainly sounds very reasonable. Silly follow-up question then. I assume I should cut the slanting molding at 55 degrees. Shouldn't I then have the molding at the current angle (110 degrees) when I cut the end?T Testarn said:You need to angle the cut 45 degrees in one direction and 55 degrees in another since you have 90-degree corners horizontally and 110 degrees vertically.
Take a couple of short pieces that you hold up against the corner and draw on and "practice" the cut to find the exact angles before you take the whole molding and make your cuts. You have to cut the corresponding angles on both moldings if you want to get the meeting to fit.
It looks in the picture as if you have put up a molding that is cut at 90 degrees, and that will not work, and it also looks like it's placed on the wall and not the ceiling. Then the meeting molding must also be placed on the wall in the same way.
And yes. I put it up with 90-degree ends thinking it would be easiest that way 😶 I obviously understand now that I wasn't quite close to the goal.
You need to cut both moldings in both directions for the ends to meet as you want.L Lugas said:That certainly sounds very reasonable. A dumb follow-up question then. I assume I should cut the slanted molding at 55 degrees. Should I have the molding at the current angle (110 degrees) when I cut the end?
And yes. I've put it up with 90-degree ends, thinking it would be easiest that way 😶 I obviously understand now that I wasn't quite close to the goal.
Your cut will be a combination of the angles at the same time, and then the cuts must be "mirrored" for the two moldings.
Yes, I'm with you so far. I was more wondering which of the moldings should have which degree. Or maybe it doesn't matter as long as the total is 110?T Testarn said:
Then there's the molding that leans at 110 degrees. Should I set it at the same angle in the saw when I cut the end to 45/55 degrees? I spontaneously think I should, but I've been thinking in roundabout ways for a day now, so I'm not really sure anymore...
Homeowner
· Norra Roslagen
· 326 posts
Will soon be working with moldings myself and the best tip I have received is to cut some small pieces to use as a template. Otherwise, you cut wrong...
I'm totally with you and fortunately, I usually work the same way. Today I've been tinkering with this for two hours. Running up and down the ladder, measuring, cutting, fitting, getting it wrong, redoing it... Thankfully, only a few decimeters of scrap wood have been used 😅R Real-House said:
I couldn't figure out how to explain what I meant, so I took a crown molding similar to yours and went down to the basement to make a couple of pieces... 😳L Lugas said:Well, I'm with you so far. I was more wondering about which moldings should have which angle. Or maybe it doesn't matter as long as the total is 110?
Then there's the molding that leans 110 degrees. Should I set it at the same angle on the saw when cutting the end at 45/55 degrees? I think instinctively that I should do that, but I've been thinking in circles for a day now, so I'm not really sure anymore...
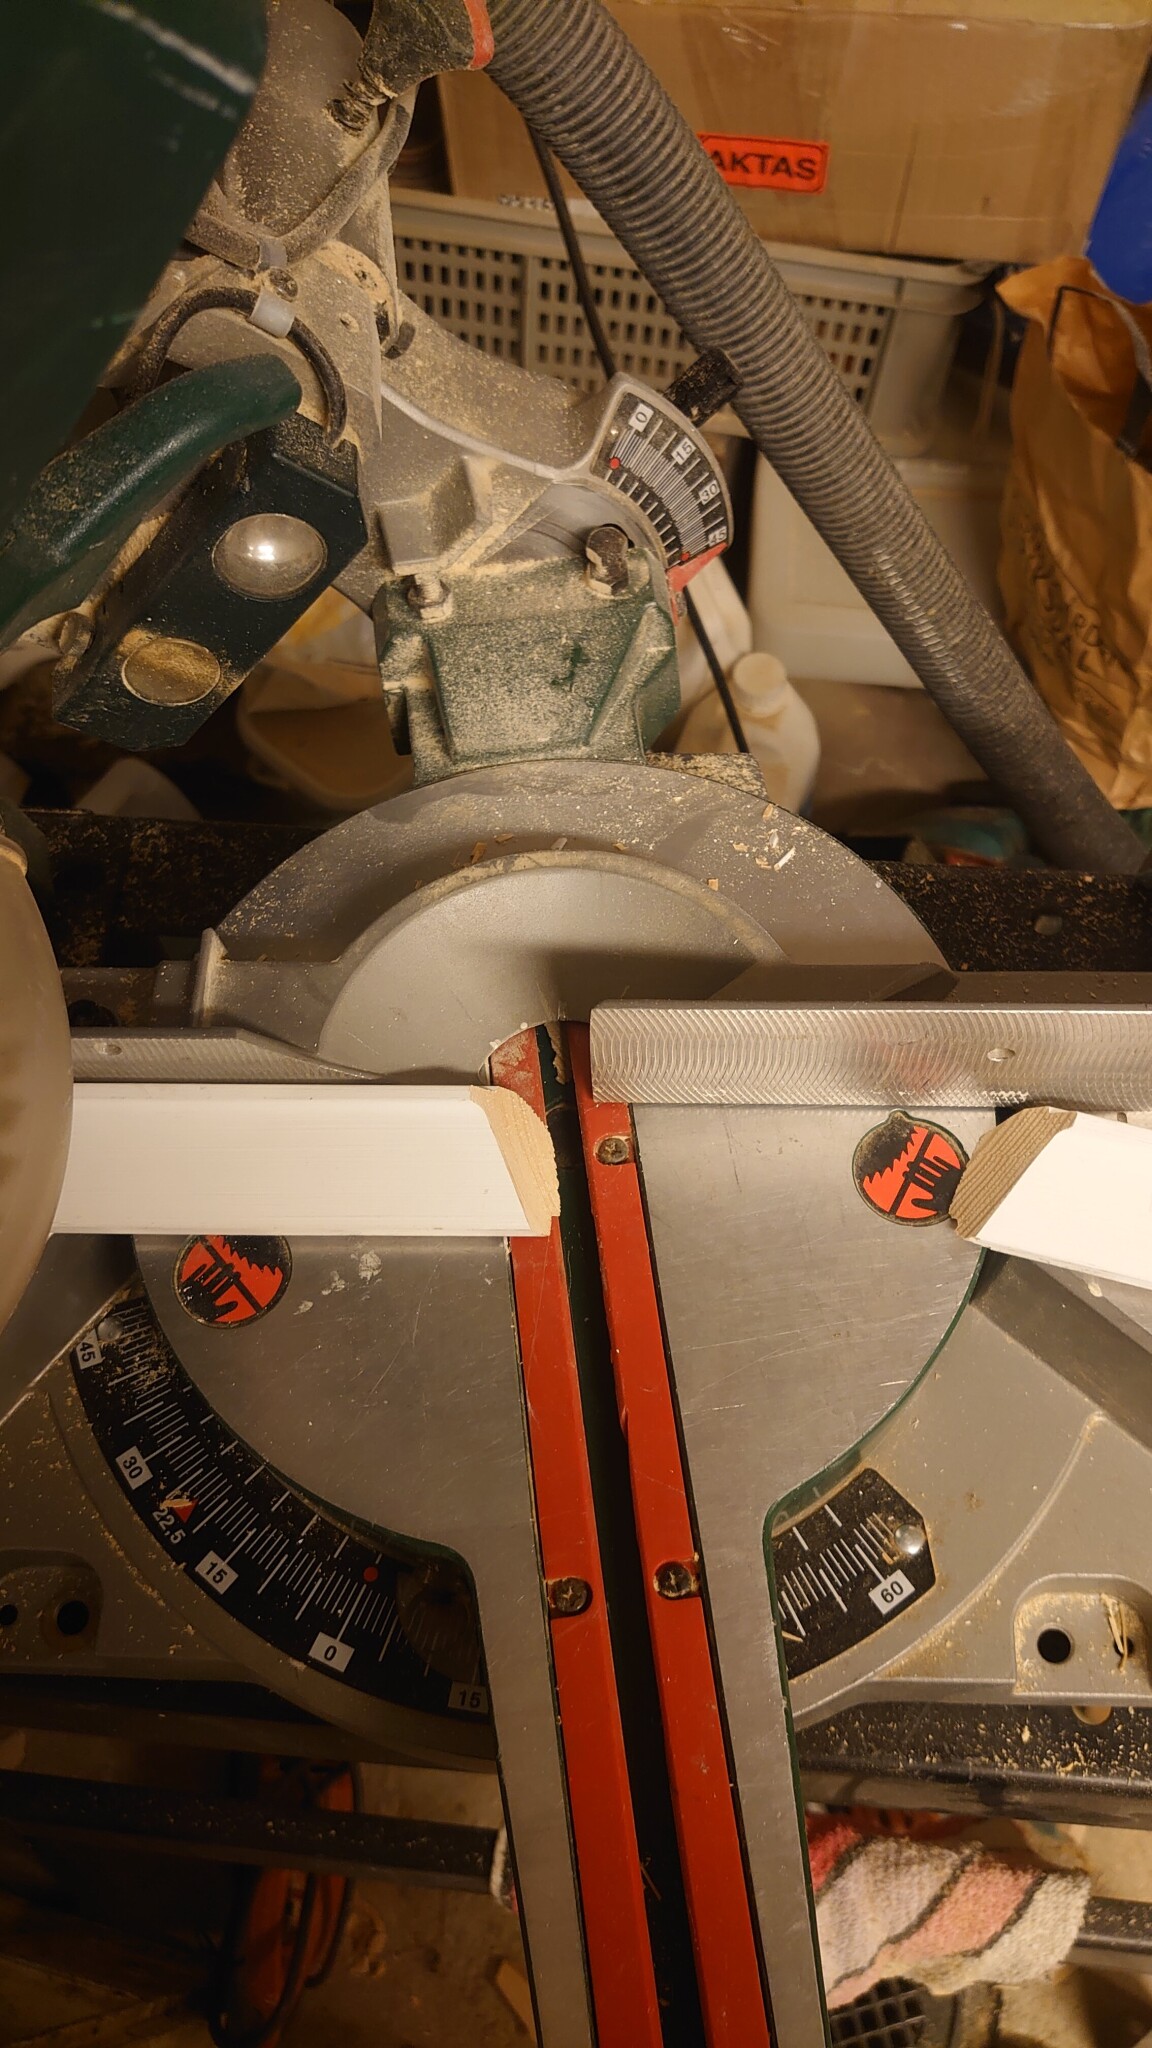
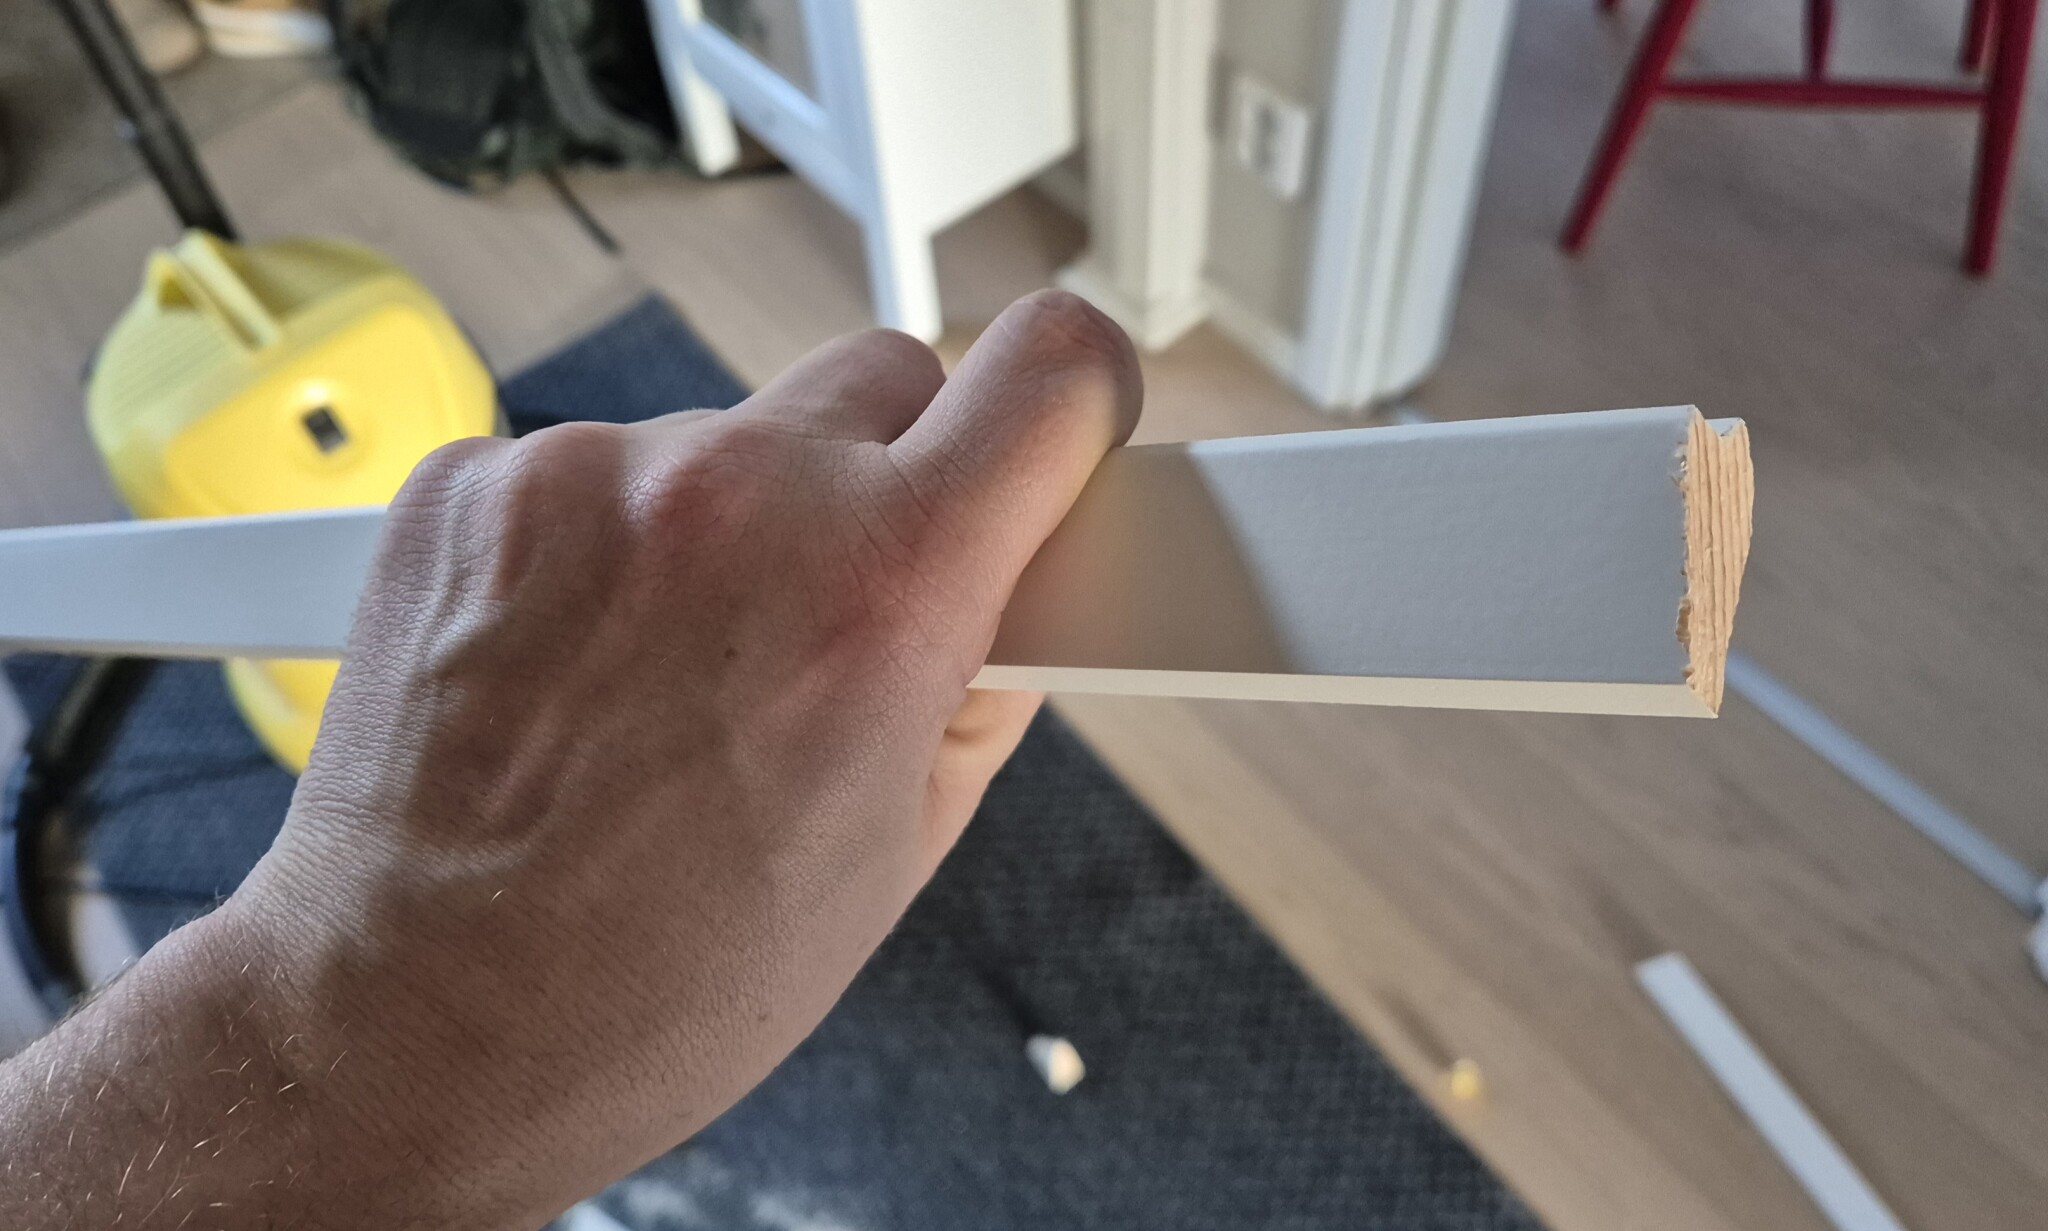
In the picture, the molding that should be on the wall under the sloping ceiling is positioned with the thicker side up against the saw's fence.
The saw is angled at 45 degrees, which corresponds to half of the 90 degrees that the molding should fill. Then, since you mentioned that it's about 110 degrees in the angle between the wall and ceiling, I've set the angle at 10 degrees, which is half the difference from a right angle (90 degrees) and 110 degrees. (110-90)/2 = 10
To then cut the opposite molding, which should be on the wall where the ceiling is horizontal, I tilted the 10 degrees to the left and kept the angle the same since my miter saw only tilts in one direction. To get the 45-degree angle right, I had to cut with the thinner side of the molding against the saw's fence.
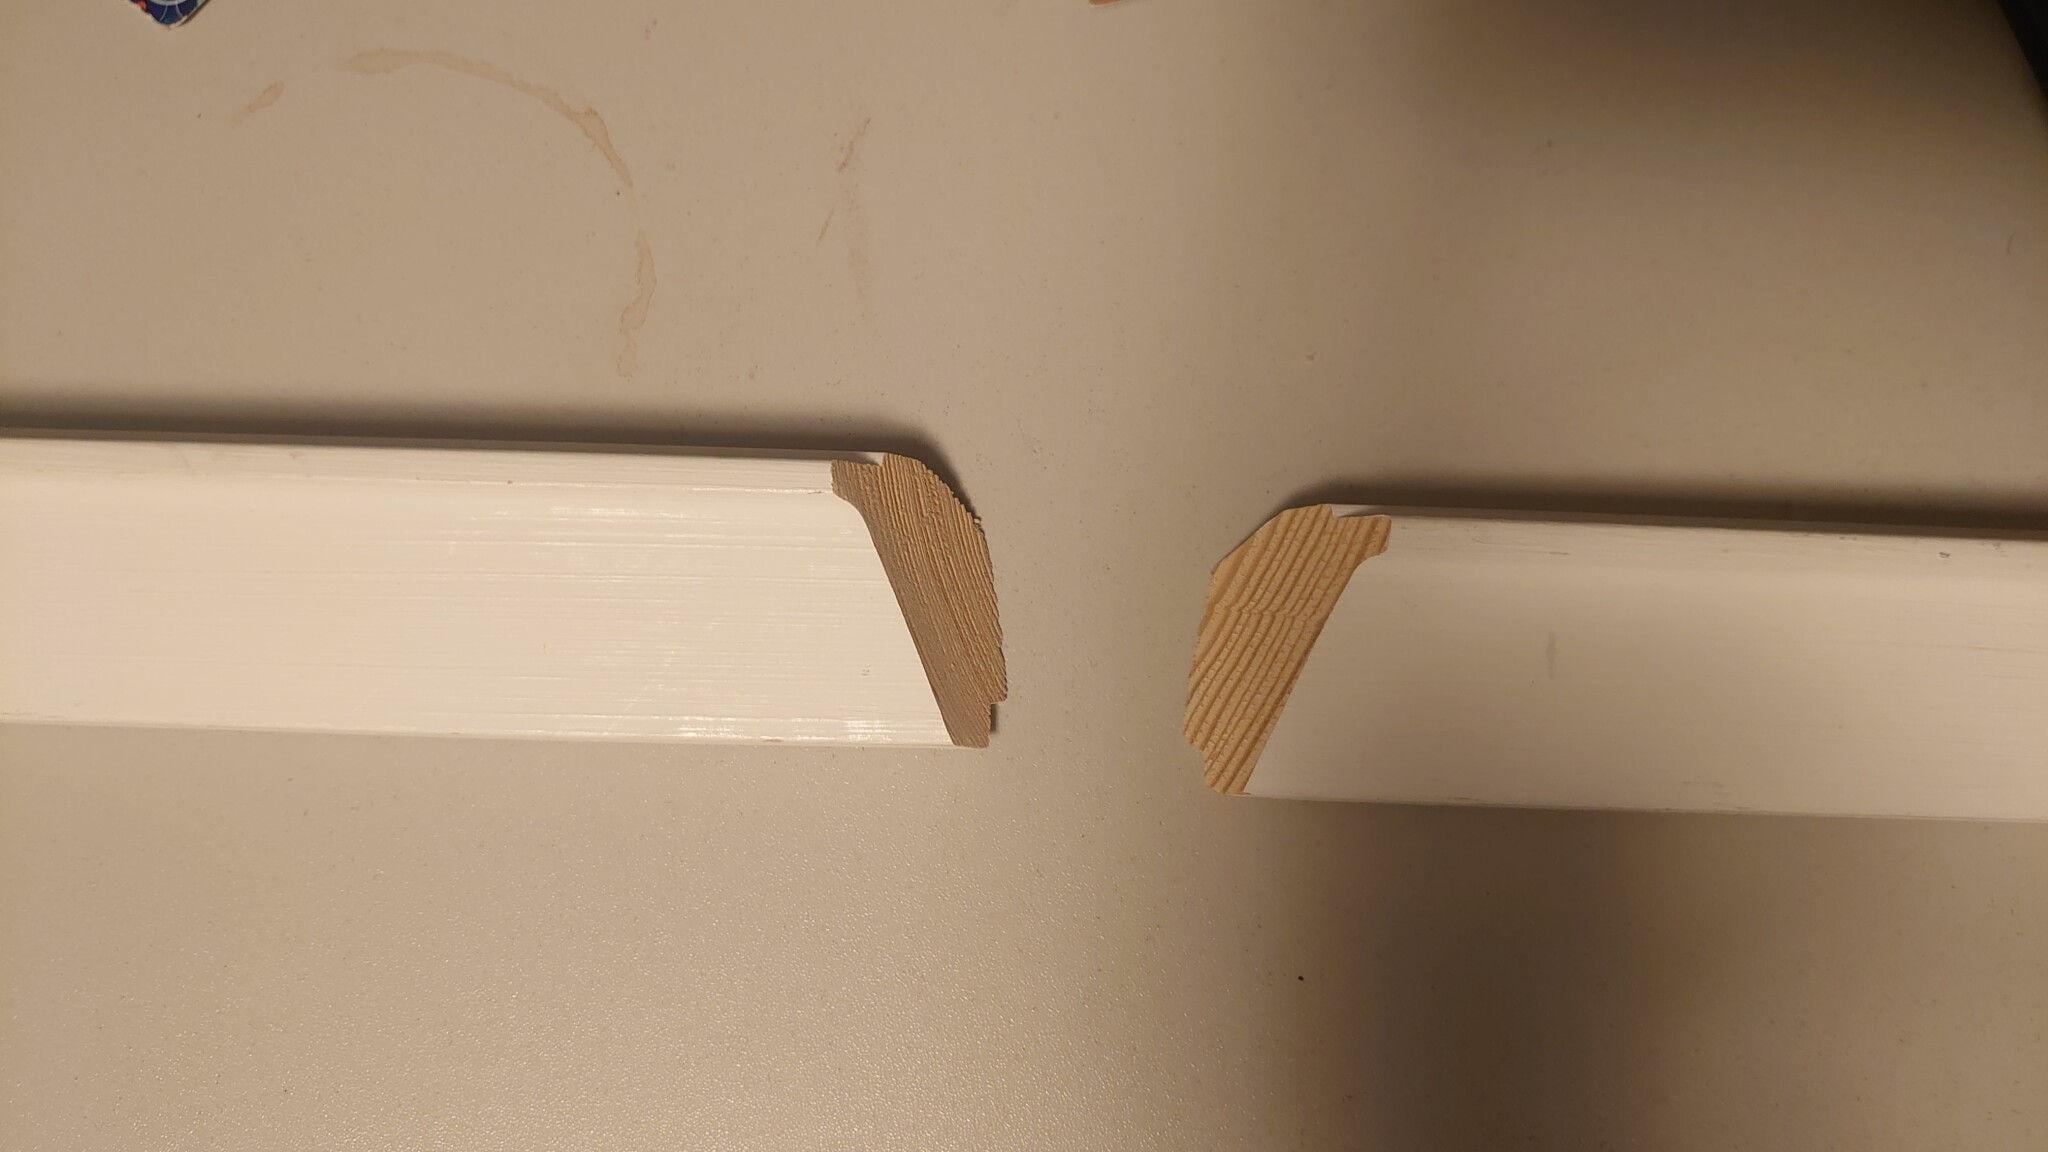
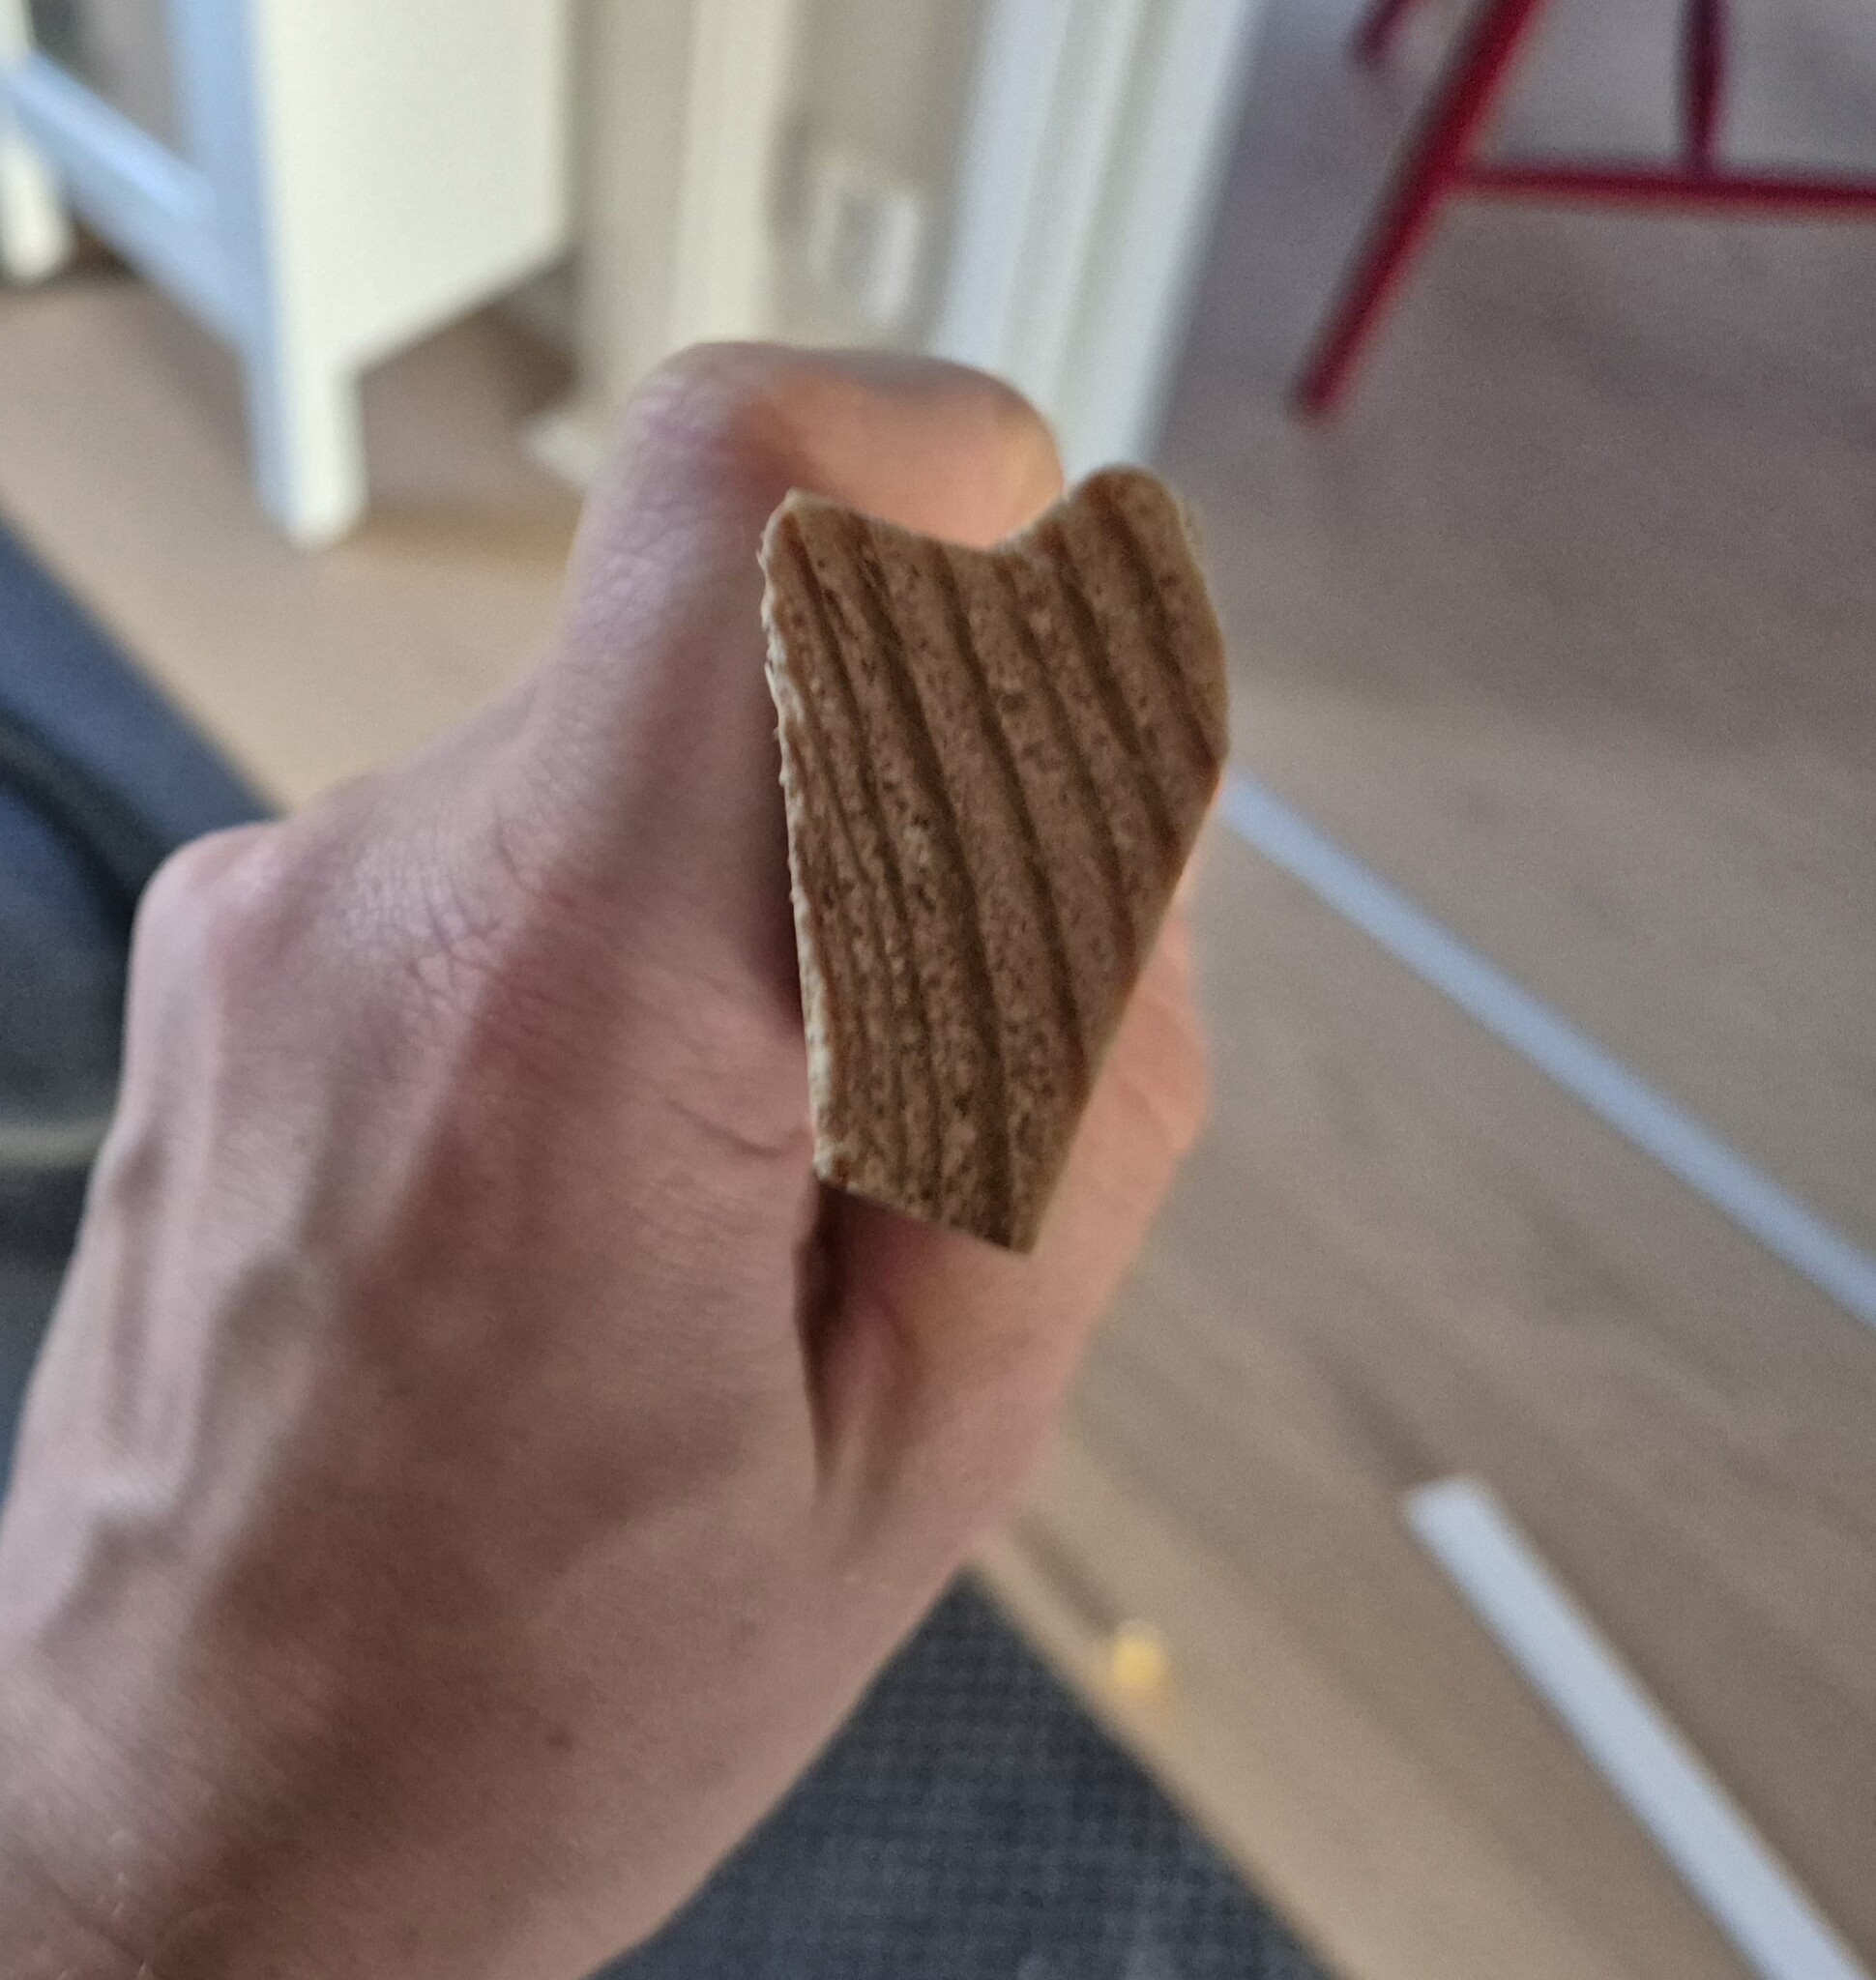
In the picture, you can now see the ends of the pieces, with the left one being the one that should tilt "up" and the right one being the one that should be horizontal. Both moldings have the "same" angles but mirrored.
After placing the cut ends against each other and measuring the angles, it looks OK, with the caveat that my saw isn't great with exact angles... but it shows the principle, and you'll need to experiment a bit with the angles to get a good fit against your ceiling and walls. Then let the "painter fix the rest"...
")
I don't know how to thank you. Thank you so much for your time and phenomenal explanation. Now I really feel good again 😃T Testarn said:I couldn't figure out how to explain what I meant, so I took a ceiling molding similar to yours and went down to the basement to make a couple of pieces... 😳
[image]
In the picture, the list that will be on the wall under the sloped ceiling is with the thicker side that should be upwards against the saw's support. The saw is tilted at 45 degrees, which corresponds to half of the 90 degrees that the molding should fill. Then, since you said it is about 110 degrees between the wall and the ceiling, I've set the angle to 10 degrees, which is half the difference between a right angle (90 degrees) and 110 degrees. (110-90)/2 = 10
To then cut the opposing molding, which should be on the wall where the ceiling is horizontal, I tilted the 10 degrees to the left and kept the tilt the same since my miter saw can only tilt one way. To get the 45-degree angle right, I had to saw with the thinner side of the molding against the saw's support.
[image]
In the picture, you can now see the ends of the pieces, where the left one is the one that will tilt "up" and the right one is the one that will be horizontal. Both moldings have the "same" angles but mirrored. After placing the saw cuts against each other and measuring the angles, it looks OK, with the reservation that my saw is not very good at exact angles... but it shows the principle, and you will have to experiment a bit with the angles to get a good fit against your ceiling and walls. Then let the "painter fix the rest"...
I had no idea such a formula existed. I remember somehow solving an exterior corner with a similar slope last year. I don't know how, but I experimented for hours without taking notes (knowledge=gone). However, I wouldn't have solved this myself. Big thanks again 🙂
You're welcome! That's kind of what this type of forum is for - to get help and to give help. I'm glad it could have helped you move forward. Now you at least have a method to start with, and then it's a bit of experimenting to find the exact angles. With experience and practice, you'll remember it for next time.L Lugas said:I don't know how to thank you. Thank you so incredibly much for your time and phenomenal explanation. Now it feels good again 😃
I had no idea there was such a formula. I remember solving something similar with a similar slope a year ago. I don't know how, but I experimented for hours without taking notes (knowledge=gone). This, however, I wouldn't have solved on my own. Big thanks again 🙂
Good luck with the lists!
No matter how you cut, there will be gaps between the meeting trims that you need to treat with caulk. So a little miscut doesn't matter much. Old carpenters use a method called scribing. You cut one trim at 90 degrees and place it flush against the meeting wall. The other trim is whittled with a sharp knife so that it fits perfectly into the profile of the first trim. With the narrow trims you have, it's not a problem.
It's a method that works well when you have junctions in one plane, i.e., a skirting board or a regular crown molding. It becomes significantly more complicated to do when you have a 90-degree corner that also has a slanted ceiling.T Thomas_Blekinge said:However you cut, there will be gaps between the meeting trim that you need to treat with soft caulking. So a little miscutting doesn't matter much.
Old carpenters use a method called förkroppning. You cut one trim at 90 degrees and place it flush against the meeting wall. The other trim is whittled with a sharp knife so that it fits perfectly into the profile of the first trim. With such narrow trims as you have, it's no problem.
No.