Hello!
I'm in the process of tearing out the particle boards in the bathroom.
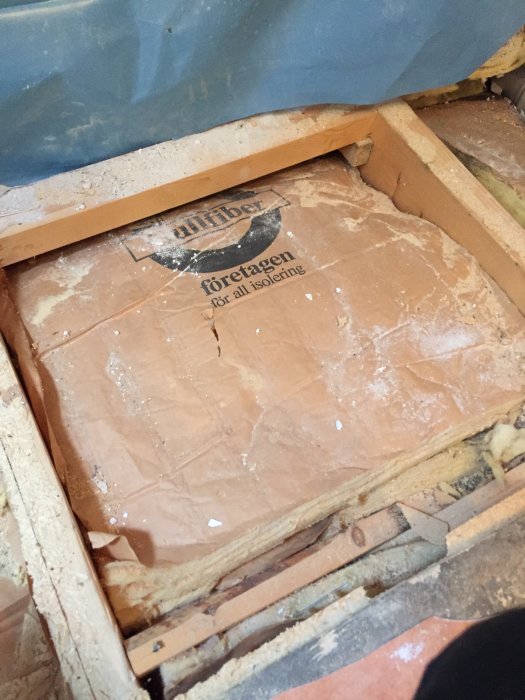
But I'm concerned that the furring against the wall is very weak, see the image.
What dimensions should it have?
I'm going to lay new subflooring and then self-leveling compound and tiles on top of that.
I'm also planning to have a hot tub in the bathroom
You are providing too little information to receive a good answer. The most important things to know are the dimensions of the floor joists, c/c spacing, and length (span), as well as information about the hot tub. The load on the bathroom floor you are planning may require more than noggins. The "noggin" visible in the picture seems more like some form of nail rule.
Hello!
The beams are 220/45, the short pieces are 45x45 or 45x70 and are just nailed with C-C 600 mm between the beams.
The span is about 8 meters, but I believe the wall in the middle of the house is load-bearing, which gives us a span of about 4 meters.
The bathroom is located at the far edge of the span and measures about 2.5x2.7.
I can't find any weight information on the pool, but it has a volume of 388 L.
To this, about 4 cm of leveling compound on average + tiles are added.
It's not a very easy operation to densify the joists, as it is a relatively small bathroom and installations such as drains and water pipes are coming up through the floor.
I was thinking of using 120x45 joists, but maybe that's too weak?
When you work with fiber-reinforced and reinforcement mesh, the slab becomes more or less self-supporting in a 4cm layer if it is framed at 600cc. You have a bathtub that holds 388 liters (1L of water = 1kg), i.e., 388kg + bathtub weight 50kg plus a person 65kg. So the weight where the tub will be is a minimum of 500kg distributed over the surface area of the bathtub.
If I were you, I would go with 220x45 anyway and with cc 300. Then you "only" need to add extra joists between the existing ones. You do this yourself, and the hours cost you nothing, and the price difference for materials is so extremely negligible.
When you lay tiles on the upper floor, you absolutely do not want the floor to flex just because you skimped on the spacing. If the floor flexes, the tiles will crack, as will the grout, resulting in a ruined waterproofing layer. The house can move for several reasons. I assume you also have the drainage outlet in the joist layer, and the hole cutting itself will also impair stiffness if you set 600cc.
Do it properly, and you will have a bathroom floor that will be flawless for your entire lifetime. Now you have my suggestion / carpenter.
When you use fiber-reinforced and reinforcement mesh, the base is more or less self-supporting in a 4cm layer if it's set on 600cc. You have a bathtub that holds 388l (1L water = 1kg), i.e., 388kg + the bathtub's weight 50kg, plus one person 65kg. So the weight where the tub will stand is a minimum of 500kg distributed over the tub's surface. If I were you, I would then go with 220x45 anyway and with cc 300. Then you only need to put in extra beams between your existing ones. You do this yourself, and the hours cost you nothing, and the difference in material price is extremely negligible. When you're laying tiles on the upper floor, you absolutely don't want the floor to flex just because you skimped on the joist spacing. If the floor flexes, the tiles will crack, and so will the grout, with a ruined waterproof membrane as a result. The house can move for several reasons. I assume you also have drainage outlets in the joist layer, and those holes in themselves will also reduce sturdiness if you set 600cc. Do it right, and you'll have a bathroom floor that will be flawless for your entire lifetime. Now you have my suggestion / carpenter.
Yep, that's how it will be, heading off to buy joists tomorrow. To attach the beams, I need to shorten them so the ends of the beams will be attached to these. I can't do it any other way, right?
how do you mean? I don't quite understand how/what you mean by shortening it so that the ends... Do you mean Kotla? I assume you mean you want to screw a kottling onto the existing opposing bearing beam and then side screw the bearing beam into the end grain on the kottling in the measurement chain 300cs. If so, it's of course fine. Don't forget to also screw diagonally so that the end grain on the floor joists is attached to the existing bearing beam as well and not just to the kottling OR use reinforced angle brackets on either side of the joist. Remember that if you choose the kottling variant, everything that is screwed wood to wood should be glued. (standard wood glue works fine)
how do you mean? I don't quite understand how/what you mean by shortening so that the ends...
I mean that the existing beams continue outside the bathroom, so there's nothing else to do as I see it, but to cross-brace between the c-c 600 studs and attach the new beams to these when I densify.
Then screw a blocking between each compartment at 600 on your existing wall. This way, you also have something to screw the floor chipboard into that goes against the wall. Then you go against these blockings with the extra support beams you insert with cc 300.
Done =)
If you have any support point from underneath that can support the floor, use it.
Otherwise, if I understand correctly, your bathroom walls are completely freestanding and not supported by the existing wall from the floor below.
But this will work fine for you.
Then you attach a blocking between each 600mm section on your existing wall. Then you also have something to attach the floorboard to that goes against the wall. Then you align these blockings with the extra support beams you add at 300mm centers.
done =)