E.g. If the insulation in the wall is 15cm, I would have put 10cm of insulation, set the vapor barrier. Added a 45x45 stud and put 5cm of insulation where all the electrical wiring is done inside the vapor barrier.
Plastic against the frame, then sparse paneling (installation layer) for hose routing/boxes. This is the only right way - the plastic is not punctured at all.
Plastic against the frame, then sparse paneling (installation layer) for conduit/routing boxes. That's the only correct way—the plastic is not perforated at all.
Nowadays, people often add an extra layer of studs and insulation on the inside of the plastic to avoid making holes in the plastic, as Daniel barnaniel and BSOD wrote. But you can do as you do. Just cover the boxes with plastic, then cut around the inside of the box with a sharp knife. Then press the plastic over the box to ensure it seals tightly. If you want, you can also tape the plastic to the box with something like tflex tape.
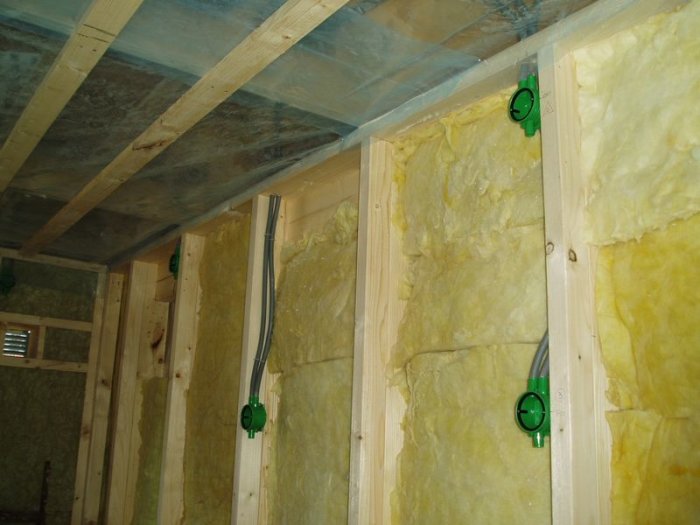
In crosses against the framework, fasten to the framework in the "crosses." Just like BSOD wrote - the most common is 45x45 c600 which is also insulated with 45. In your case, electricity comes under plastic in the ceiling. If it's not super easy to redo: pull out the conduit through the plastic and seal. Sealing boxes is hopeless/impossible. As in the picture except here they've used a vapor barrier instead of plastic.
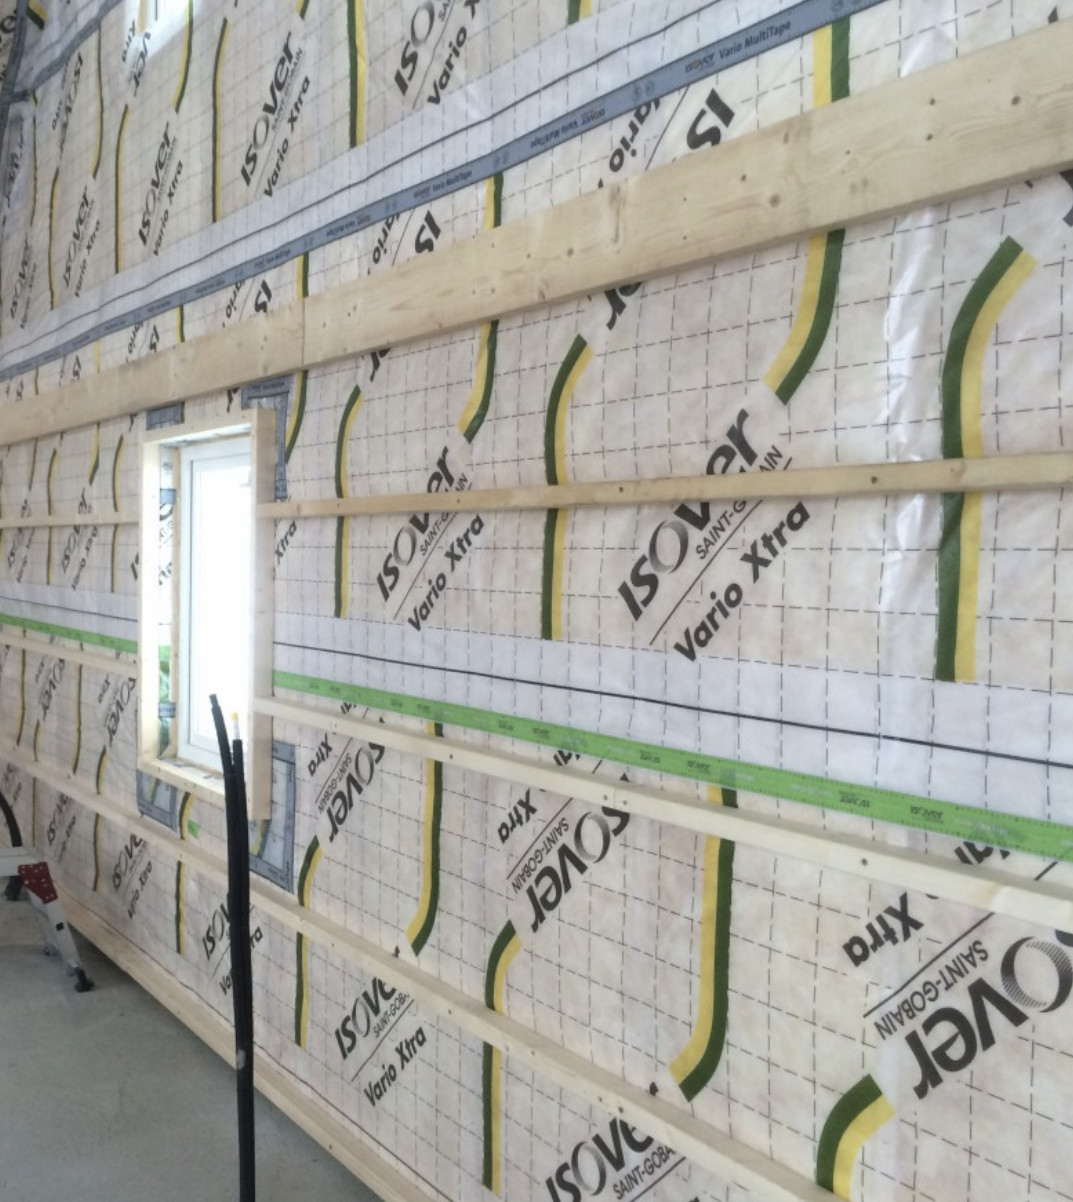
When building new, electrical boxes and conduits should be inside the plastic, not outside, the same applies to the ceiling. Then you run the conduit between the plastic and the furring strips. Another advantage of this is that the conduit gets fixed between the plastic and the studs/furring strips and remains still.
If you want to do it right, you should reroute the conduits and remove the boxes, insulate the entire wall thickness, place plastic, and then nail/screw on an offset or horizontal framework with 45x45 insulation and then boards. It must be offset; otherwise, it will be very difficult to run conduits between the sections. Another advantage is that it breaks the thermal bridge from the framework.
If you want to fix what has been done now, you cut the plastic tightly around the box and then seal with a round of T-Flex or another good tape to make it tight. The downside is that the plastic will be punctured as soon as you screw in the panel material. But overall, it doesn't make a huge difference, it's less optimal but not catastrophic. The most important thing is that the ceiling is tight.
Crosswise against the frame, fastened to the frame in the "crosses". Just as BSOD wrote - the most common is 45x45 c600 which is also insulated with 45. In your case, the electricity will be under plastic in the ceiling. If it's not super easy to redo: pull out the conduit through the plastic and seal. Sealing boxes is hopeless/impossible. Like in the picture, but here they have put vapor barrier instead of plastic.
Is it better to place 45x45 horizontally rather than vertically against existing studs?
Here is a picture of how I did during the extension last summer. The electricity is inside the vapor barrier, the thermal bridge is broken, and no risk of puncturing the vapor barrier when you screw up paintings, etc.
Since you don't have rafters, you must install the studs for the installation layer horizontally. It's possible to set them vertically and staggered to eliminate thermal bridges, but the studs must be nailed/screwed into something with cc60 as well. The cc measurement must, of course, be consistent everywhere to ensure sufficient rigidity.
Worth considering, if you install the layer horizontally, is that you need to have plywood, OSB, or chipboard behind it. Gypsum boards don't work well horizontally as you get joints without tapering. If set vertically, you can drywall as usual.
Ok. Do you lay the sheets down or do you still screw them while standing?
It is optional, but I usually screw OSB in a way that results in the least waste. I want to avoid having "butt joints" (not recessed) on the gypsum, so I usually screw them while standing. Make sure to overlap the joints between OSB and gypsum.
If you are only installing gypsum or only OSB, it becomes a bit different since the board can't be screwed all around (in that case, I would probably batten).
Vi vill skicka notiser för ämnen du bevakar och händelser som berör dig.