17,914 views ·
26 replies
18k views
26 replies
Extra layer of sparse paneling to align the ceiling in the "right" direction?

Don't quite understand the question? If you attach cross planks of 22 mm, the difference in ceiling height will be 22 mm.Flank1985 said:
Hello!
I am in the middle of renovating the girls' new bedroom when I realized that the wooden ceiling I planned to install will end up in the "wrong" direction since I have learned that ceilings and floors should be installed perpendicular to the window.
After a short discussion with my better half, it has become clear that the ceiling should be installed perpendicular to the window even though the furring strips do not support this. It is also desirable not to just add an extra layer of furring strips under the existing ones, as this would lower the ceiling height to around 235-236 cm.
So my question is: Does anyone have a good solution for this or experience with similar issues? Is there a simple solution that can be bought that doesn't involve me having to cram in furring strips above the existing panel and then cut small pieces which I then screw together with my crammed furring strips to thus get a furring strip at the right height and in the right direction?
[image]
The wife will be happy and you know that into that room you should never go when the carpenter is around due to the risk of head injuries…

J jonaserik said:
Ah perfect, now I have a plan and good tip with the ceiling box, I had completely forgotten to account for it! So it's off to the hardware stores tomorrow for some studs. The only thing remaining is for Düsseldorf to have time to reply if he suspects anything else regarding the black spots on the old vapor barrier...J jonaserik said:
Düsseldorff
Building conservationist
· Bromma
· 2 704 posts
Düsseldorff
Building conservationist
- Bromma
- 2,704 posts
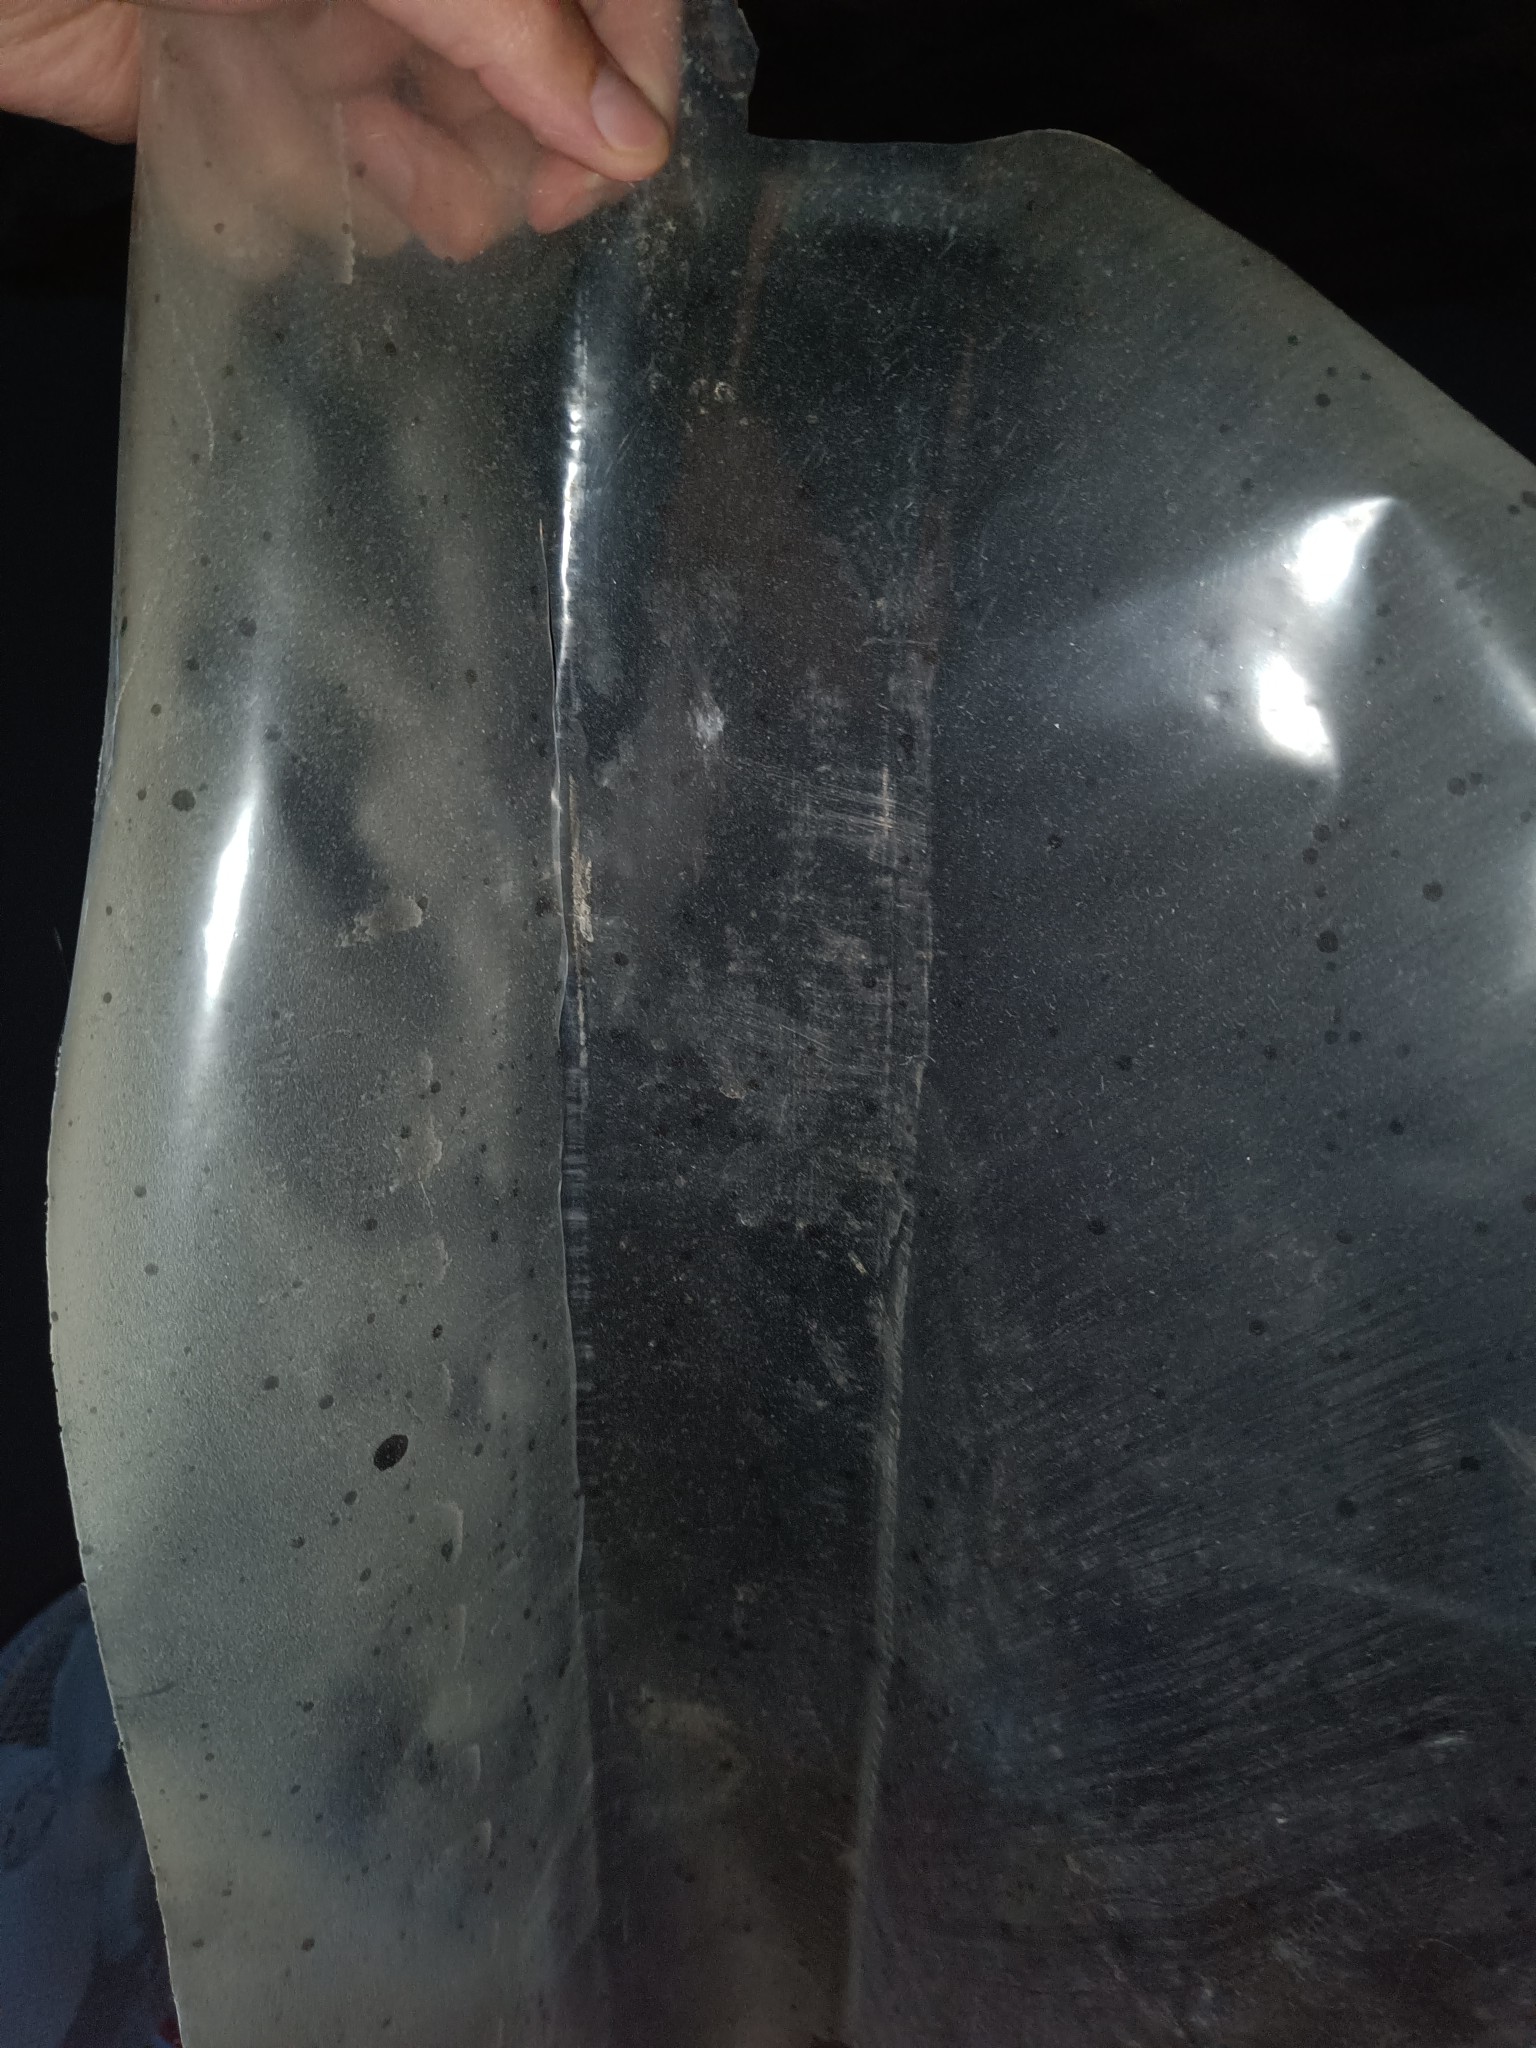
Strange. Instinctively, you think black mold, but it obviously isn't. Looks more like paint in the close-ups. Almost makes you think the plastic is black-spotted from the factory since it is so even all over. But why would it be?Good question! We got a little panic when we took down the ceiling. However, we have determined that the black spots are facing upwards, meaning they are against the insulation and the insulation appears completely unaffected, the same goes for the studs, it is only the vapor barrier that is spotty. Our best guess is that it has been outdoors or got dirty during installation, but if you have any good idea what it might be and how worried we should be, please let us know, attaching close-up:
[image] [image]
I don't think it's anything you need to worry about at all, but it does make you curious.
Just took an extra check, pulled down a piece of plastic that was under the beam and as far as I can see there are black spots on that plastic too, suspect it's the cameraman who did a somewhat poorer job than desirable, in the image below you can see the crease where the beam pinched the plastic:Düsseldorff said:
Düsseldorff
Building conservationist
· Bromma
· 2 704 posts
Düsseldorff
Building conservationist
- Bromma
- 2,704 posts
Well, that just leaves someone splashing the entire plastic with paint or something similar before installation (a feat in itself since it has to be rolled out first), or alternatively, it was delivered with stains. Extremely unclear.
Check the levels on the sparse panel with a rotating laser to ensure the ceiling is flat.
For now, it is easy to shim to correct any settling in the joist that occurs over time.
Sometimes it is easier to plane down a "bump" than to adjust all the other areas.
For now, it is easy to shim to correct any settling in the joist that occurs over time.
Sometimes it is easier to plane down a "bump" than to adjust all the other areas.
hi,
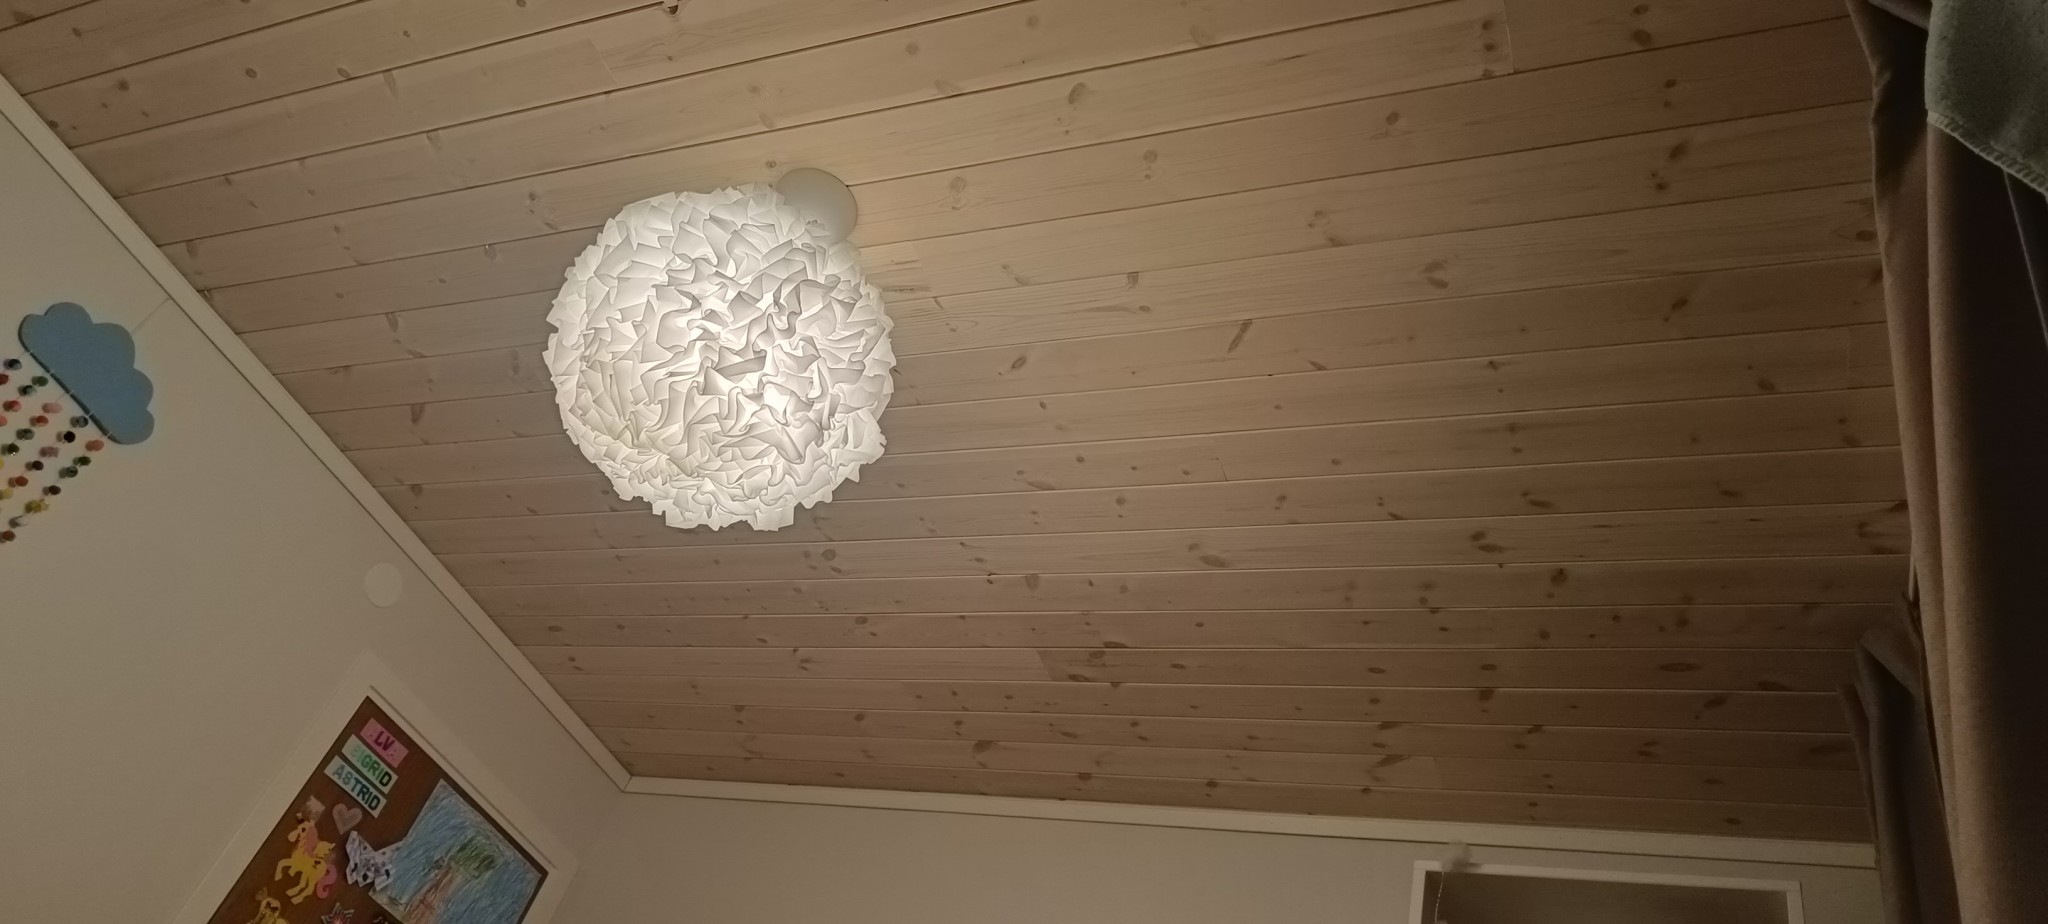
Nice ceiling. What panels did you put?
I suspect it's this one from Bauhaus:debjyotipaul said:
https://www.bauhaus.se/panel-basis-moelven-furu-vaxbehandlad-vit-13x120x4200mm#go-to-description
I know there are at least 2 different styles and it wasn't super clear from the packaging which one I bought so it prompted at least two trips to the store
Click here to reply
Similar threads
-
Extra lager spån på golvvärme
Värme allmänt -
Why is extra drywall never added inside the framework?
Building Materials and Construction Technology -
Laminate flooring on dirt floor, what extra layers are needed?
Building Materials and Construction Technology -
Höja undergolvet med extra lager golvspånskiva?
Golv -
I want to put an extra layer of drywall on a drywall wall. Glue?
Building Materials and Construction Technology